Messenger
The Messenger Platform allows your app to send and receive messages between your Facebook Page and your customers. Messenger from Meta is a messaging service that allows a business' Facebook Page to respond to messages from customers. By integrating Messenger with OpenCUI, businesses can use OpenCUI's chatbot to handle customer messages more quickly and efficiently.
This tutorial will show you how to integrate Messenger with an OpenCUI chatbot in the OpenCUI production environment. For private deployments, please check with your organization's DevOps team.
Before you begin
On the Messenger side, please ensure you have all of the following:
- Facebook Page: A Facebook Page will be used as the identity of your Messenger experience. To create a new Page, visit Create a Page.
- Developer Account: Your developer account is required to create new apps. To create a new developer account, go to the Meta Developers website and click the 'Get Started' button.
- Facebook App: The Facebook app contains the settings for your Messenger experience, including access tokens. To create a new app, visit your app dashboard and click on 'Create App' in the top right corner.
Set up Messenger
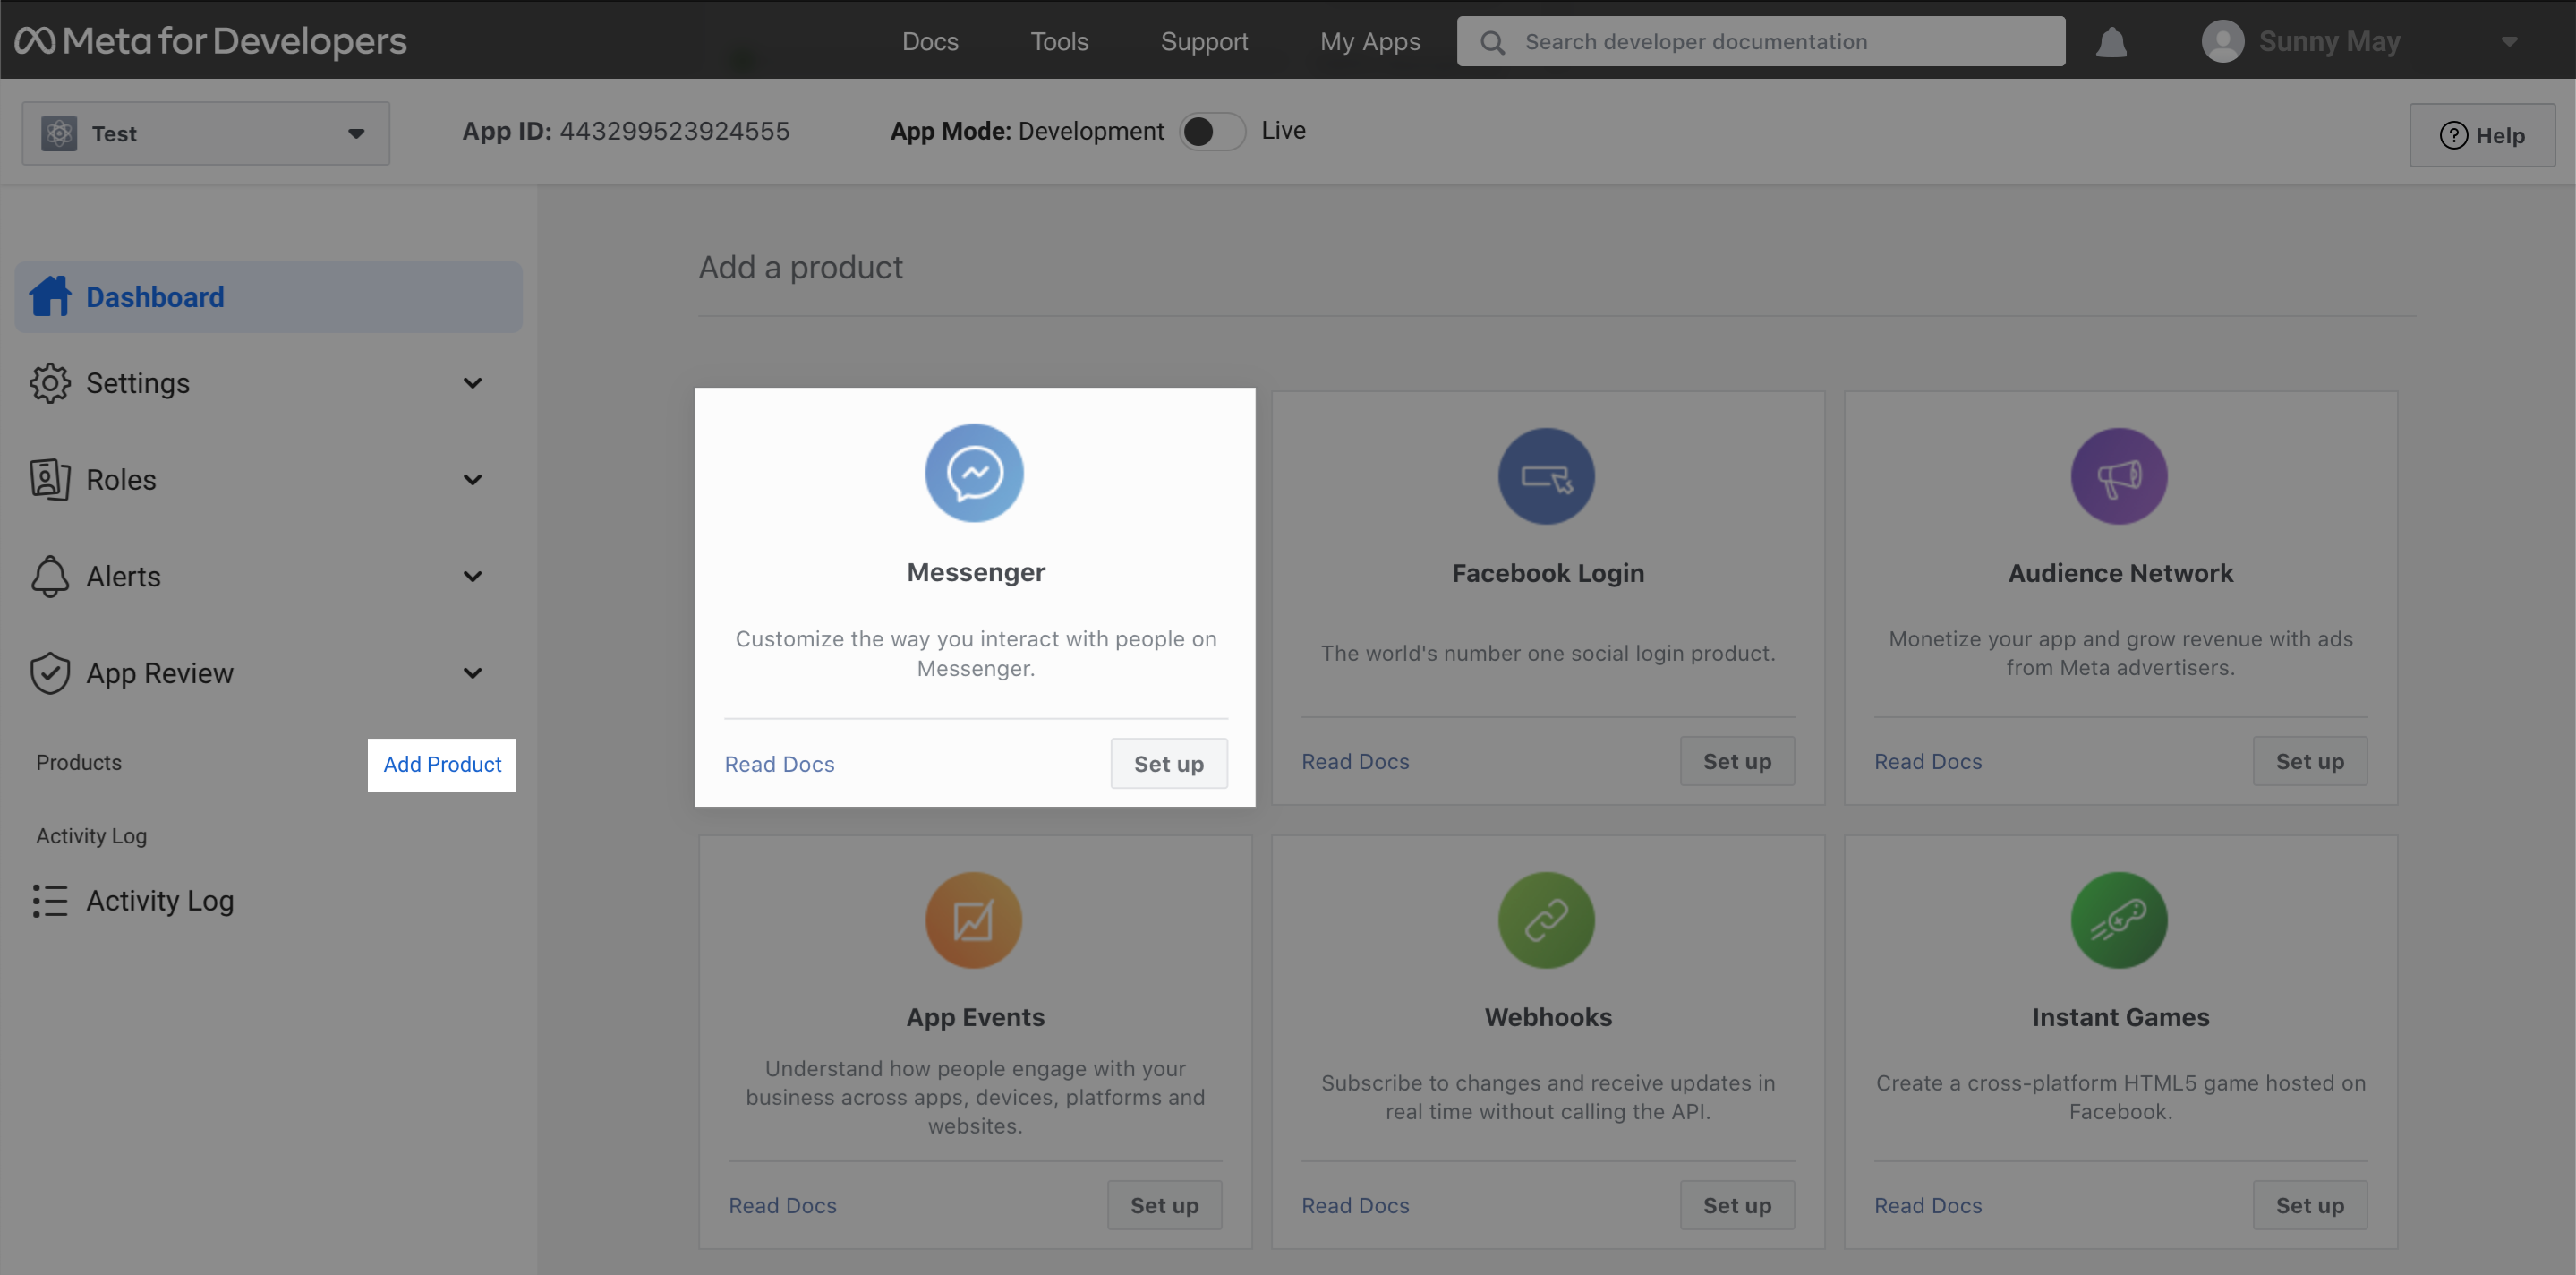
Use Meta App Dashboard to add the Messenger product to your Meta App:
- Enter the App you want to configure, click Add Product on the left sidebar menu.
- Click Set Up button on Messenger product.
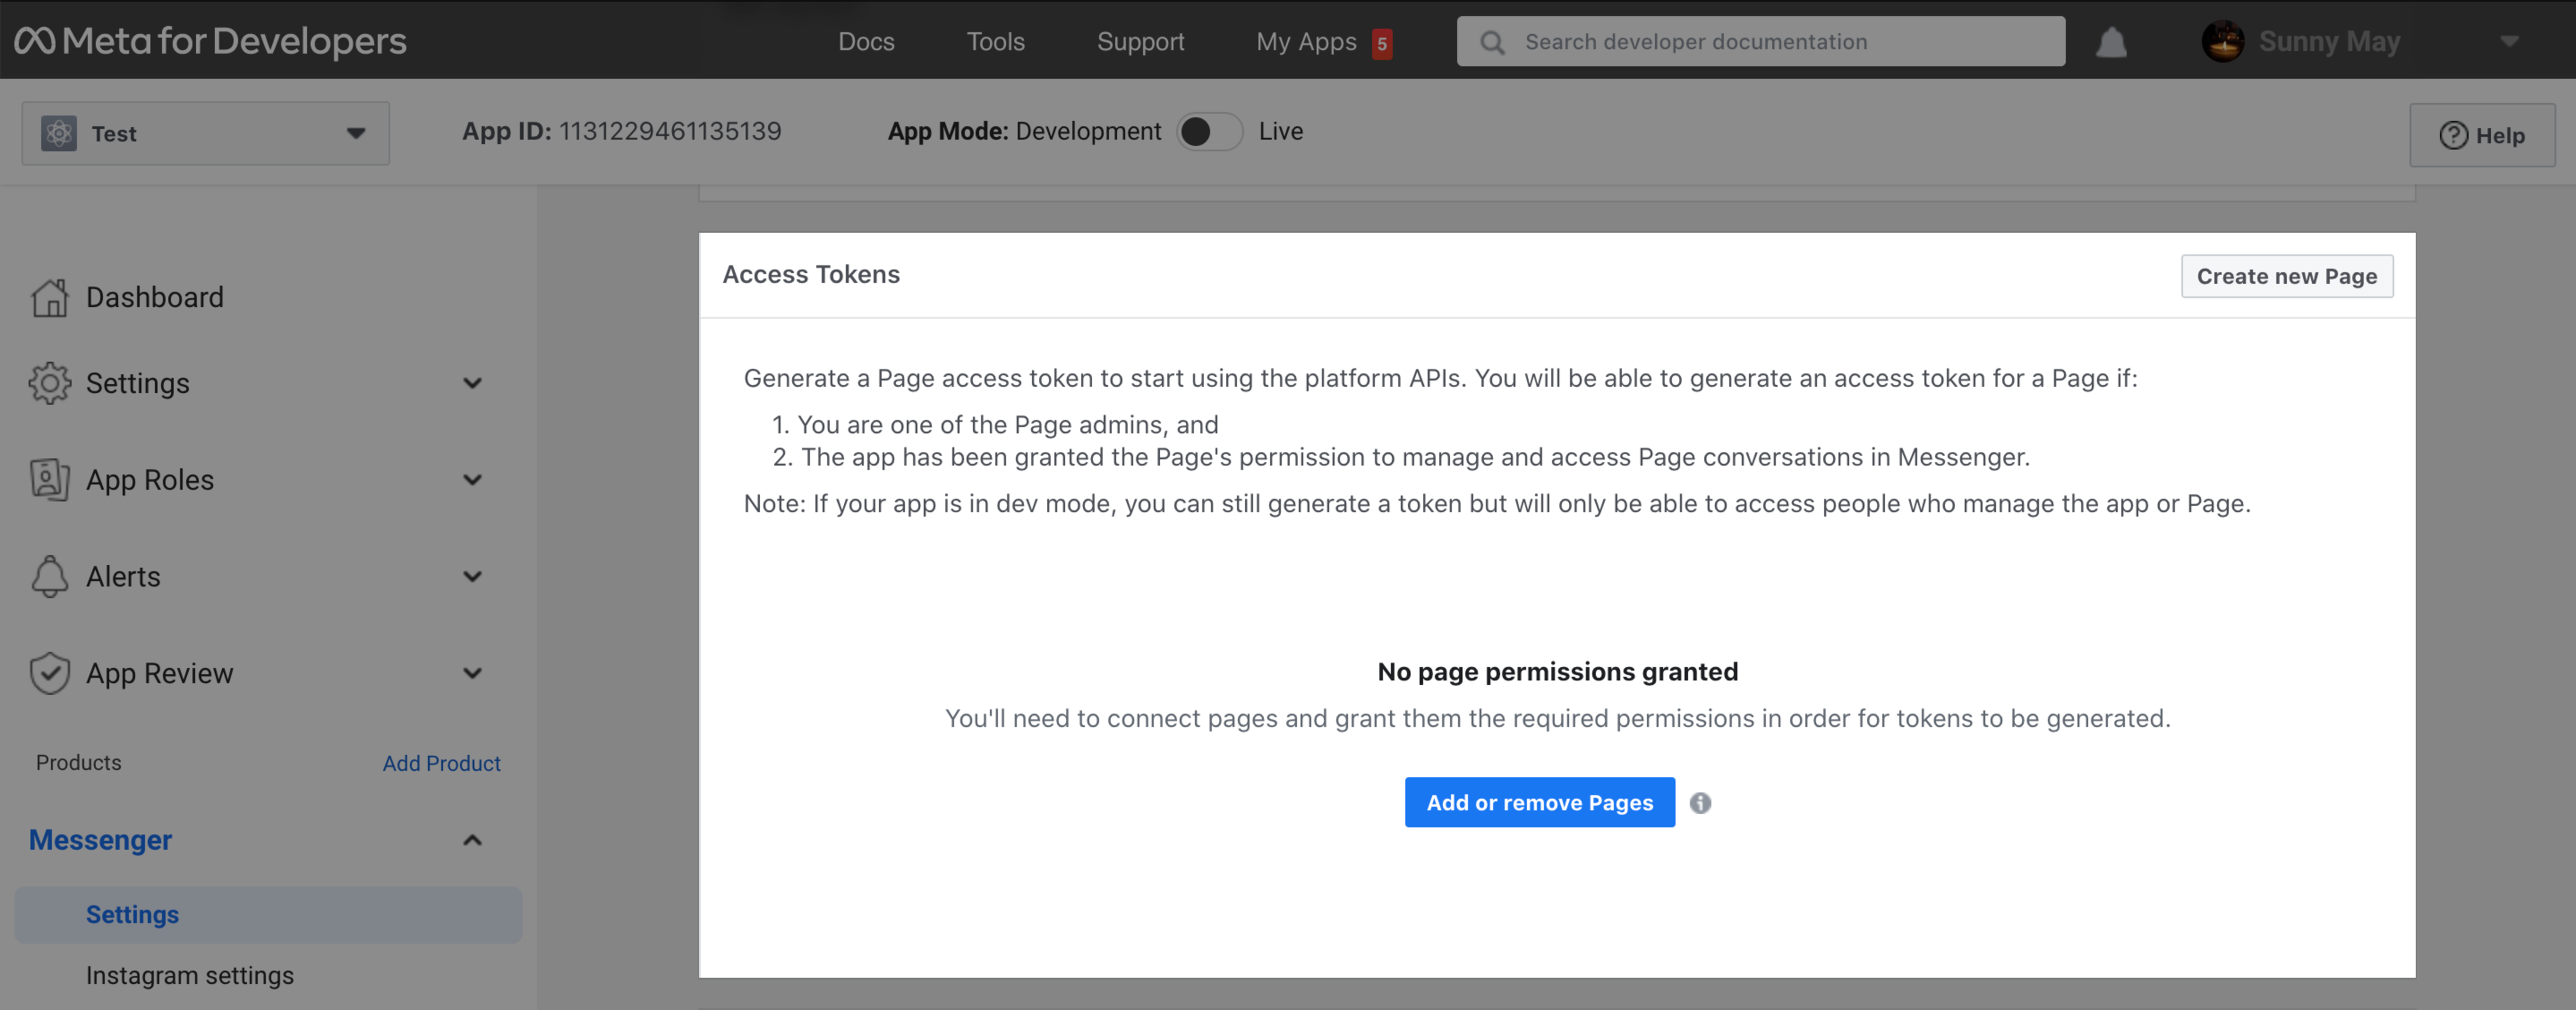
Subscribe your app to a Facebook page. Go to Messenger > Settings panel, scroll down to Access Tokens section, click Add or Remove Pages button and select your page.
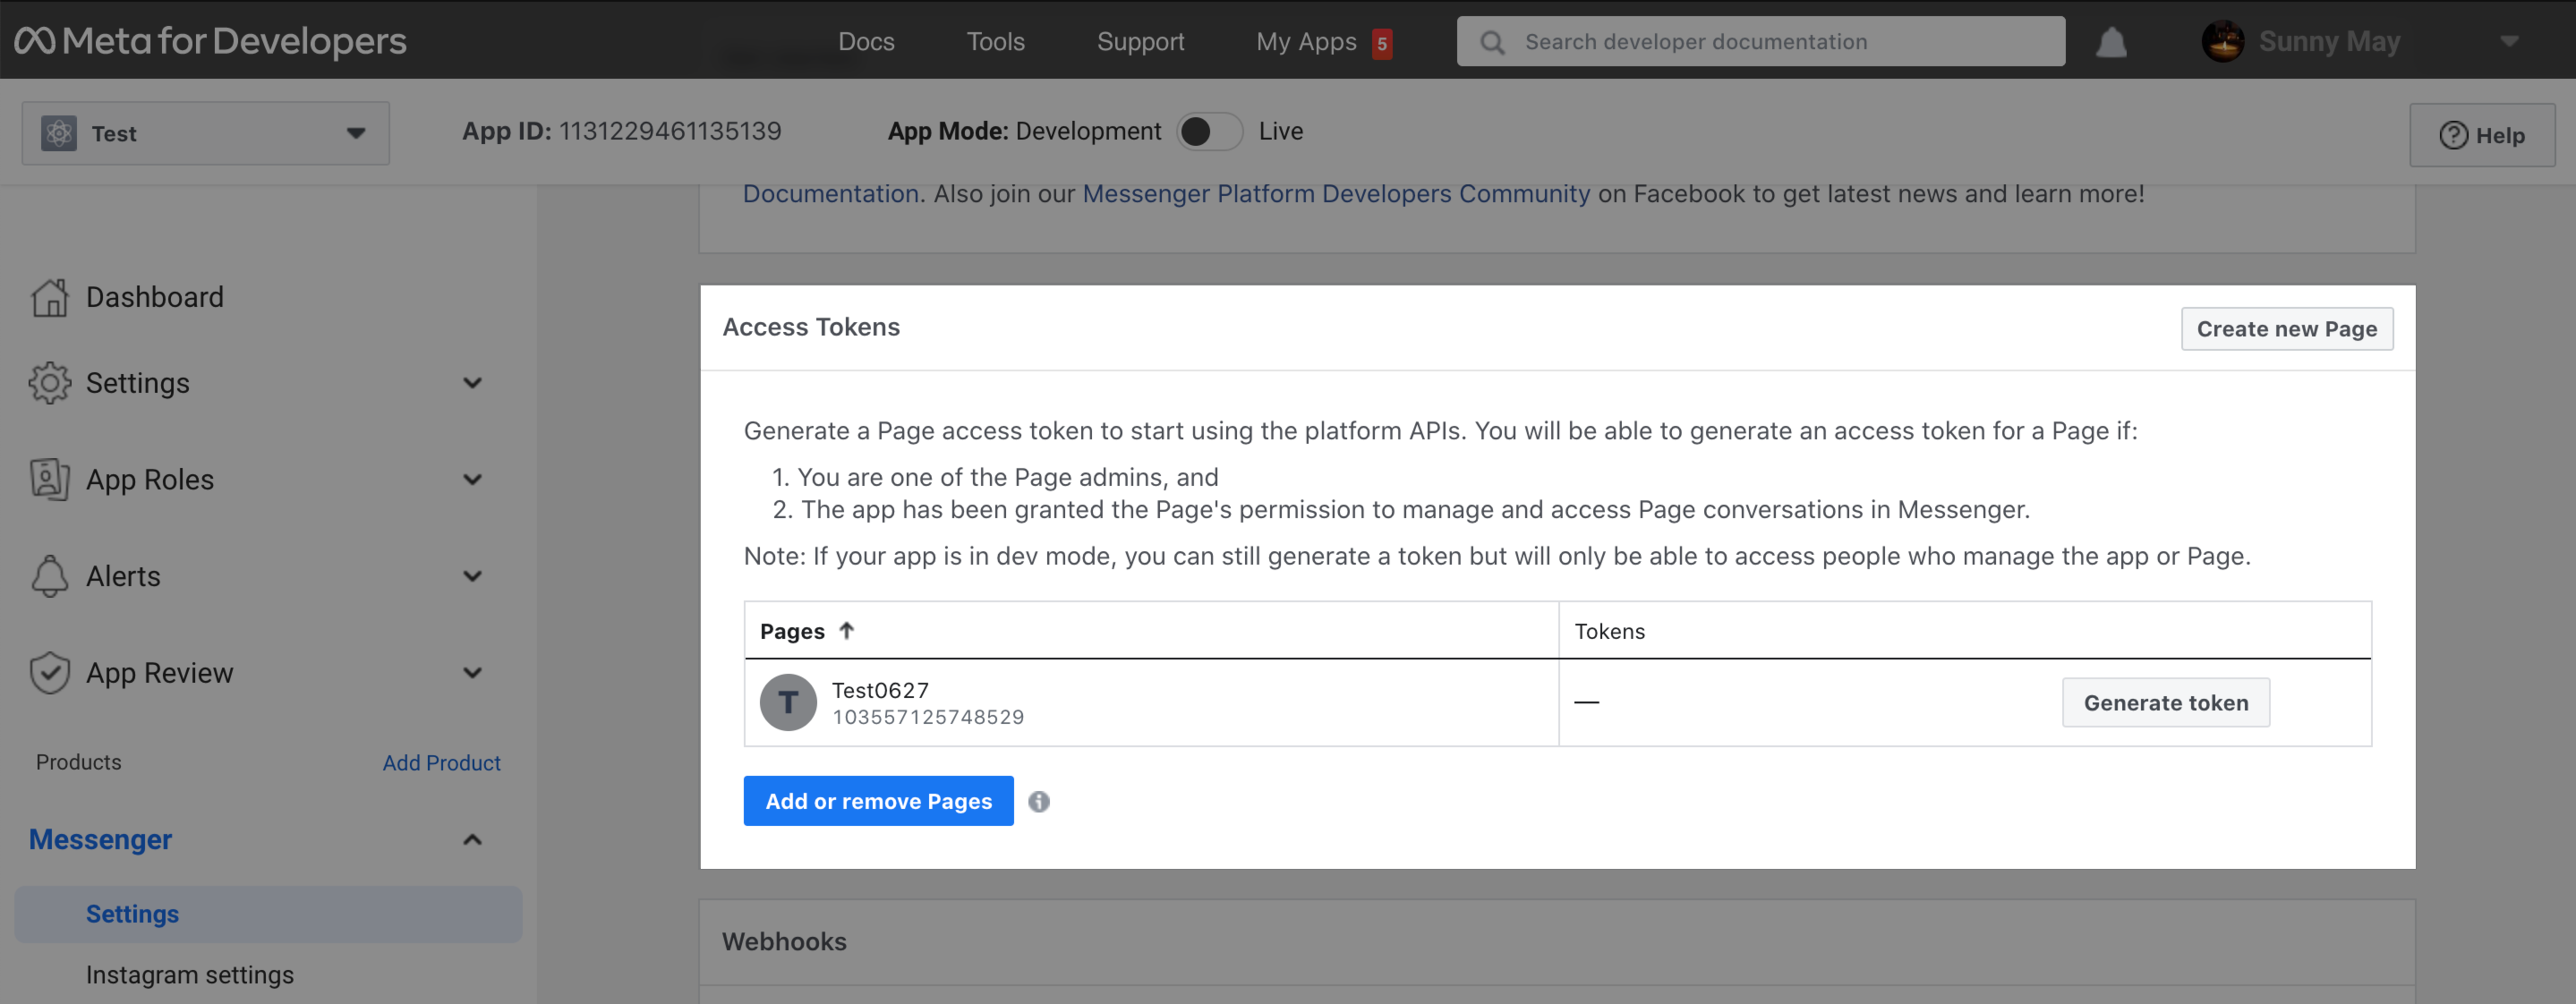
Then you will be provided with an access token at this step. In the Access Tokens section, click Generate Token button. 📋 Copy this value. This token will be used to configure the integration from the OpenCUI platform.
Configure Messenger from OpenCUI
OpenCUI allows you to configure multiple Messenger channels. This section will show you how to configure a single channel, but you can repeat the process for any number of channels you need.
Inside your chatbot, in the Settings tab and under Integrations page.
In the Deploy service provider section, select
io.opencui.channel.IChannelfor setting up channel.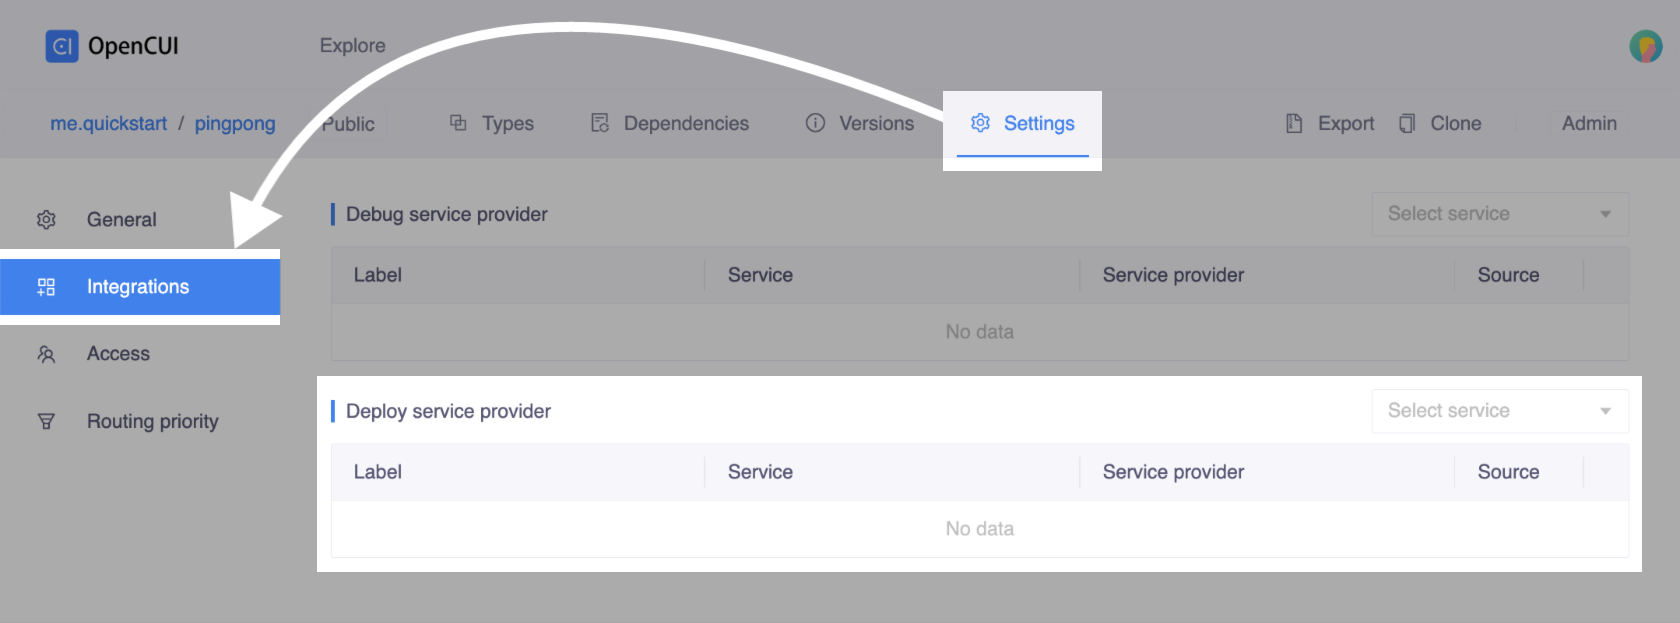
A popup window will appear. In the Service provider dropdown, select
io.opencui.messenger. Then the necessary configuration information required by the Messenger channel will be displayed in the same window.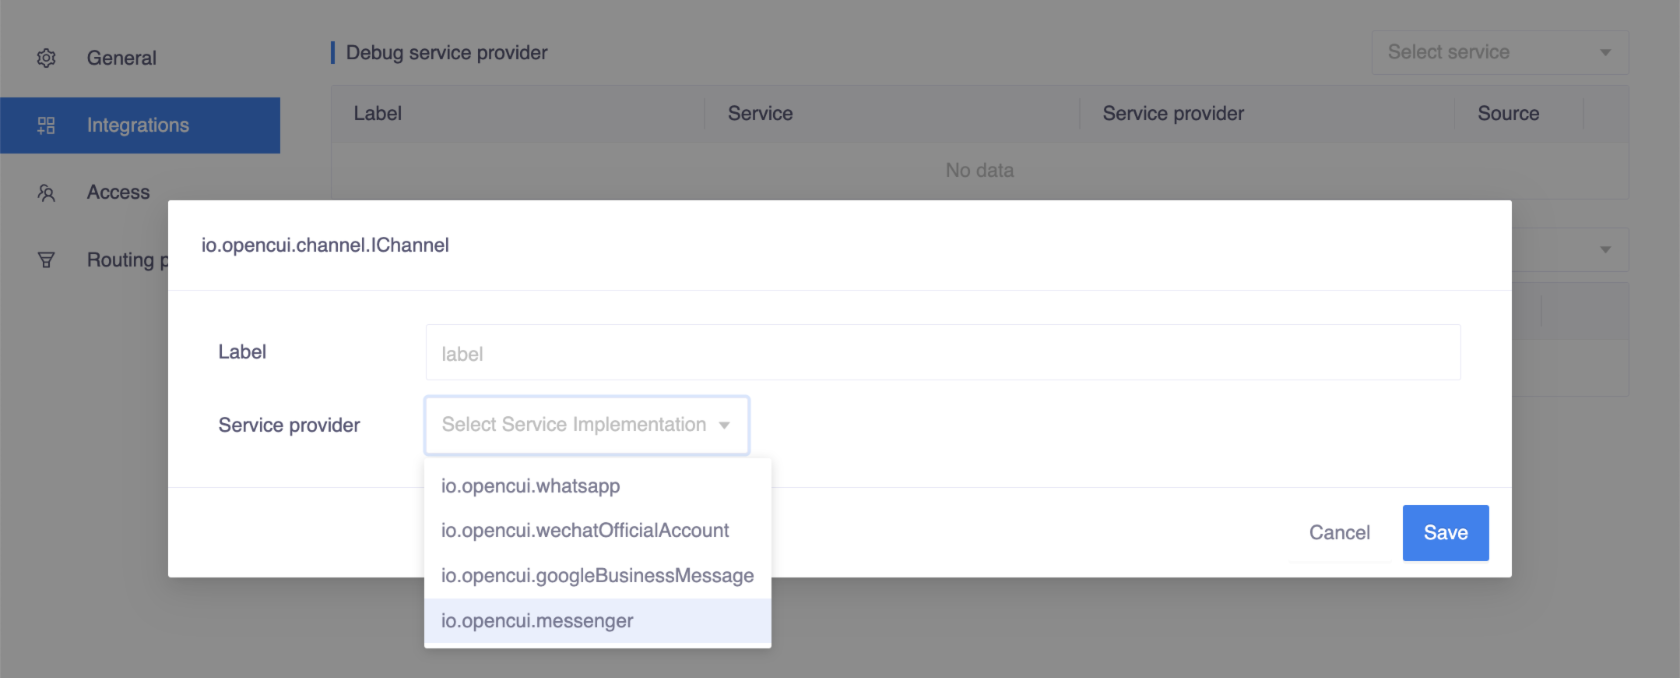
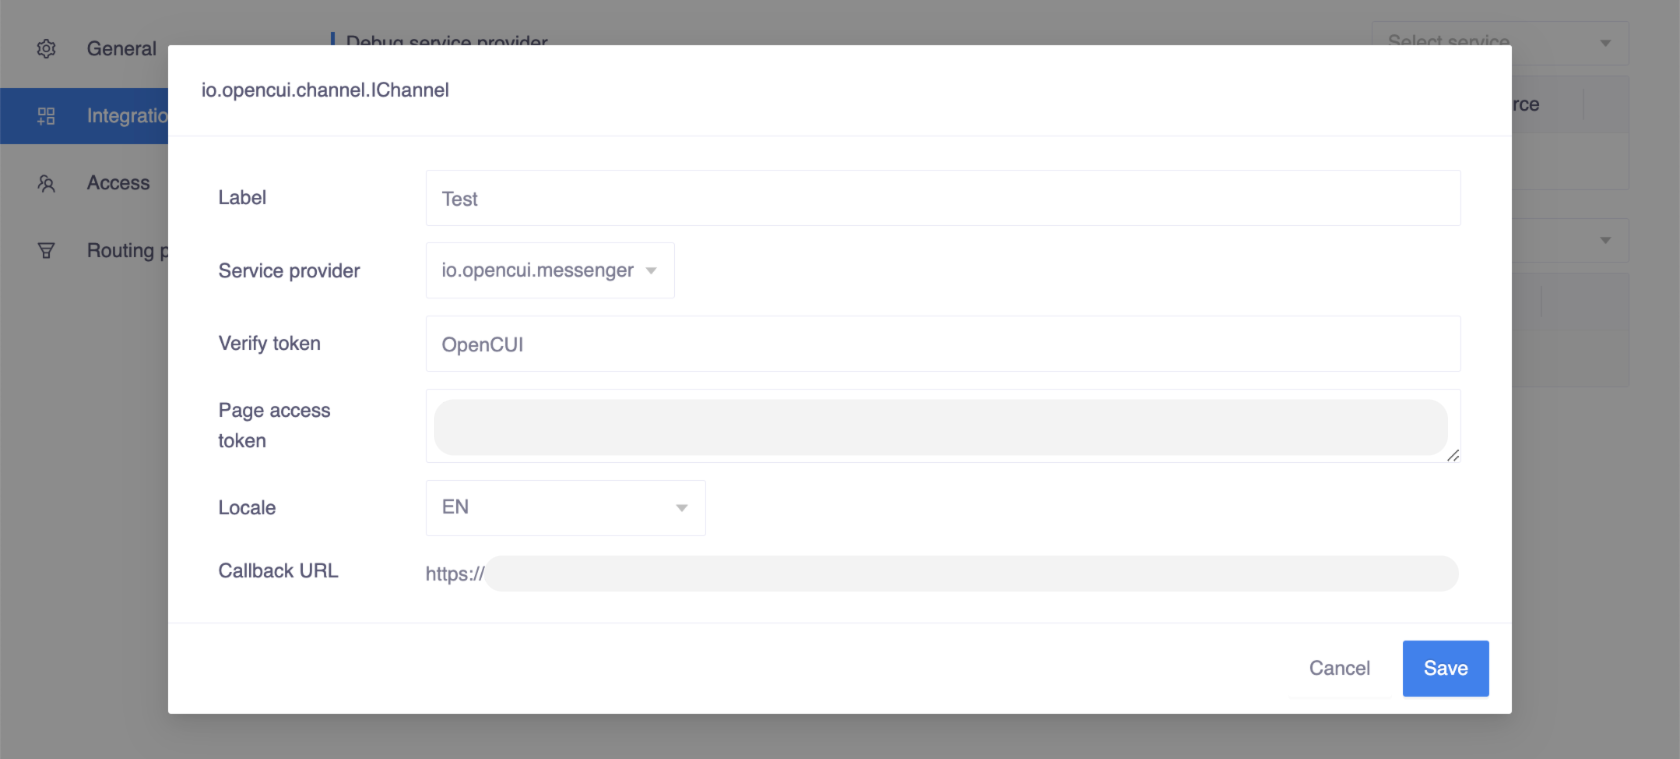
Continue inside the popup window, configure the following settings and save:
- Label: Set a label for this channel type, should be unique in the chatbot.
- Verify Token: Enter any private token you desire. This value will be needed to configure Messenger Webhook on Meta's side.
- Page Access Token: Enter the access token you copied from Messenger when you set it up.
- Locale: Select a locale that determines the default language used by your chatbot.
- Callback URL: Copy this value after setting the label and locale. This will be needed to configure Messenger Webhook.
Before you move on to the next step, be sure to deploy your chatbot to the OpenCUI production environment.
Finish Messenger setup
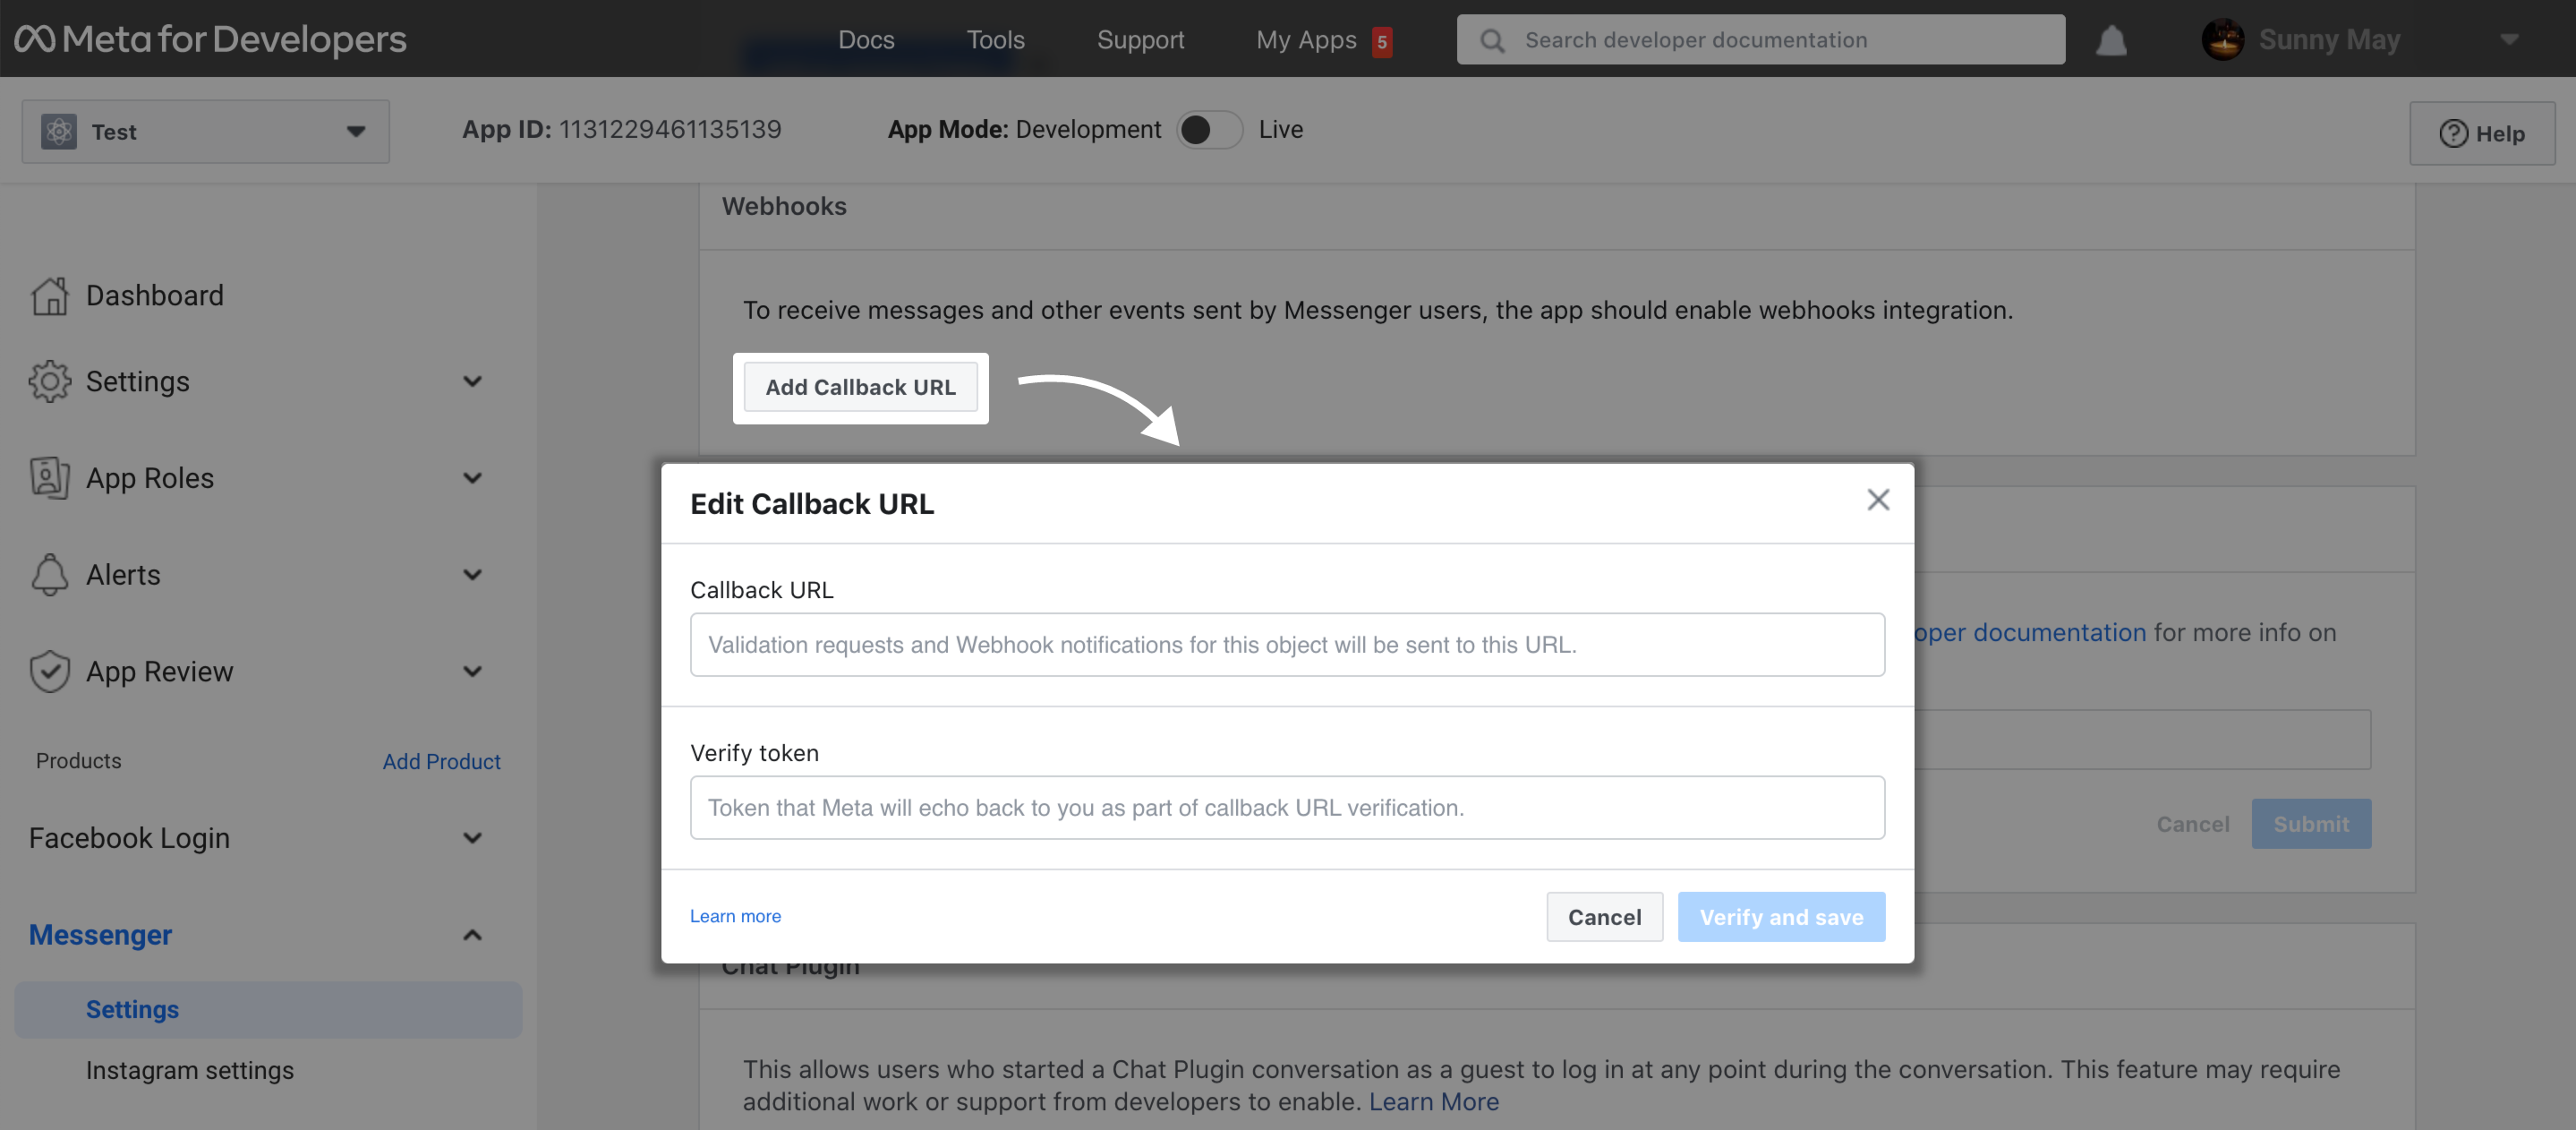
Configure the Messenger webhook for your app. Back to your Meta App:
Go to Messenger > Settings panel, scroll down to Webhooks section, click Add Callback URL button.
A Webhook setting dialog opens, use the Callback URL and Verify Token values you copied above, then click Verify and Save.
In the Webhooks section, click Add subscriptions button and enable
messagesandmessaging_postbacksin the page subscriptions.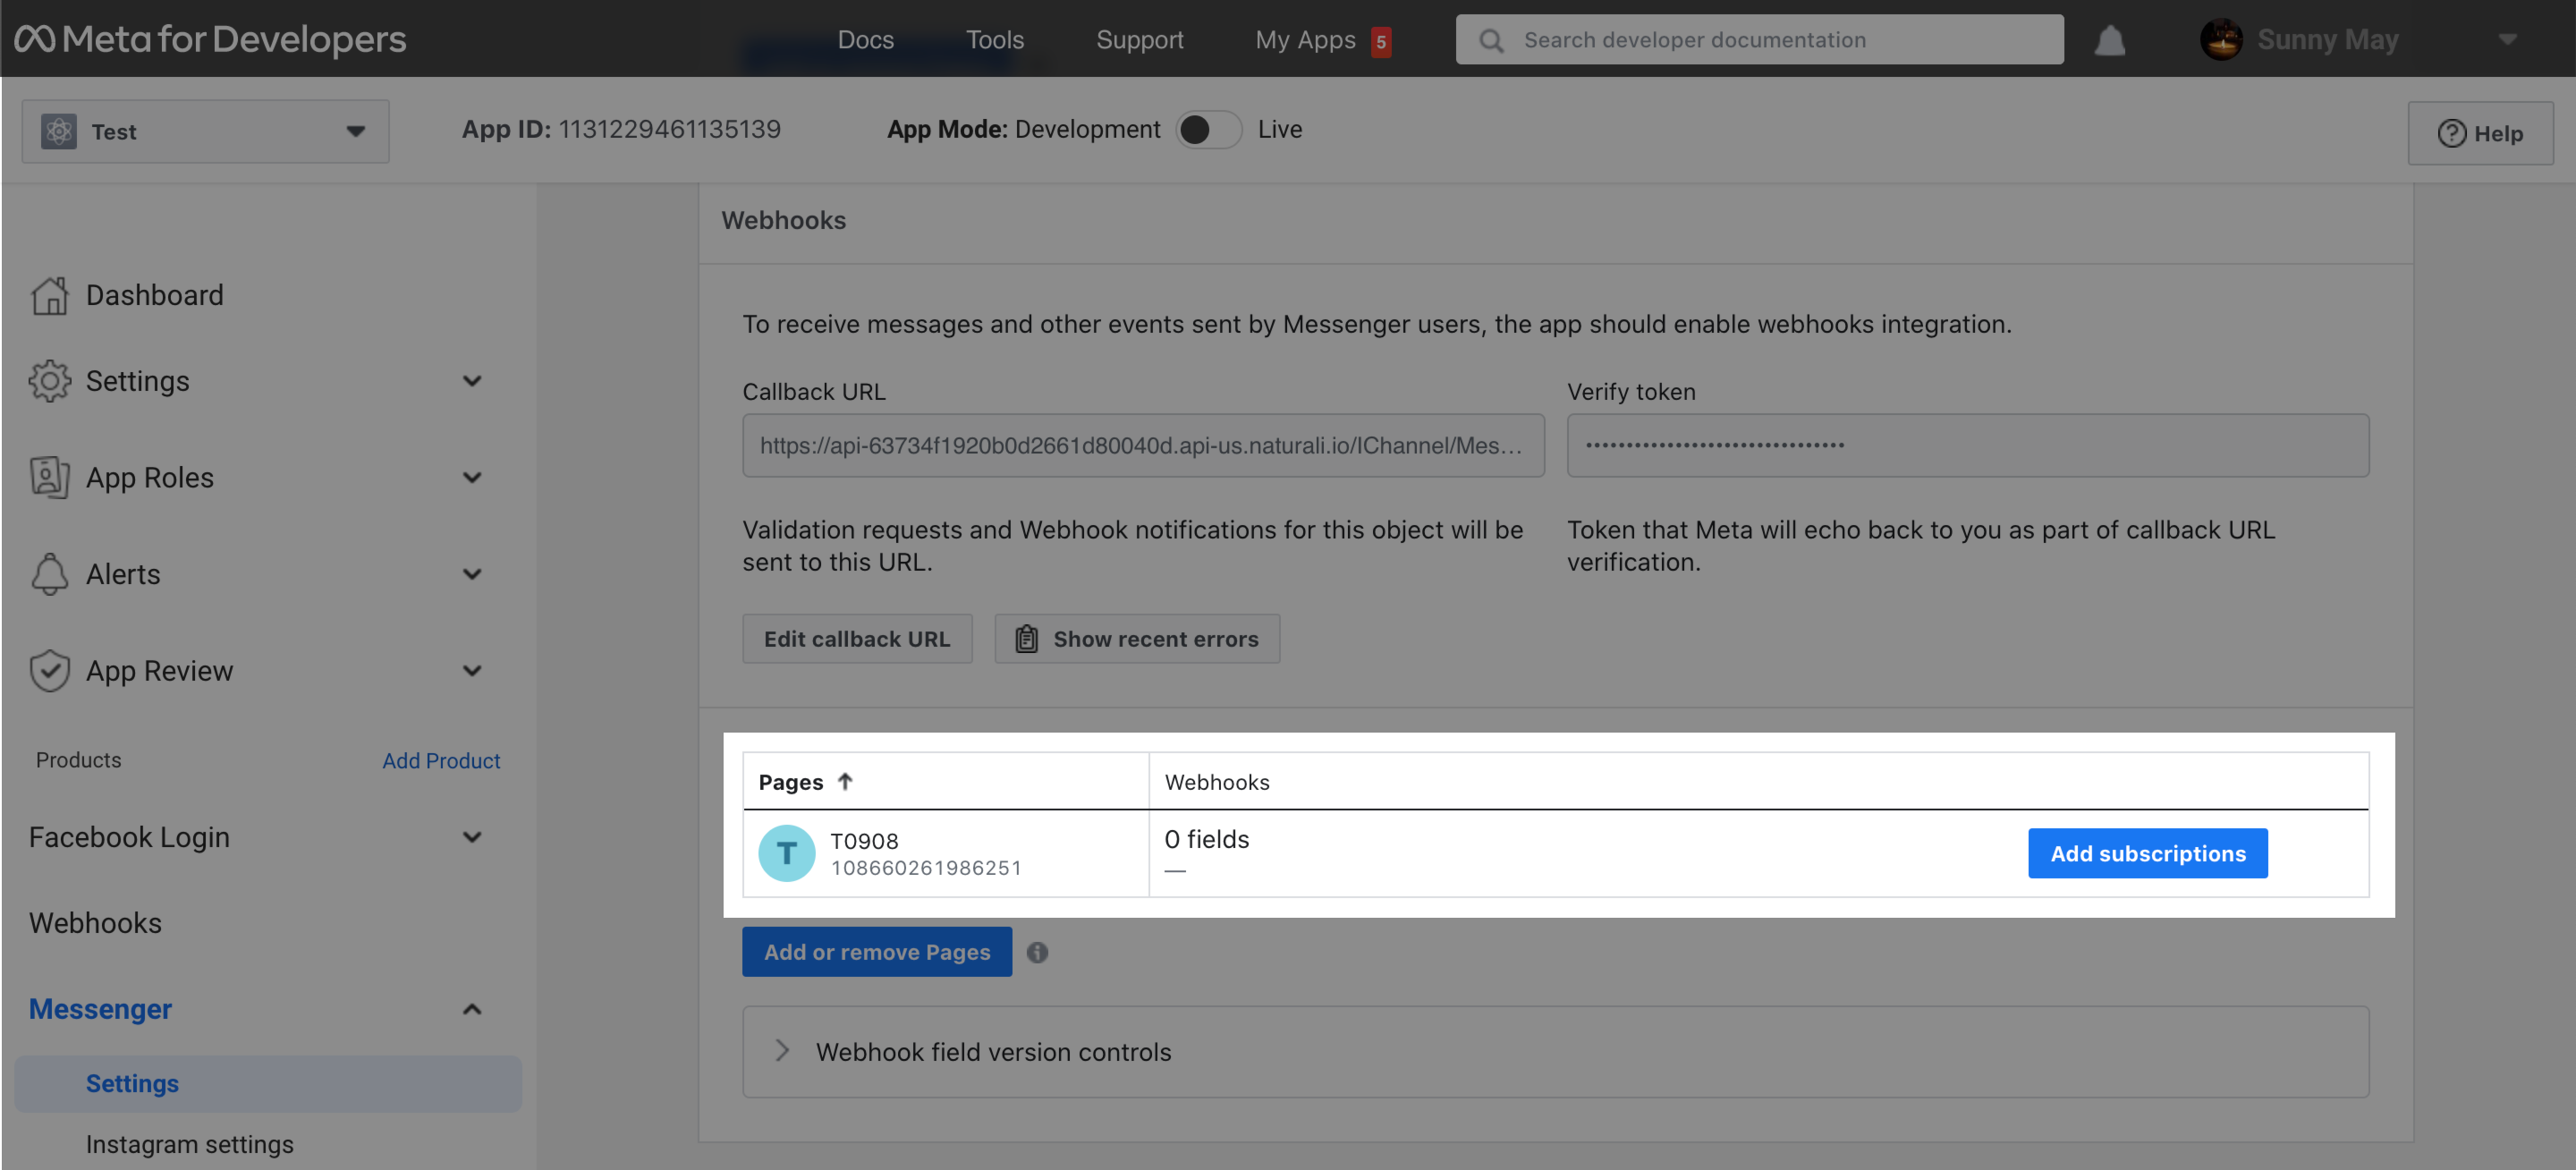
Test your chatbot
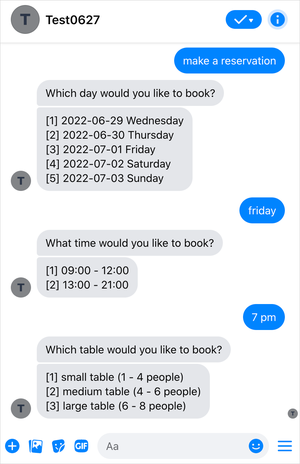
- To test that your app setup was successful, go to your page and send a message to yourself. If you get a response, you have fully set up your app for receiving messages! 🎉
- To make the app accessible to the public, switch to live mode.
Two app modes in Facebook apps
- In the development mode, only the administrator and tester that you invited can access the app. In this case, talk to the chatbot.
- In the live mode, apps can request permissions from anyone, but only permissions approved through App Review. Click here to submit your app for review.