Build an echo chatbot
This tutorial will guide you step-by-step through the process of building the same chatbot you played within the last guide. After completing this tutorial, you will be able to develop a level 2 conversational experience, which is sufficient for allowing users to check your business hours or make a reservation. But let's start with a bit of background, as you will be using a new and more effective approach to build the chatbot.
Background
A chatbot is an application with a conversational user interface (CUI). It is developed to provide user services, including answering informational questions and completing transactional tasks. A service is an interface for a business capability that usually consists of a set of Application Programming Interface (API) functions. These interfaces decouple the front end, like the chatbot, from the backend implementation of the service, so that they can be developed independently.
In order to invoke API functions in a conversational manner, the chatbot needs to create an instance of a function type through conversations, which implies that chatbot also needs to create instances for the input parameters of the function or attributes of composite types in a more general sense.
A type is considered conversationally exposed if the chatbot knows how to create an instance of it conversationally, potentially in multiple turns. This suggests a different approach to building chatbots: identify the API function types that you want to expose to users, and make these types, as well as all of their dependent types (both direct and indirect), conversationally exposed.
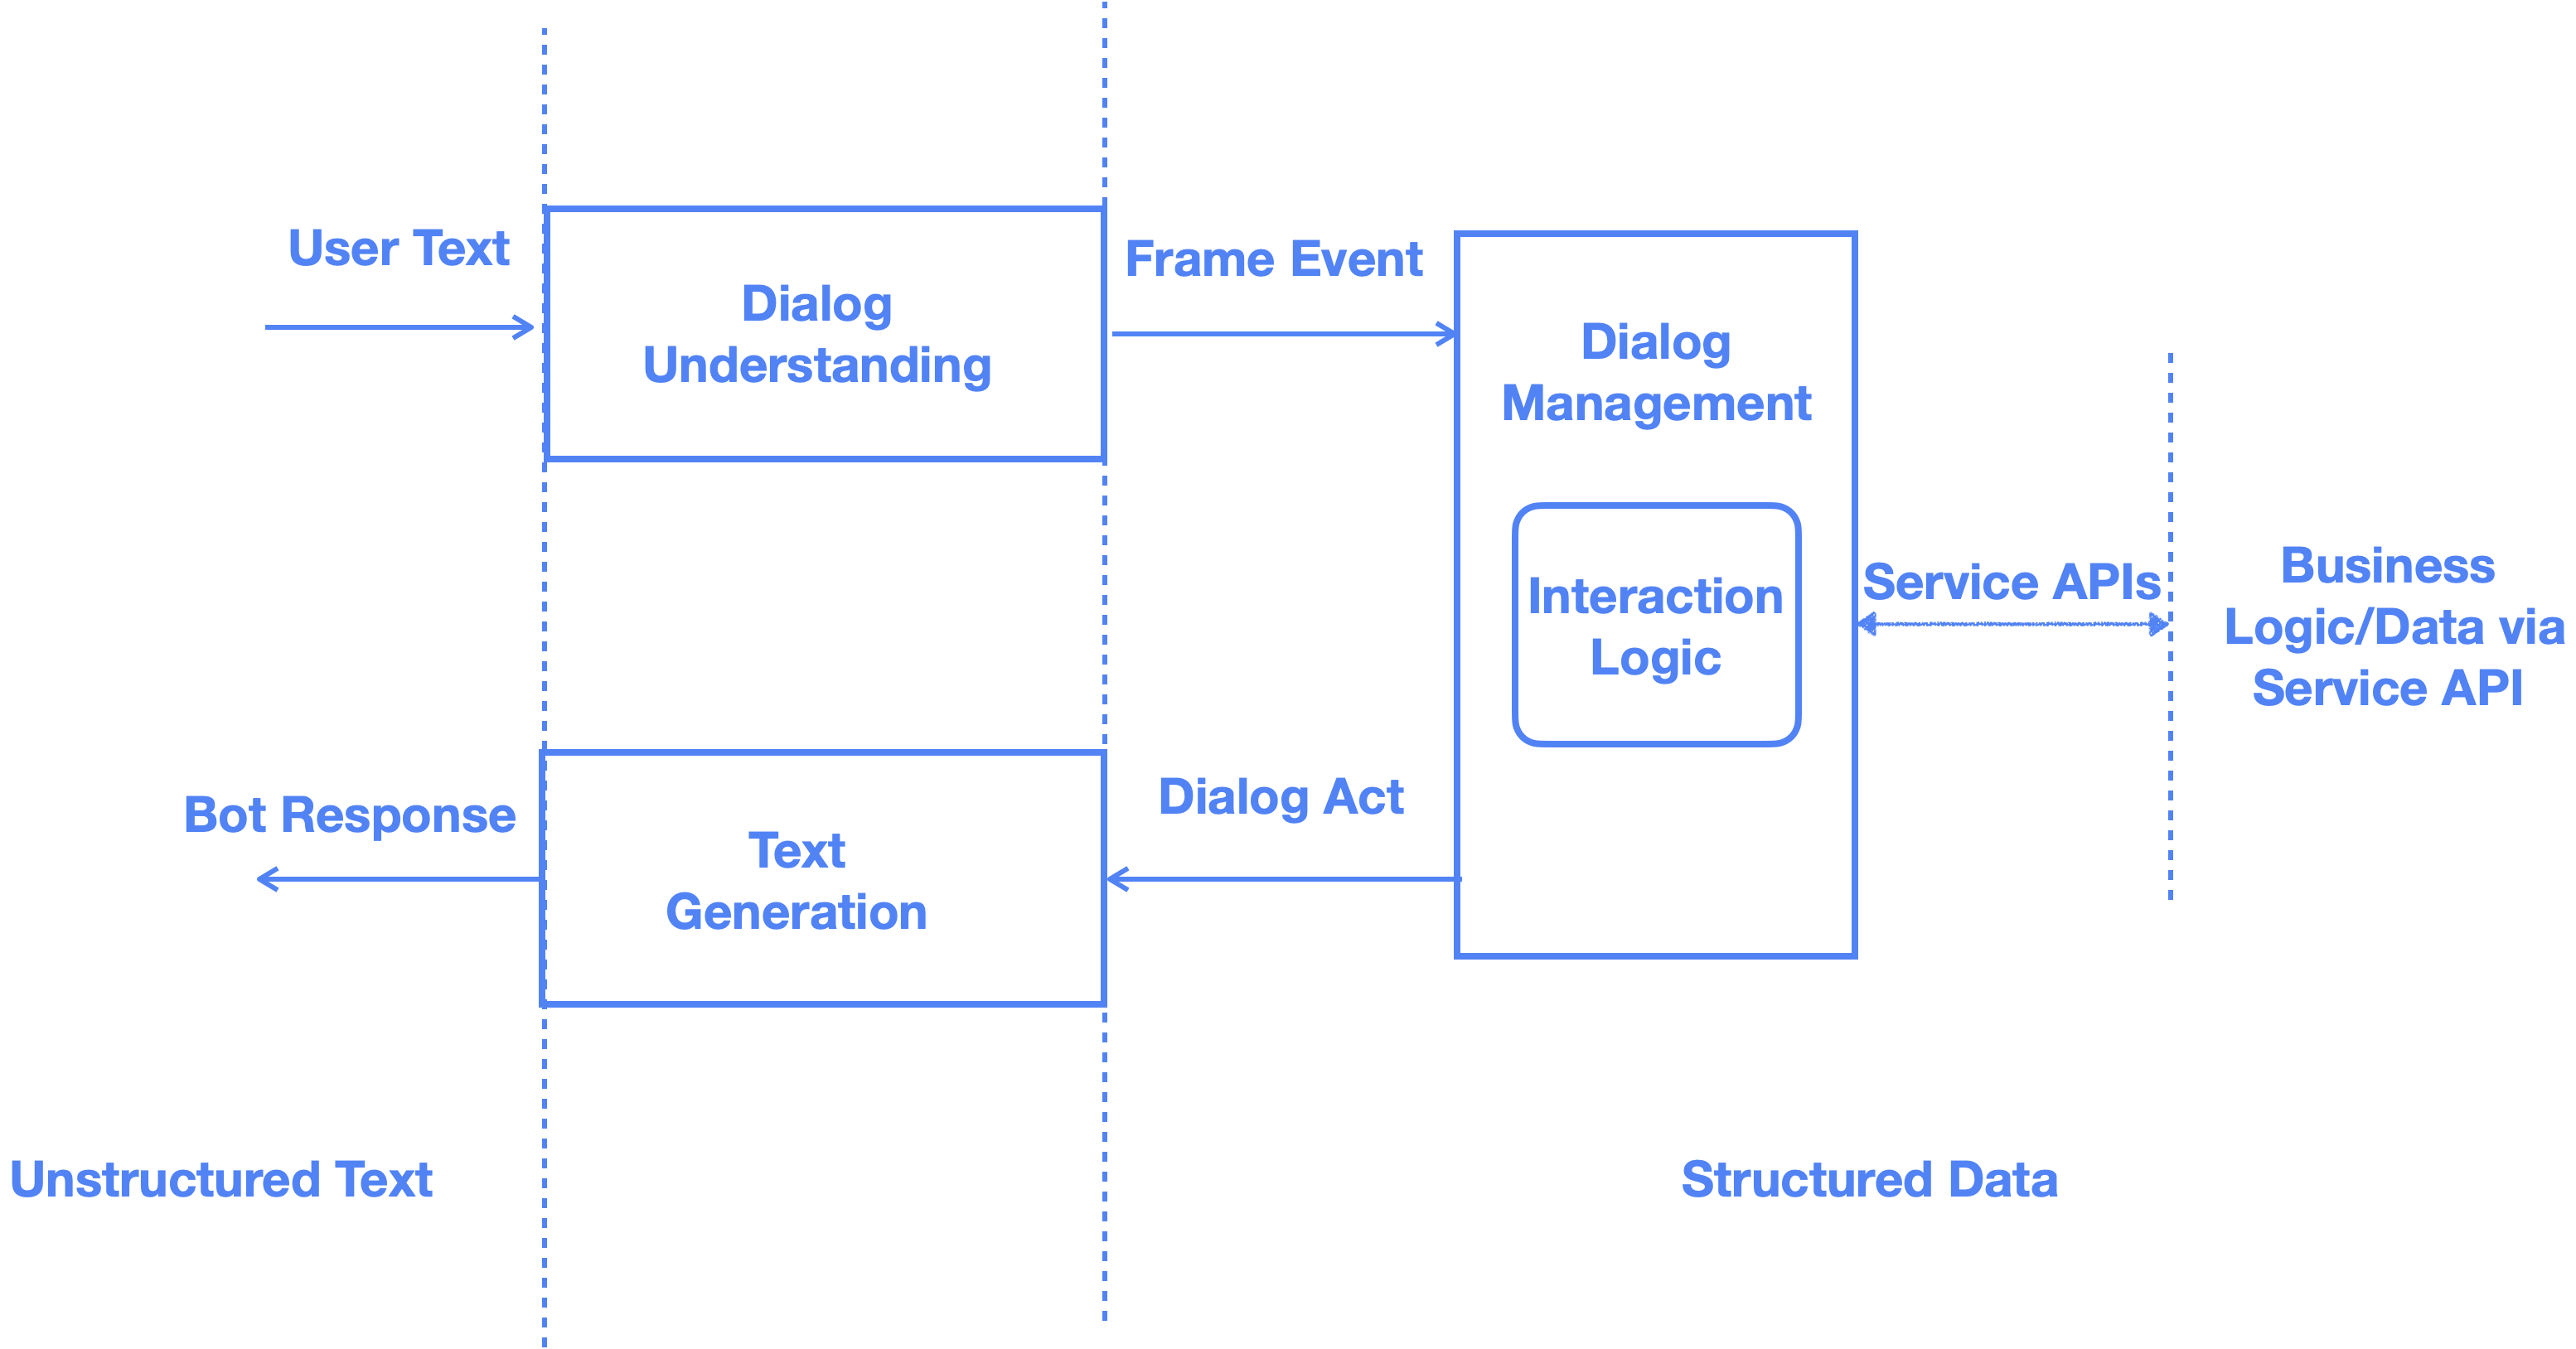
A type-based chatbot with multiple language support can then function in the following way:
Convert the user's utterance into an event. Here, an event is a way of representing the meaning of a user's utterance in a language-independent way.
Given the event and the current dialog state, generate a dialog act. A dialog act is also a language-independent representation of meaning. It is generated by following interaction logic that greedily tries to complete the instantiation of the function type. Once a function object is created, the chatbot can invoke it and wrap the function return in a dialog act.
Render the dialog act back to the user in natural language.
The same concept is also illustrated here:
A proper type system
OpenCUI is designed to support most APIs that can be defined by OpenAPI, which is a widely used standard for documenting RESTful APIs. This means that you can conversationally expose not only to primitive types like Int and String, but also to arrays and user-defined types with polymorphism support. This makes it easy to build conversational interfaces for arbitrary service APIs. In OpenCUI, functions are represented by skills, user-defined types are represented by frames, and primitive types are represented by entities.
Types declared in OpenCUI can be either internal or external. For internal types, OpenCUI generates a Kotlin class, while for external types, it uses existing Java/Kotlin types, ensuring that every type has a direct representation at the Java/Kotlin level. This allows users to tap into the vast Java ecosystem and leverage any available functionality, as well as use Kotlin code expressions to directly express logic.
Build chatbot in 3 layers
OpenCUI promotes a type-based approach to build conversational user interface, by introducing a set of dialog annotations that you can add to the type and its slots. For each composite type that you need to expose conversationally:
Declare the type at the schema layer. This includes the label of the type, the slots that are associated with the type, and the local functions and services that are available to the type.
Add dialog annotations, and configure them in the interaction layer. The interaction layer determines the language-independent aspects of the conversational interactions: whether the chatbot should ask the user to fill a slot, whether to provide a candidate list, and whether to confirm with the user when a value is received.
For each language you want to support, configure annotations in required language layer. The annotations in the language layer help dialog understanding module to map the text in the target language to structured semantics and back. For example, if you are creating a chatbot that supports English and Chinese, you will need to configure language layer annotations for both languages.
The primitive types, or entities, can be defined in only two layers: schema and language.
Clearly, a chatbot always consists of many types, and the order in which these types are defined matters. It is important to ensure that all the required types are defined before they are referenced, in order to avoid any circular dependencies or reference errors.
Annotate a composite type
It is common for composite types to have slots, and then you have to decide whether you want to follow a layer-first or slot-first approach to annotate such types. In this series of quickstart guides, annotation will be added in a slot-first, or one-slot-at-a-time approach, making it easy for you to follow:
- Repeat the following steps for each slot:
- Add all annotations needed for that slot, and configure them in the interaction layer.
- Configure annotations in the language layer.
- Add the type level annotation, in both layers.
- If the type is a skill, configure the response for it, in both layers.
Before you start
- Log in to OpenCUI.
- Clone a simple chatbot to get an idea of what to build.
Create chatbot: pingpong
You can create a chatbot under any organization, following these steps:
Within an organization, in the upper right corner of the project area, click Create and select Create chatbot.
In the pop-up window, complete the form for chatbot basic settings and click Create. For this simple chatbot, you only need to fill in the following three fields:
- Project label: The unique identifier for the chatbot. Type a short, memorable label for your chatbot. We suggest using a lowercase label. For example,
pingpong. - Region: Where you want to deploy this chatbot. Ideally, it should be close to your users.
- Languages: The language your chatbot supports. In this case, select English(en).
- Project label: The unique identifier for the chatbot. Type a short, memorable label for your chatbot. We suggest using a lowercase label. For example,
Caution: Project label and region are immutable.
Choose your project label and region carefully, because you cannot change them after creation. You can, however, clone and rename a project. When you do this, the connections and user session data for the project will not be cloned, for privacy reasons.
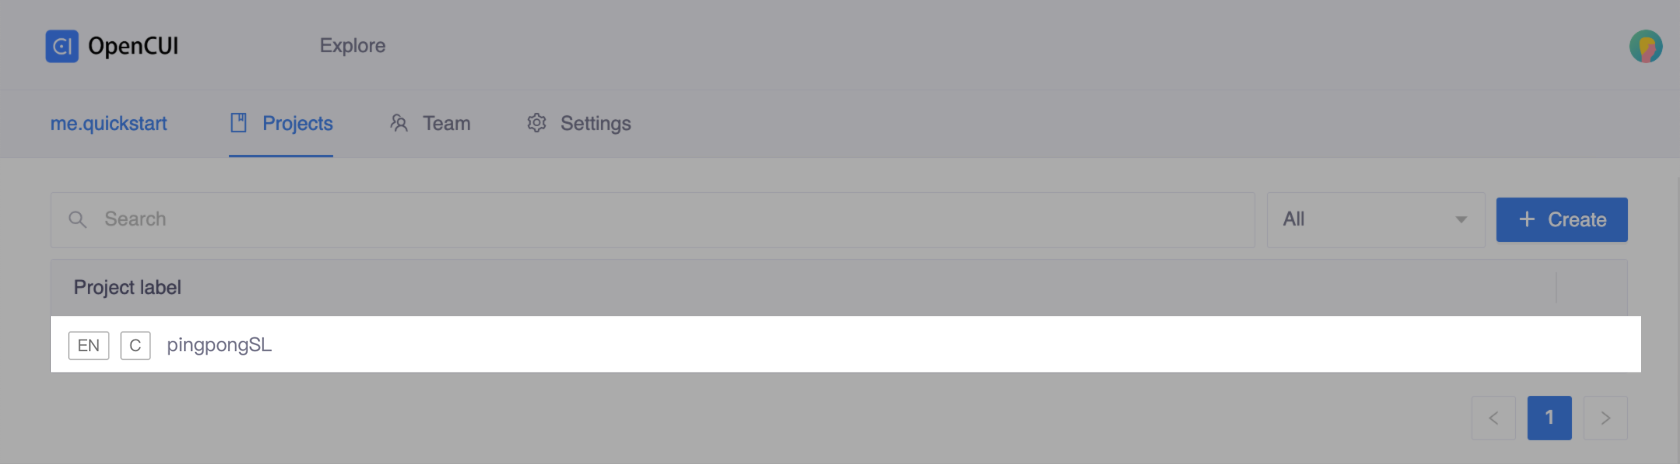
If the chatbot is created successfully, it should be displayed in the organization's project list:
Build types
Under type-based chatbot development, building a chatbot can be achieved by defining every type required by it in a "least dependencies first" approach. The conversational experience you will create in this guide requires a dependent entity type called Location and a skill called PingPong.
Build entity: Location
The most basic type in OpenCUI is "entity". It is a primitive type that the chatbot knows how to extract the value of from the user's utterance. OpenCUI provides many predefined entities, such as java.time.LocalDate for dates, io.opencui.core.Email for email addresses, and so on. You cannot change these predefined entities. OpenCUI also allows you to create custom entities. A custom entity instance contains a single reference label in schema layer and a list of expressions based on the user mentions in their utterance in language layer. To help the chatbot better understand the user, it is helpful to enumerate common expressions for each instance.
In this case, let's build a custom entity type Location in schema layer and language layer as follows.
Create entity: Location
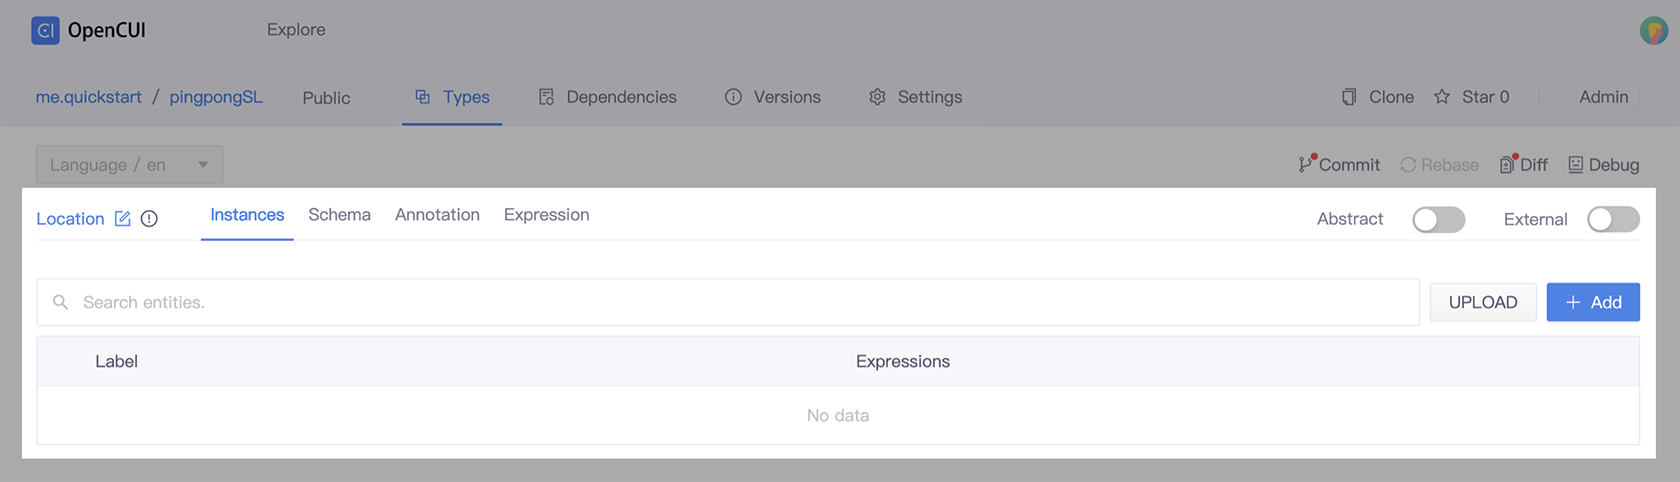
Inside the pingpong chatbot and Types page:
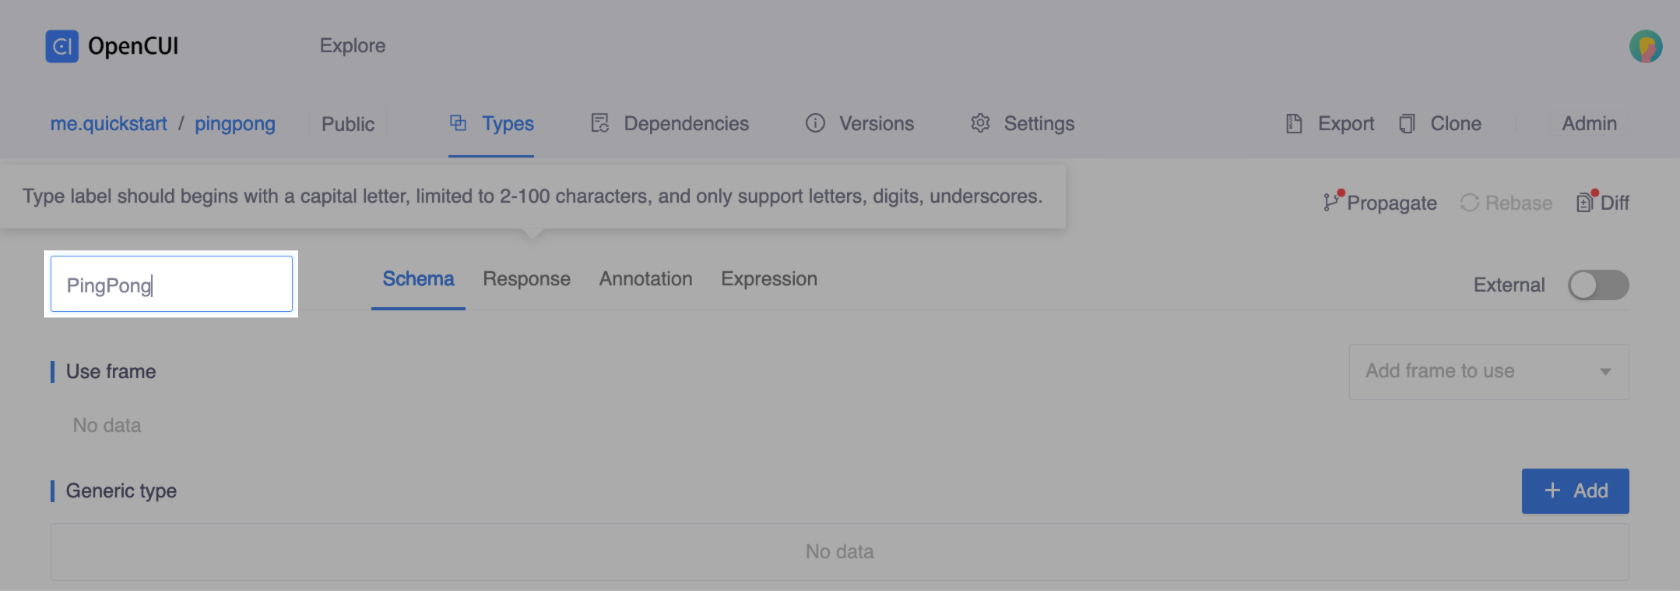
- Click Create button on the right side, and select Create entity to create a new entity.
- Enter a label for the entity type and press enter. For example,
Location.
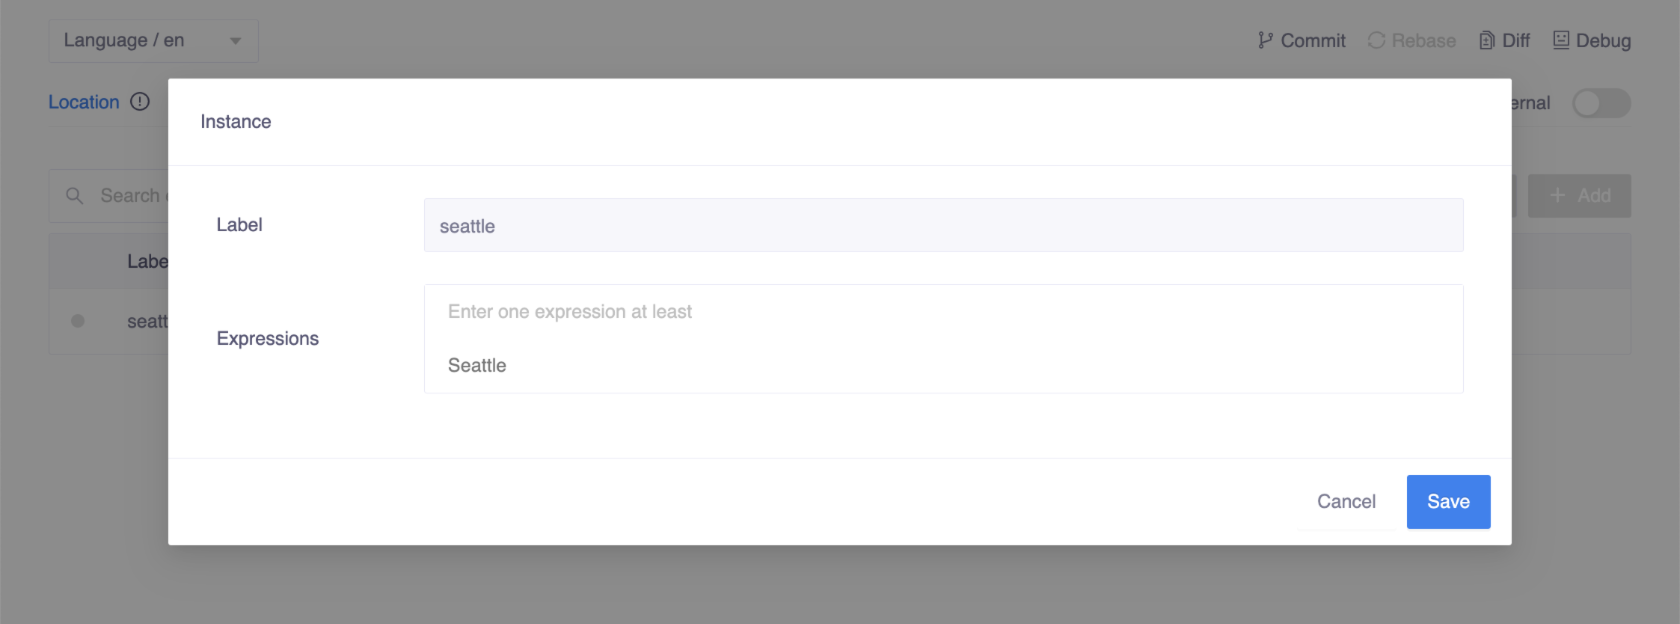
Schema layer: add instances
You are required to provide a language-independent label for each instance. One reason for this is to ensure that you can reference them in the interaction logic and make the conversational experience language independent.
Inside the Location entity and Instances tab, for each instance you want to add:
- Click Add button to add an instances.
- Fill the Label field in the pop-up window, for example
seattleorpaloAlto, and save it.
Language layer: add expressions
To enable the chatbot to create instances for an entity type based on user mentions, you must enumerate common expressions for each instance of the user-defined entity type that was added in the previous step.
Expressions for instance
Inside the Location entity and Instances tab, for each instance you need to enumerate the common expressions that might refer to the instance:
- Click on the instance you want to add expressions to.
- Add expressions into Expressions field in the pop-up window, for example,
Palo AltoforpaloAlto, then save it.
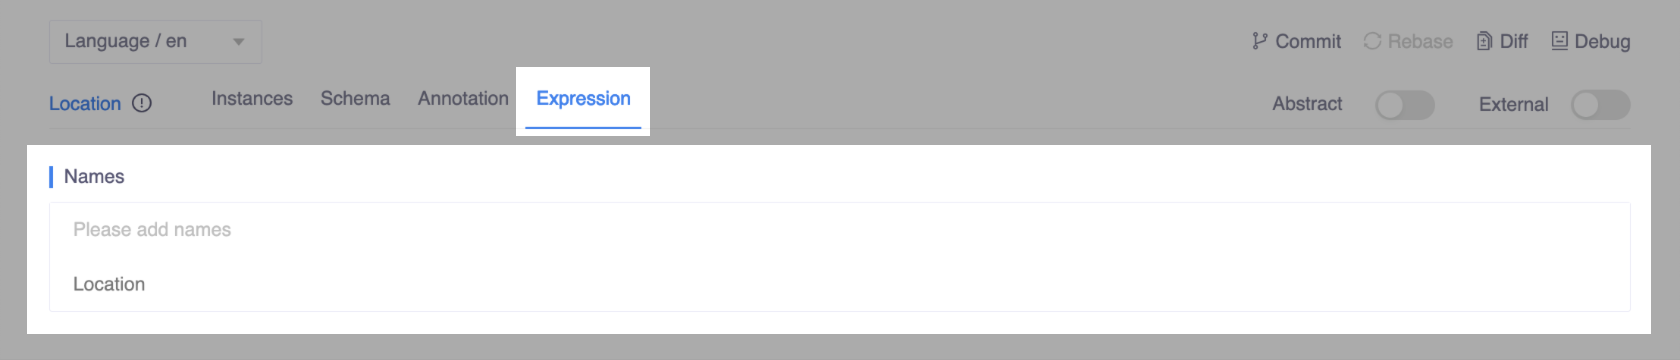
Names for type
You need to provide the expression of the entity type itself in the form of names. Names are language-dependent representations of the entity type, and they will be used for both detecting mentions of this type from the user's utterance and displaying the use of this type to the user. Note this need to be done for every type.
Inside the Location entity and Expression tab, in the Names section, enter location for the Location entity and press enter.
Build skill: PingPong
Conceptually, a skill is a function exposed in a conversational manner, with input parameters represented by its slots. In this tutorial, you will construct a basic skill called PingPong that has a single slot of type Location. Once an instance of this function type is created, the chatbot will respond with an acknowledgment in the form of pong to ${location}.
Schema layer: declare a skill
At this layer, you will create the skill and add all its slots that represent input parameters for the corresponding function. Although not necessary for this particular simple skill, this layer is also where you can declare any required local functions and services, and implement these native local functions as well.
Create the skill
Inside the pingpong chatbot and Types page:
Click Create button on the right side, and select Create skill to create a new skill.
Enter a label for the skill and press enter. For example,
PingPong.Need to know
In OpenCUI, a label is an identifier that is independent of the language used. The skill label, being a type of label, should follow these guidelines:
- It should start with a capital letter.
- It should be between 2 and 100 characters long.
- It should only contain letters, digits, and underscores.
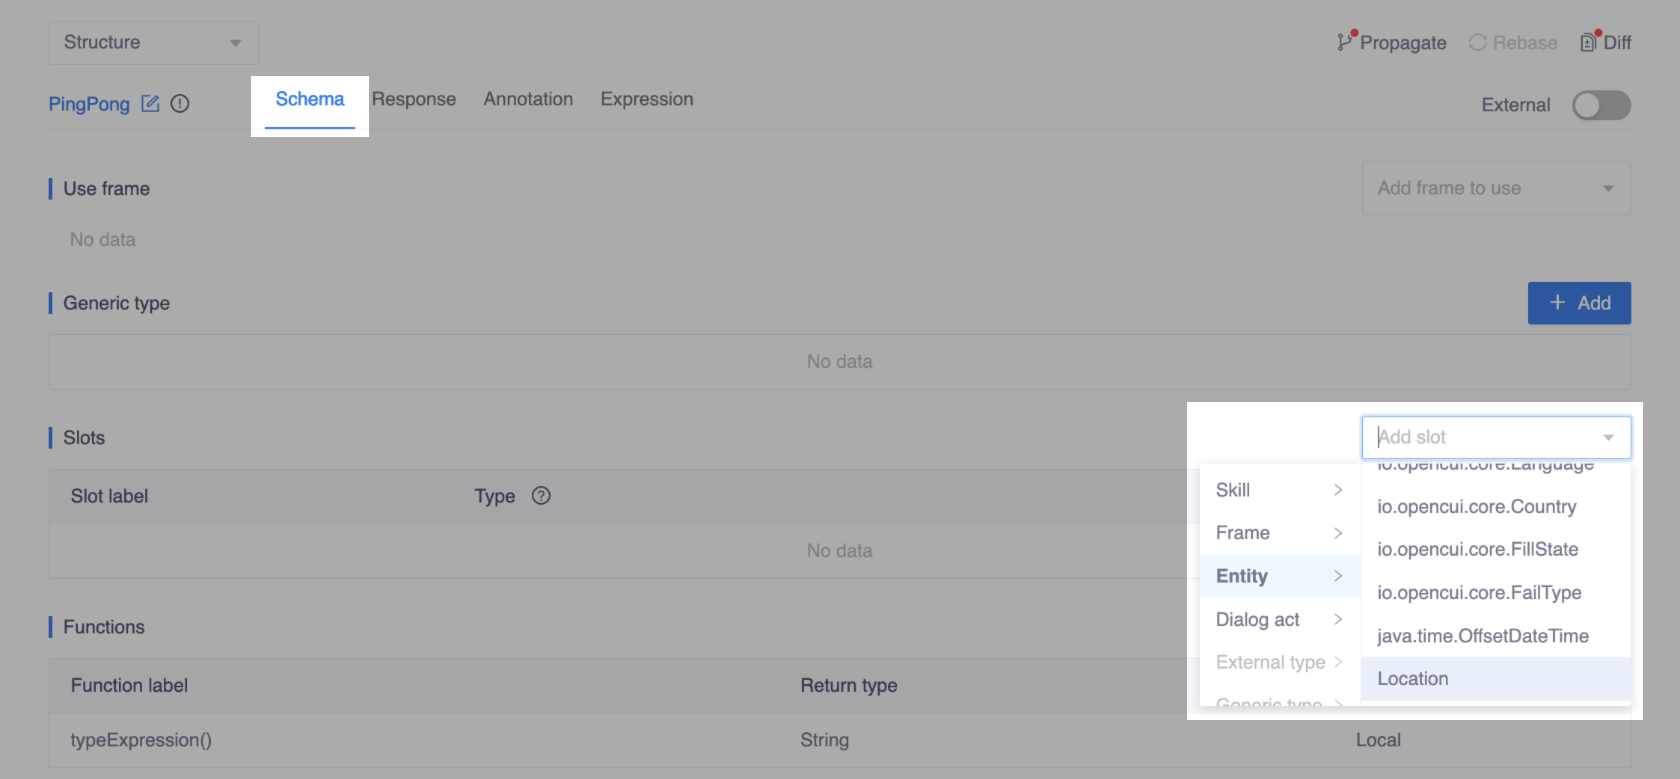
Add slots
Inside the PingPong skill and Schema tab:
Click add slot, select the type you want to add as slot in the Slots section. In this case, select Entity > Location.
Pick a label for the slot, in this case let's use
location, so that you can reference it in the response.
Annotate type: PingPong
Let's annotate PingPong skill following this guide.
Add slot level annotations to location
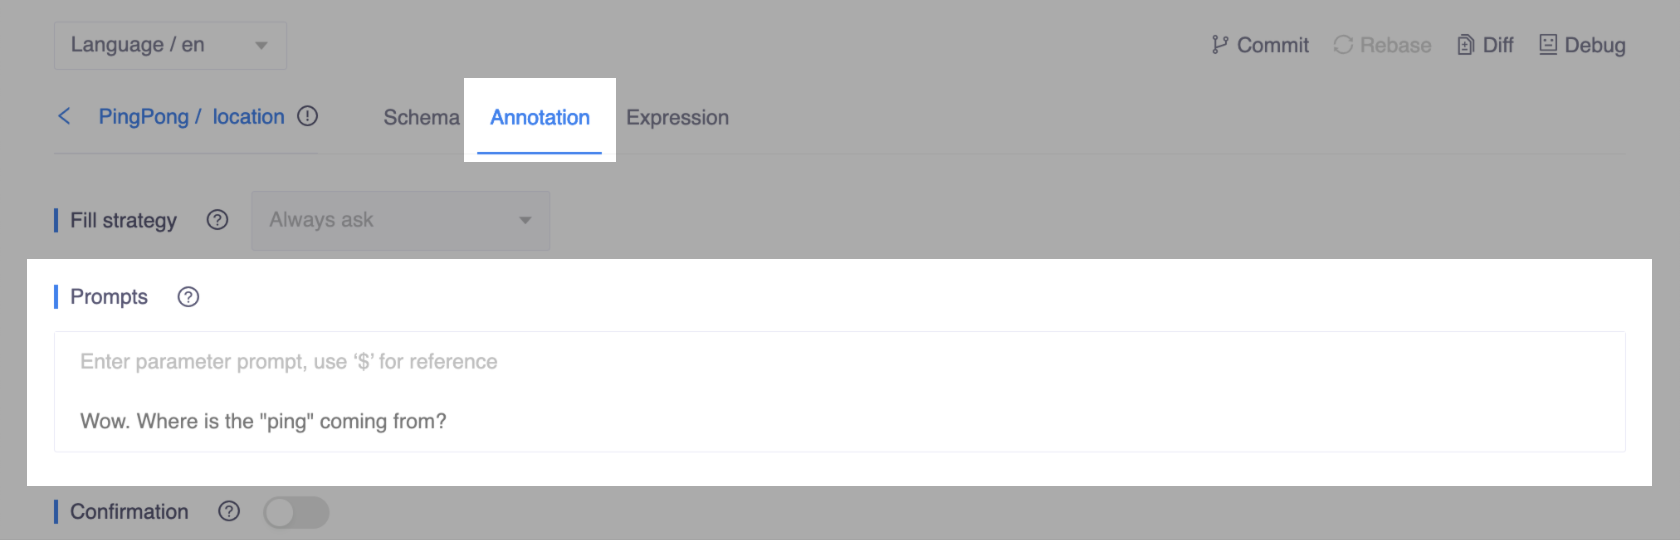
If the user does not provide all the information that the chatbot needs in the initial utterance, the chatbot can prompt the user for that information. To do this, you need to select the Always ask fill strategy for the slot. This will make the Prompt field required, and you will need to add at least one template to it.
Interaction layer
Inside the
PingPong/locationslot, under the Annotation tab, select Always ask in the Fill strategy section.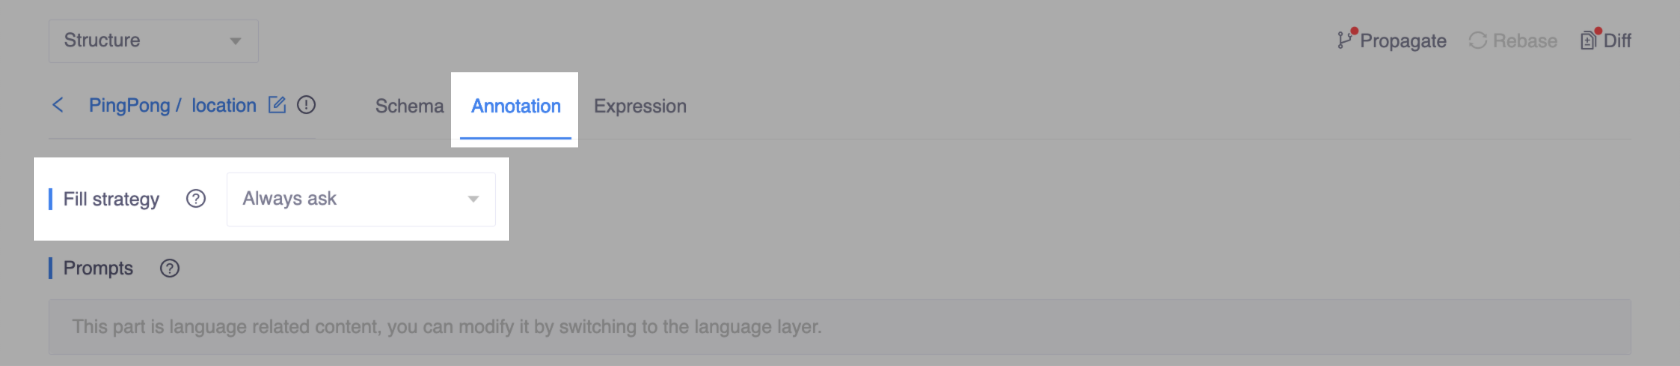
Language layer
Inside the
PingPong/locationslot:Fill templates for Prompt:
- Under the Annotation tab.
- Enter the sentences in Prompts section. For example,
Wow. Where is the "ping" coming from?.
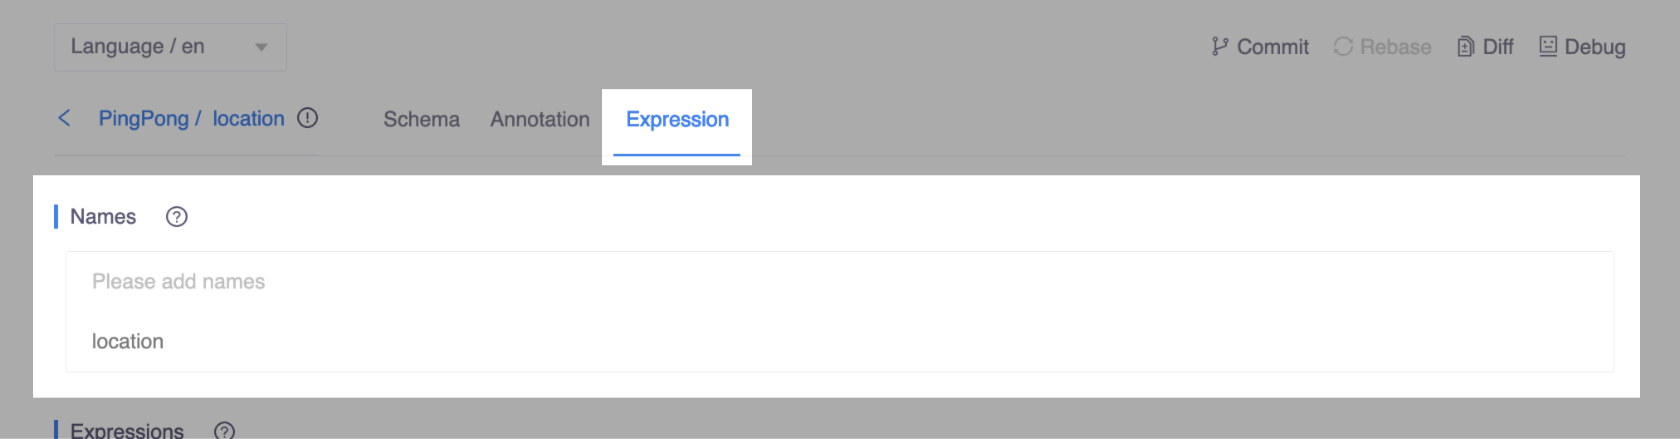
Add names for
locationslot:- Under the Expression tab.
- Enter the names in Names section, such as
location.
Add type level annotation
For this simple skill, only two type level annotations: names, utterance exemplars, are required. Both only need to be configured at language layer. If a user's utterance is semantically similar to any of the exemplars entered here, it will be considered as an intention to trigger this skill. OpenCUI dialog understanding (DU) module are large language model based, so you do not need to enumerate all possible different utterances that can imply this skill. You just need to add some representative one, or the ones that was understood wrong so that DU can hot fix it.
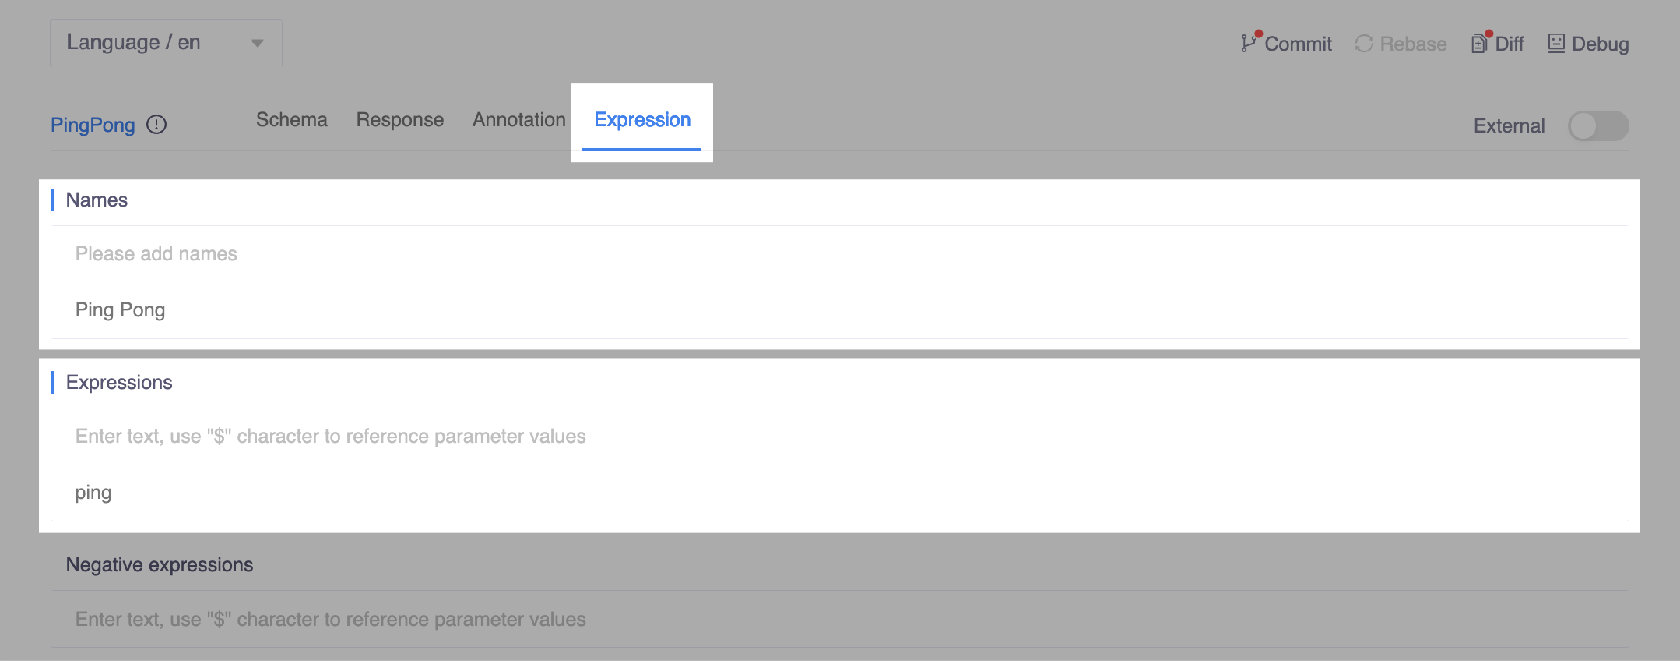
Language layer
Inside the
PingPongskill and the Expression tab:- Add expression for
PingPongskill:- In the Expressions section, enter
pingand press enter.
- In the Expressions section, enter
- Add names for
PingPongskill:- In the Names section, enter
Ping Pongfor the PingPong skill display name and press enter.
- In the Names section, enter
- Add expression for
Configure response
After being triggered, the PingPong skill responds a "pong" based on the location provided by the user, this behavior is controlled by a response. Responses are executed after the chatbot has all the slots filled per interaction logic defined by attached dialog annotations. In reality, chatbot should call out the service APIs and render the return back to user in natural text. It is often necessary to reference slots and function values in the response. In OpenCUI, this can be easily achieved using ${} with arbitrary Kotlin code expression inside.
Interaction layer
Inside the
PingPongskill and the Response tab, select Single value message under the Default action section to declare a simple reply.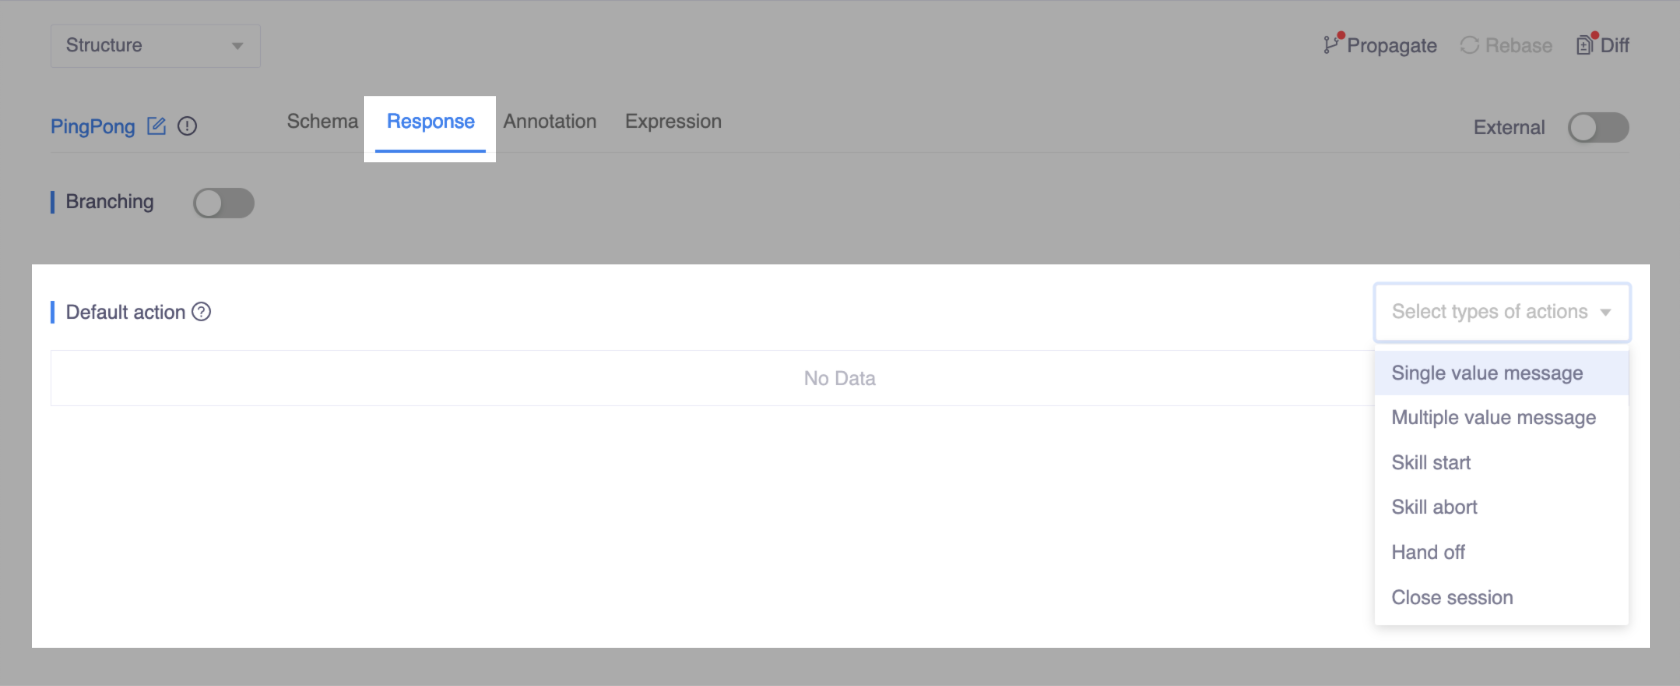
Language layer
Inside the
PingPongskill and the Responses tab, enterGreat! Pong to ${location?.expression()}.in the Single value message field and press enter.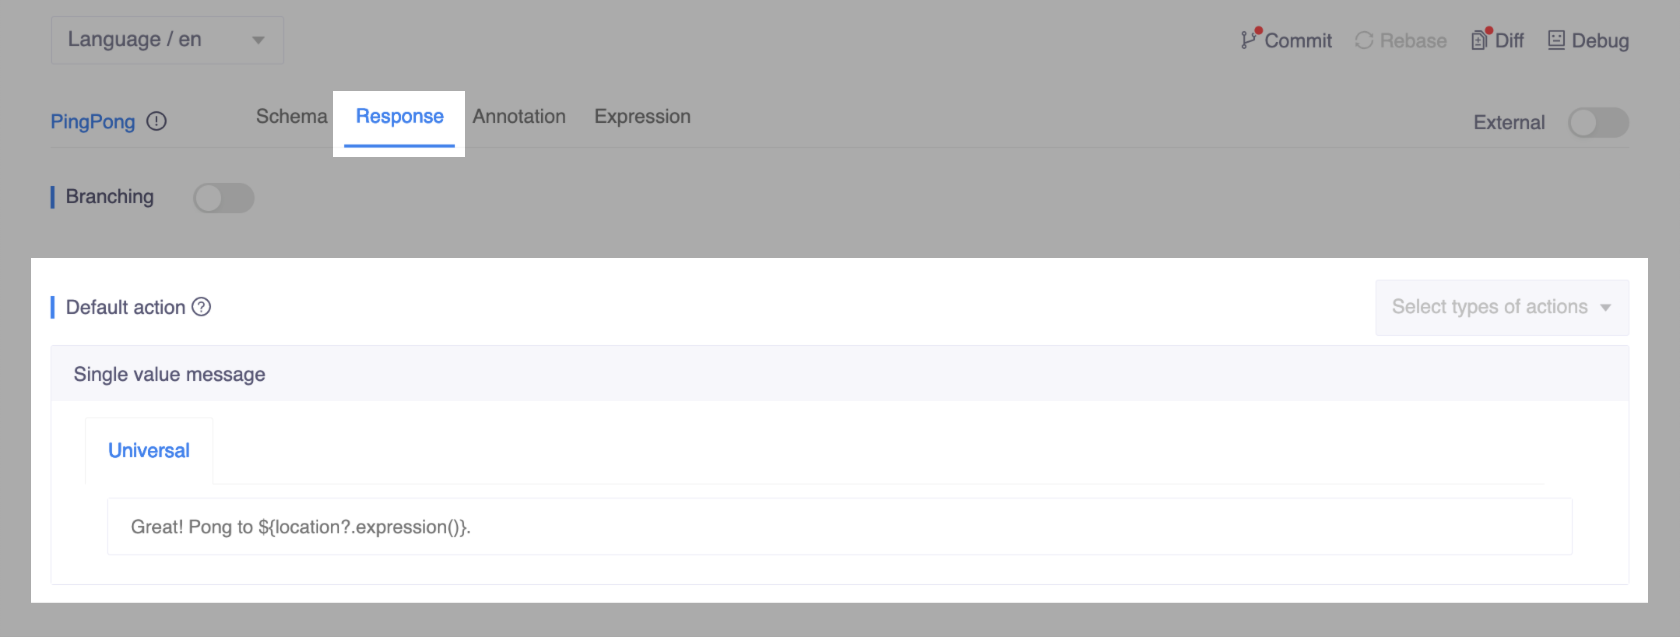
TIP
To render a slot value in a language dependent fashion, use ${location?.expression()} instead of ${location} which will be rendered to a language independent label.
Test a chatbot
Before you start testing your newly defined chatbot using the built-in Debug tool, click Commit in the upper-right corner to commit your changes in the language layer. Keep in mind that Debug can only be used to test committed content for current language, as per OpenCUI workflow.