Google Business Message
Business Messages is a mobile conversational channel that combines entry points on Google Maps, Search, and brand websites to create rich, asynchronous messaging experiences that delight customers and drive business results.
We are going to show here how to integrate Google Business Message into OpenCUI and deploy the chatbot to a OpenCUI hosted environment. For the private deployment, please consult systems in your organization.
Follow these steps to configure:
Set up Google Business Message
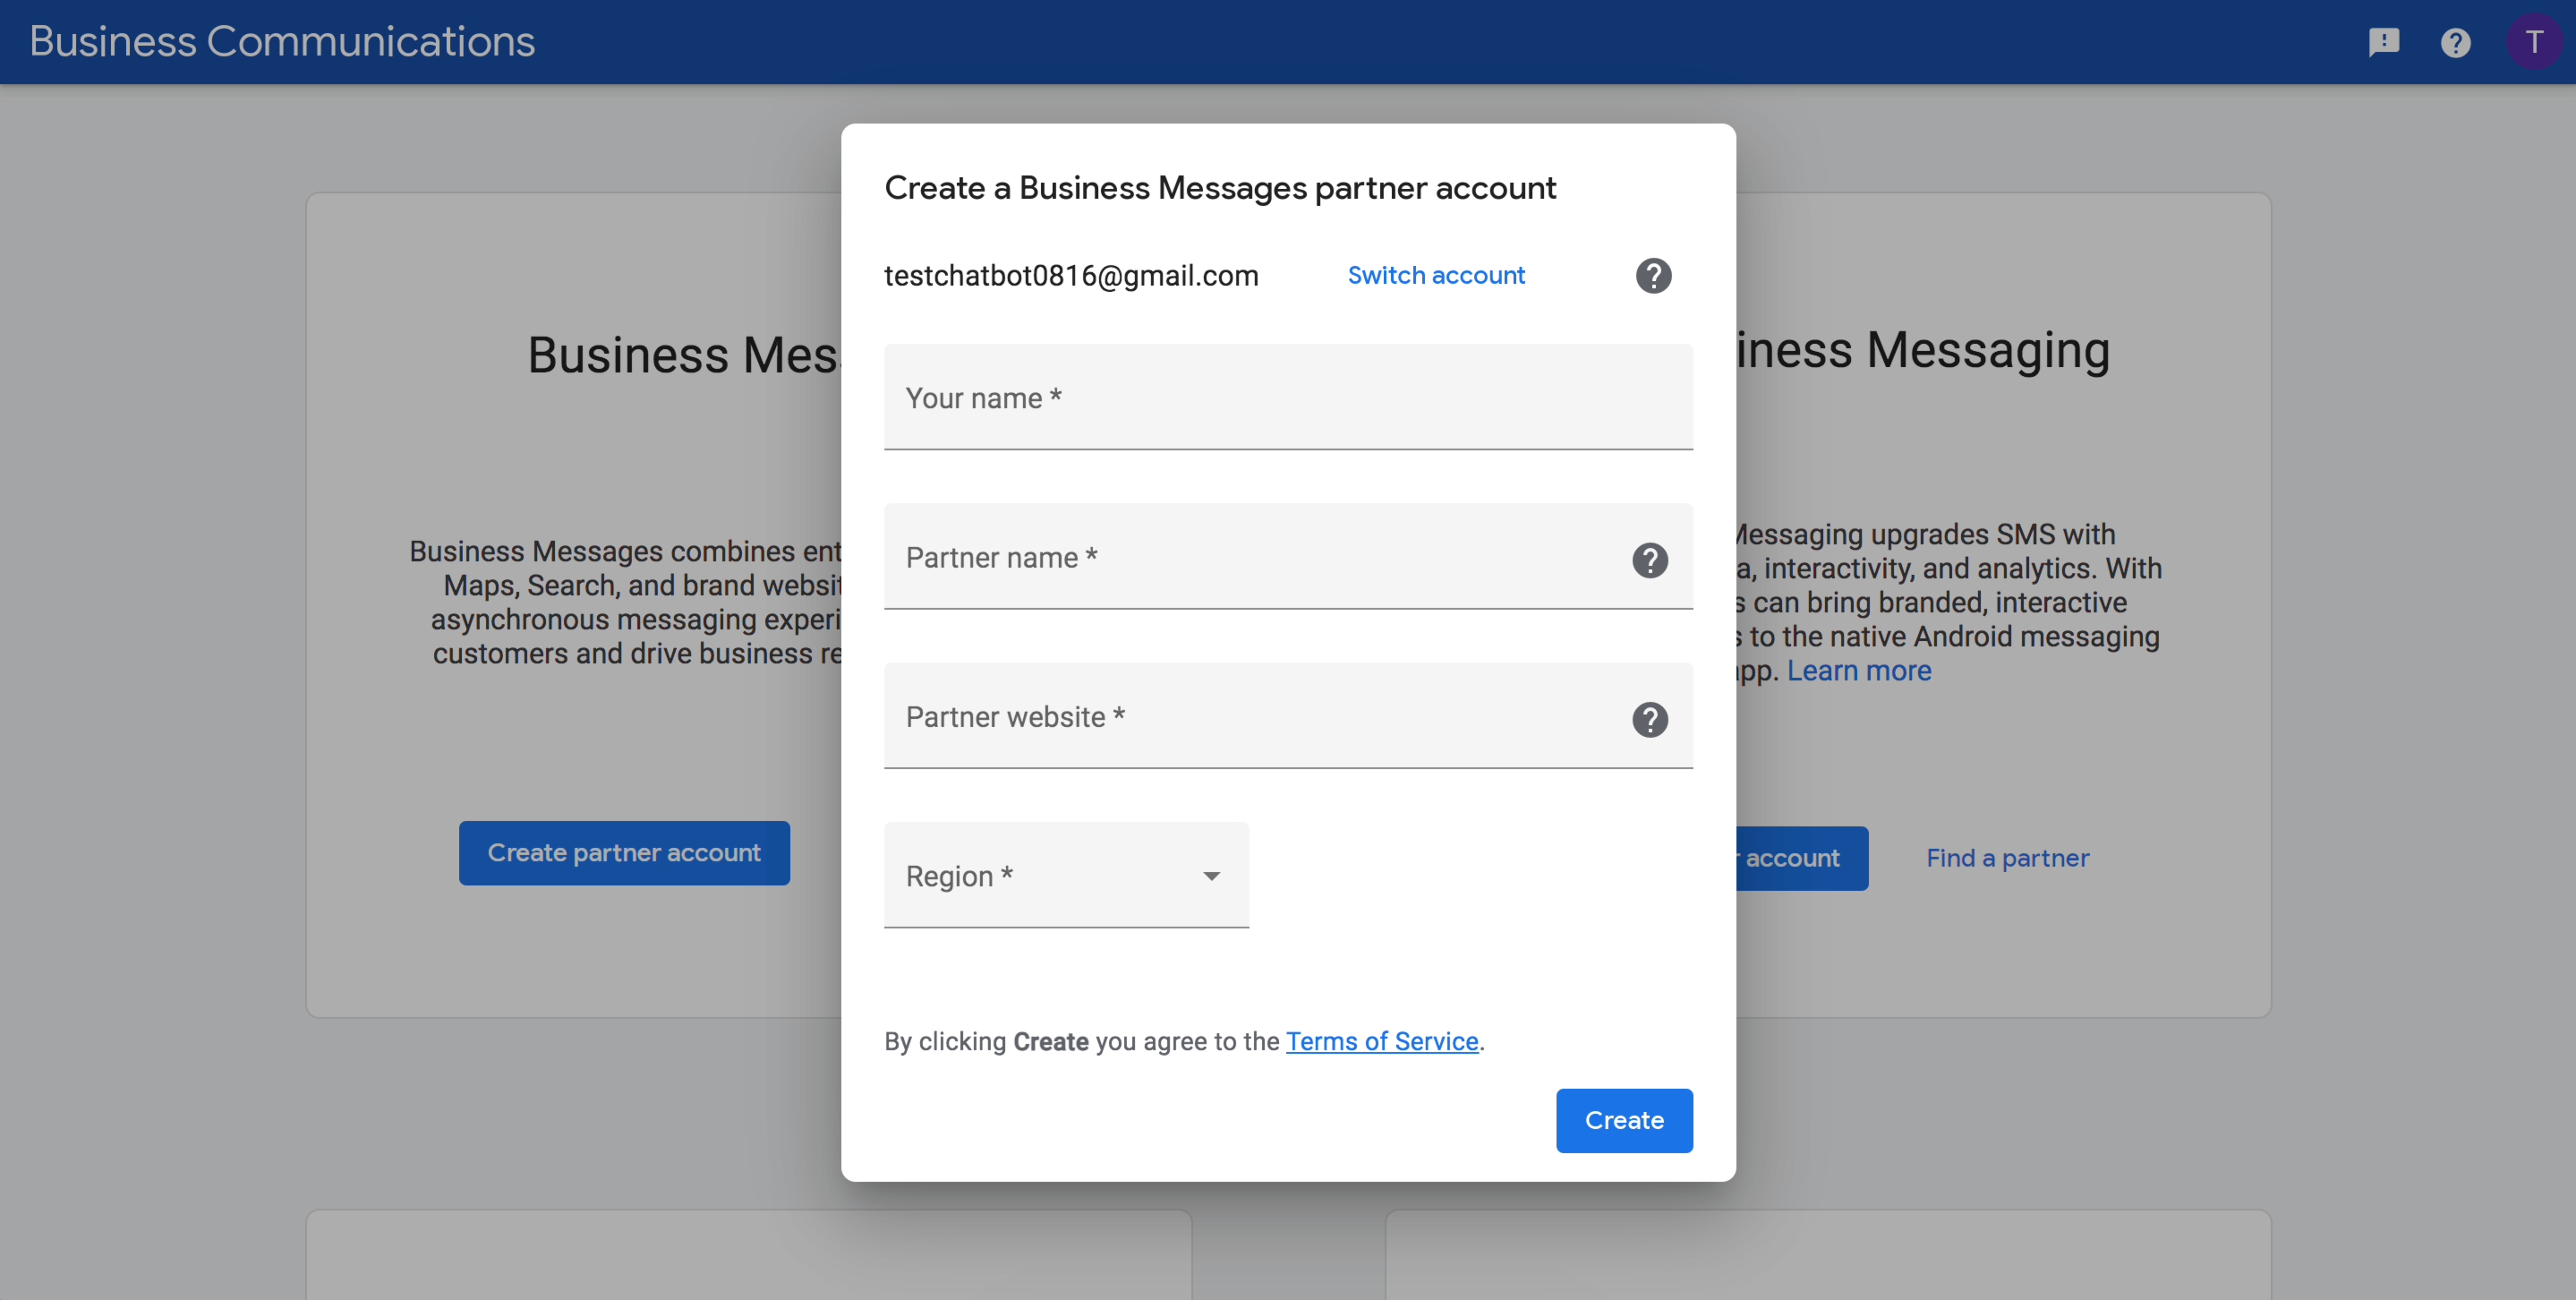
Register as a partner
- Open the Business Communications Developer Console.
- Under Business Messages, click Create partner account.
- Enter your partner information:
| Field | Value |
|---|---|
| Your name | Your full name |
| Partner name | Your organization's name |
| Partner website | Your organization's website |
| Region | The region you want to host the Business Messages service |
- Click Create.
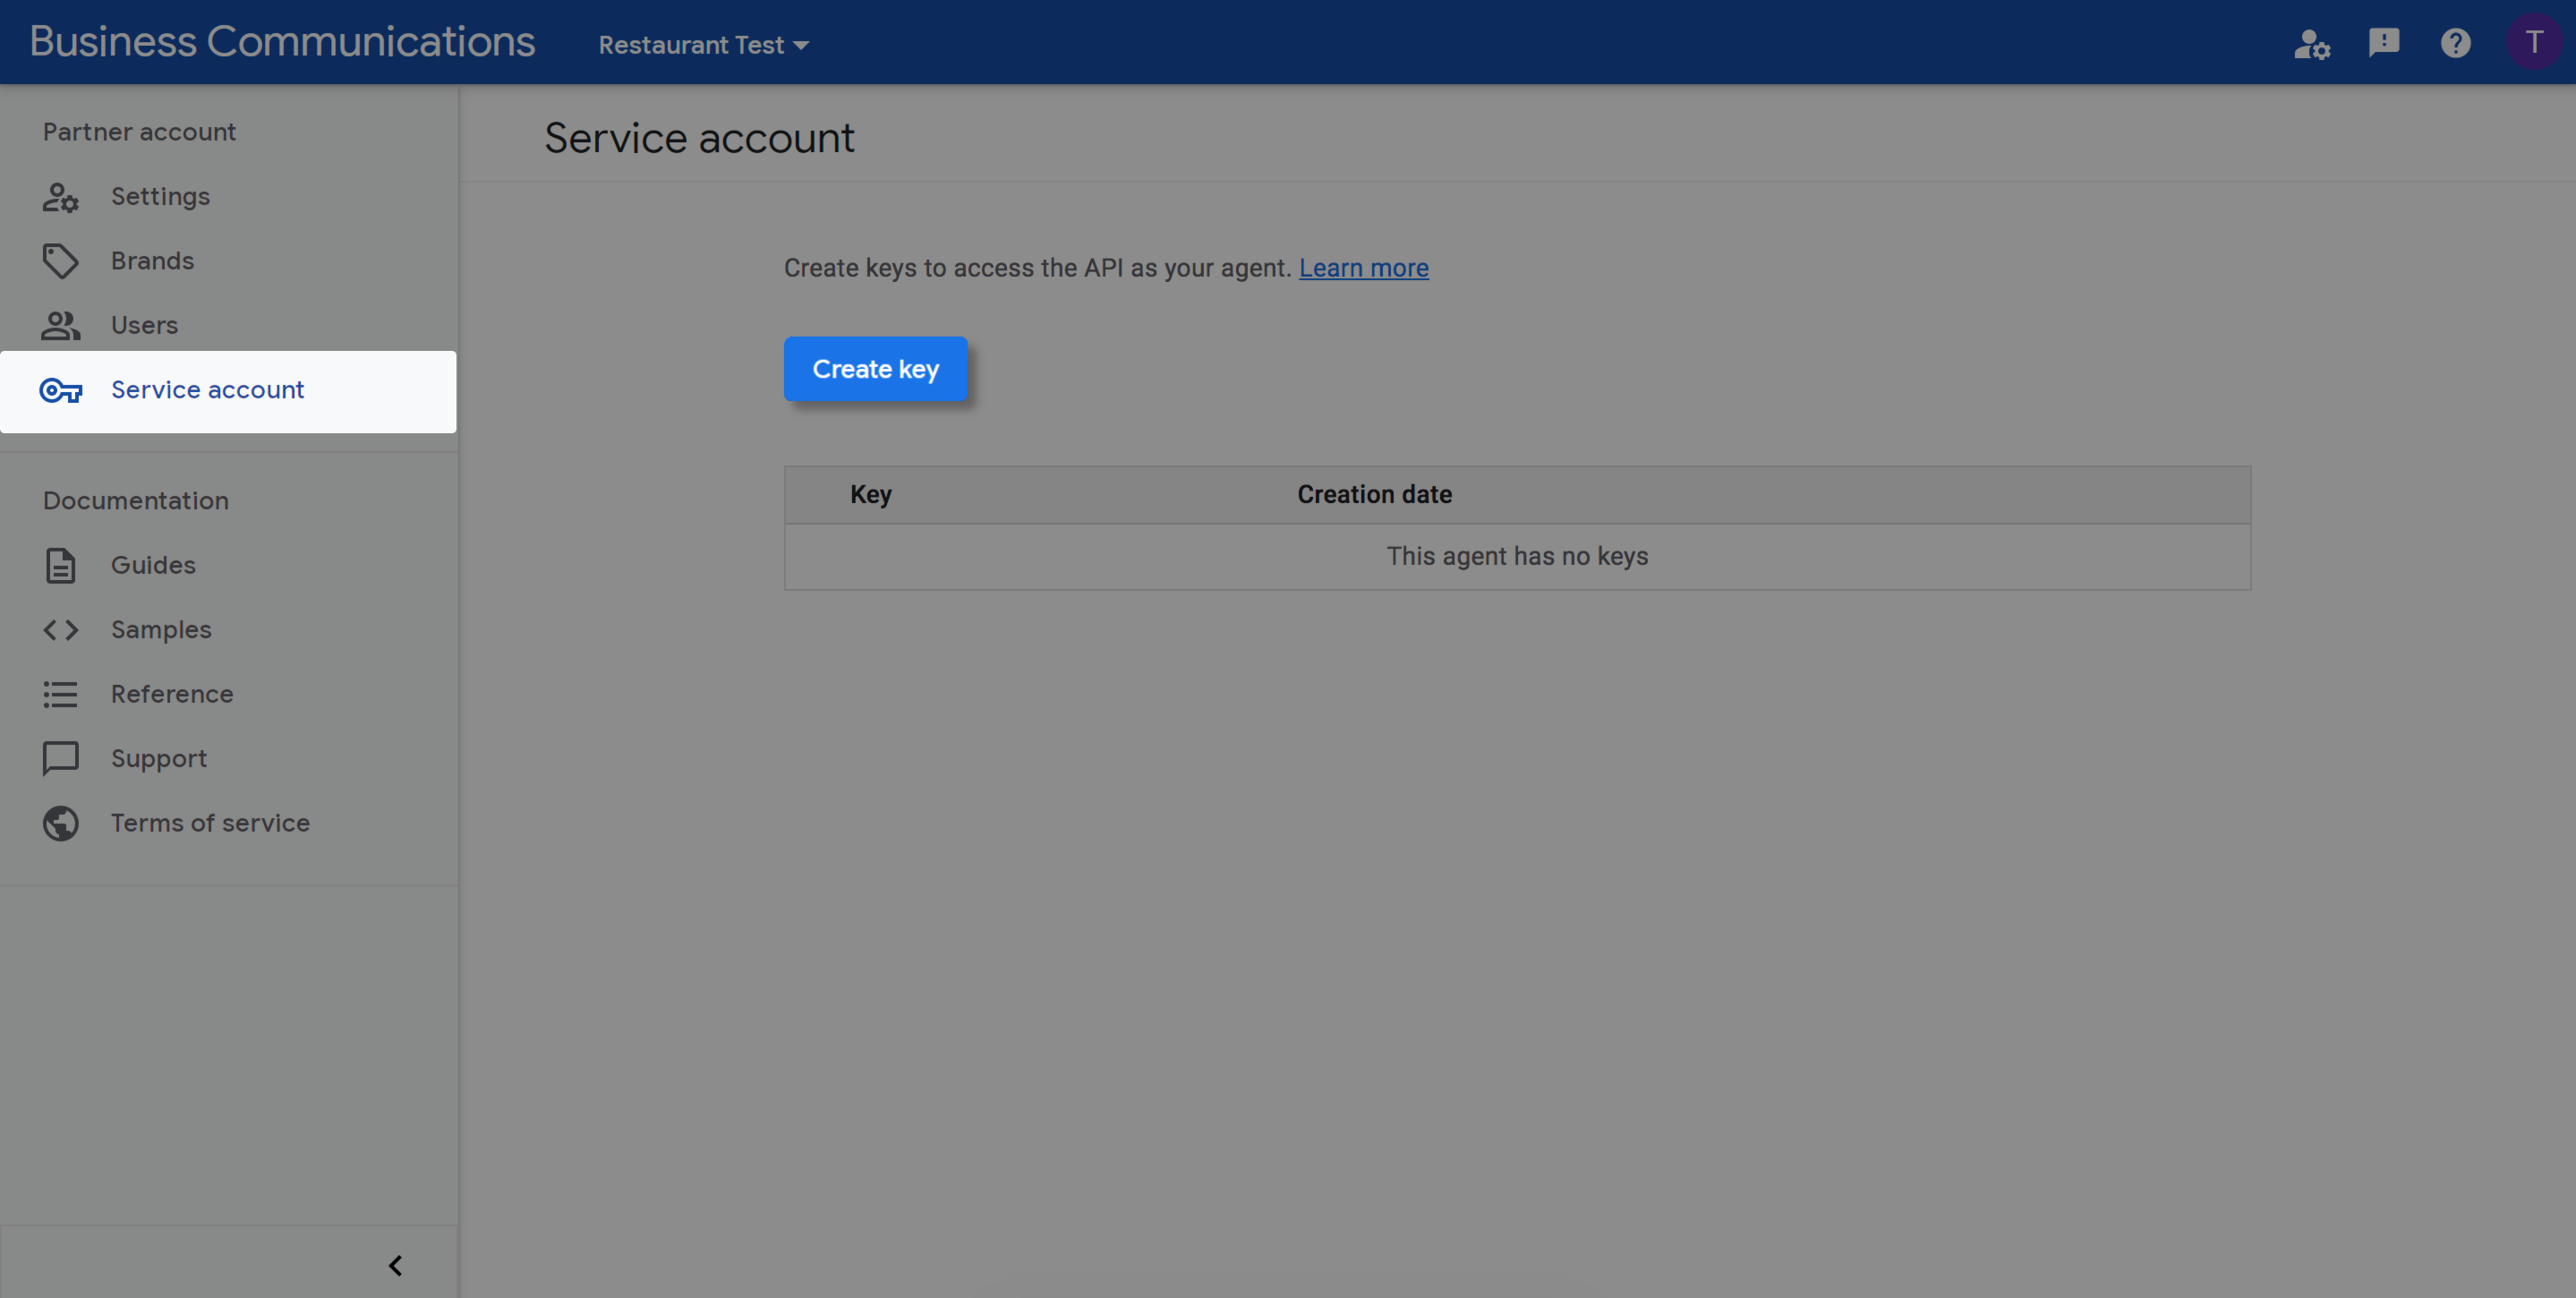
Create a service account
- On the Console home page, click Partner account settings.
- In the left navigation, click Service account.
- Click Create key, then click Create.
Your browser downloads the service account key. Store it in a secure location. You'll need this key later to deploy your chatbot.
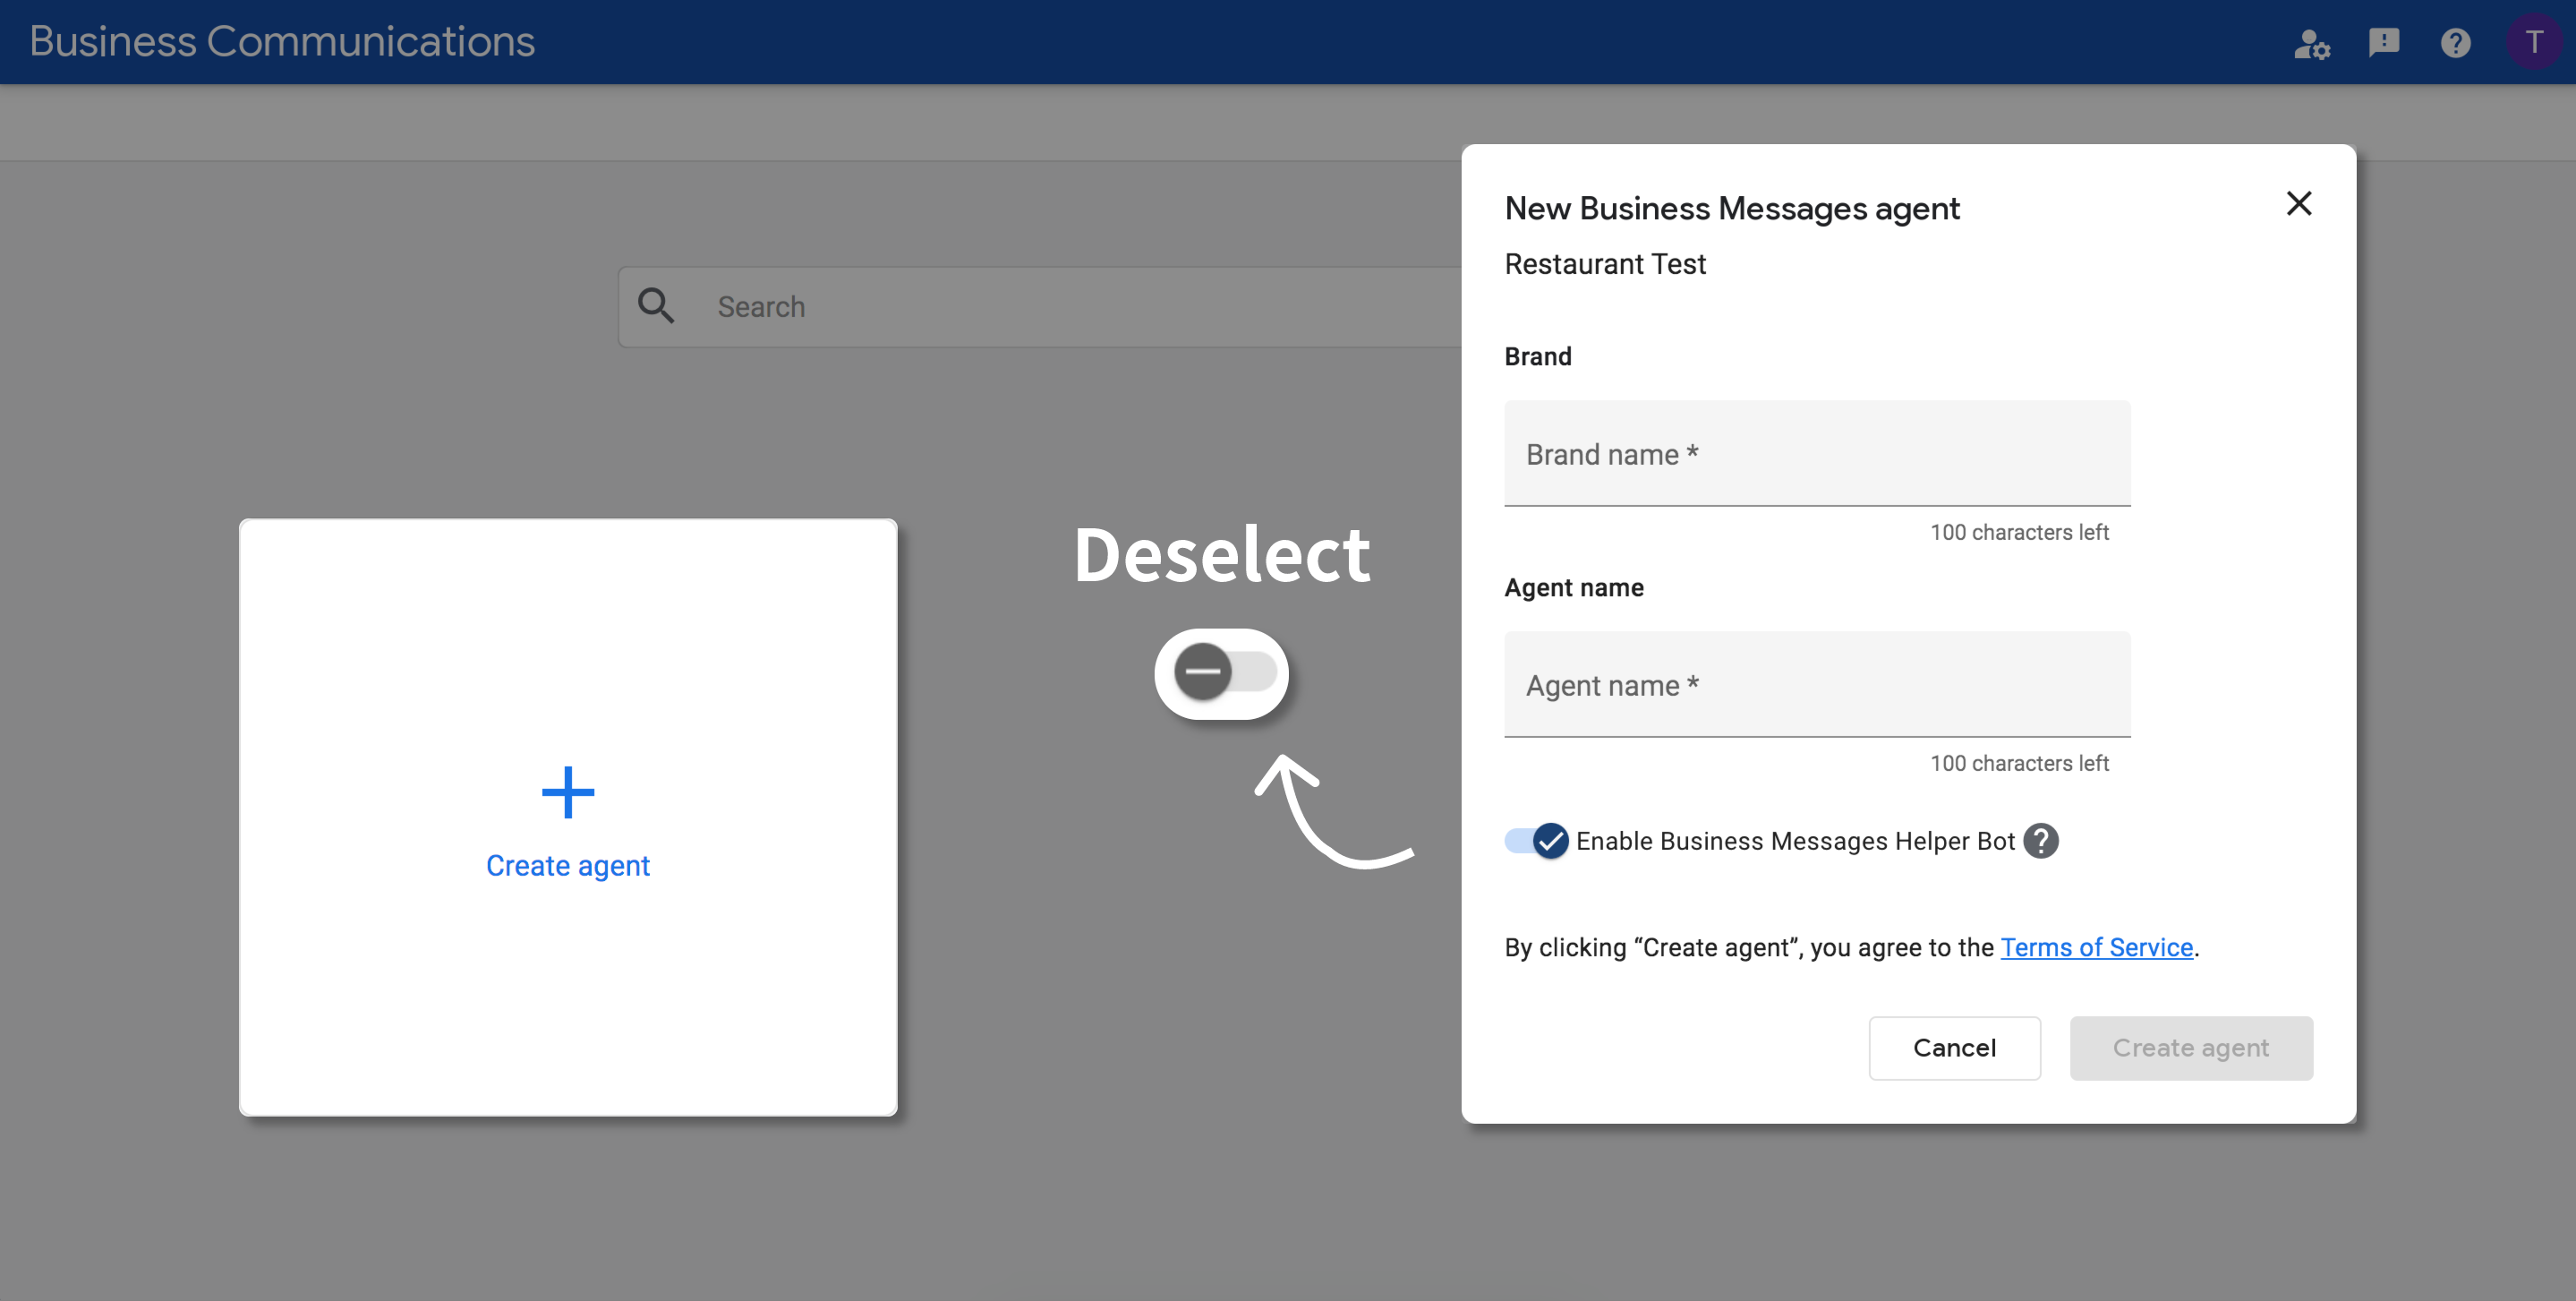
Create a brand and an agent
- Open the Console and sign in with your Business Messages Google account.
- Click Create agent.
- Enter values for Brand name and Agent name.
- Deselect Enable the Business Messages Helper Bot.
- Click Create agent.
Configure Google Business Message from OpenCUI
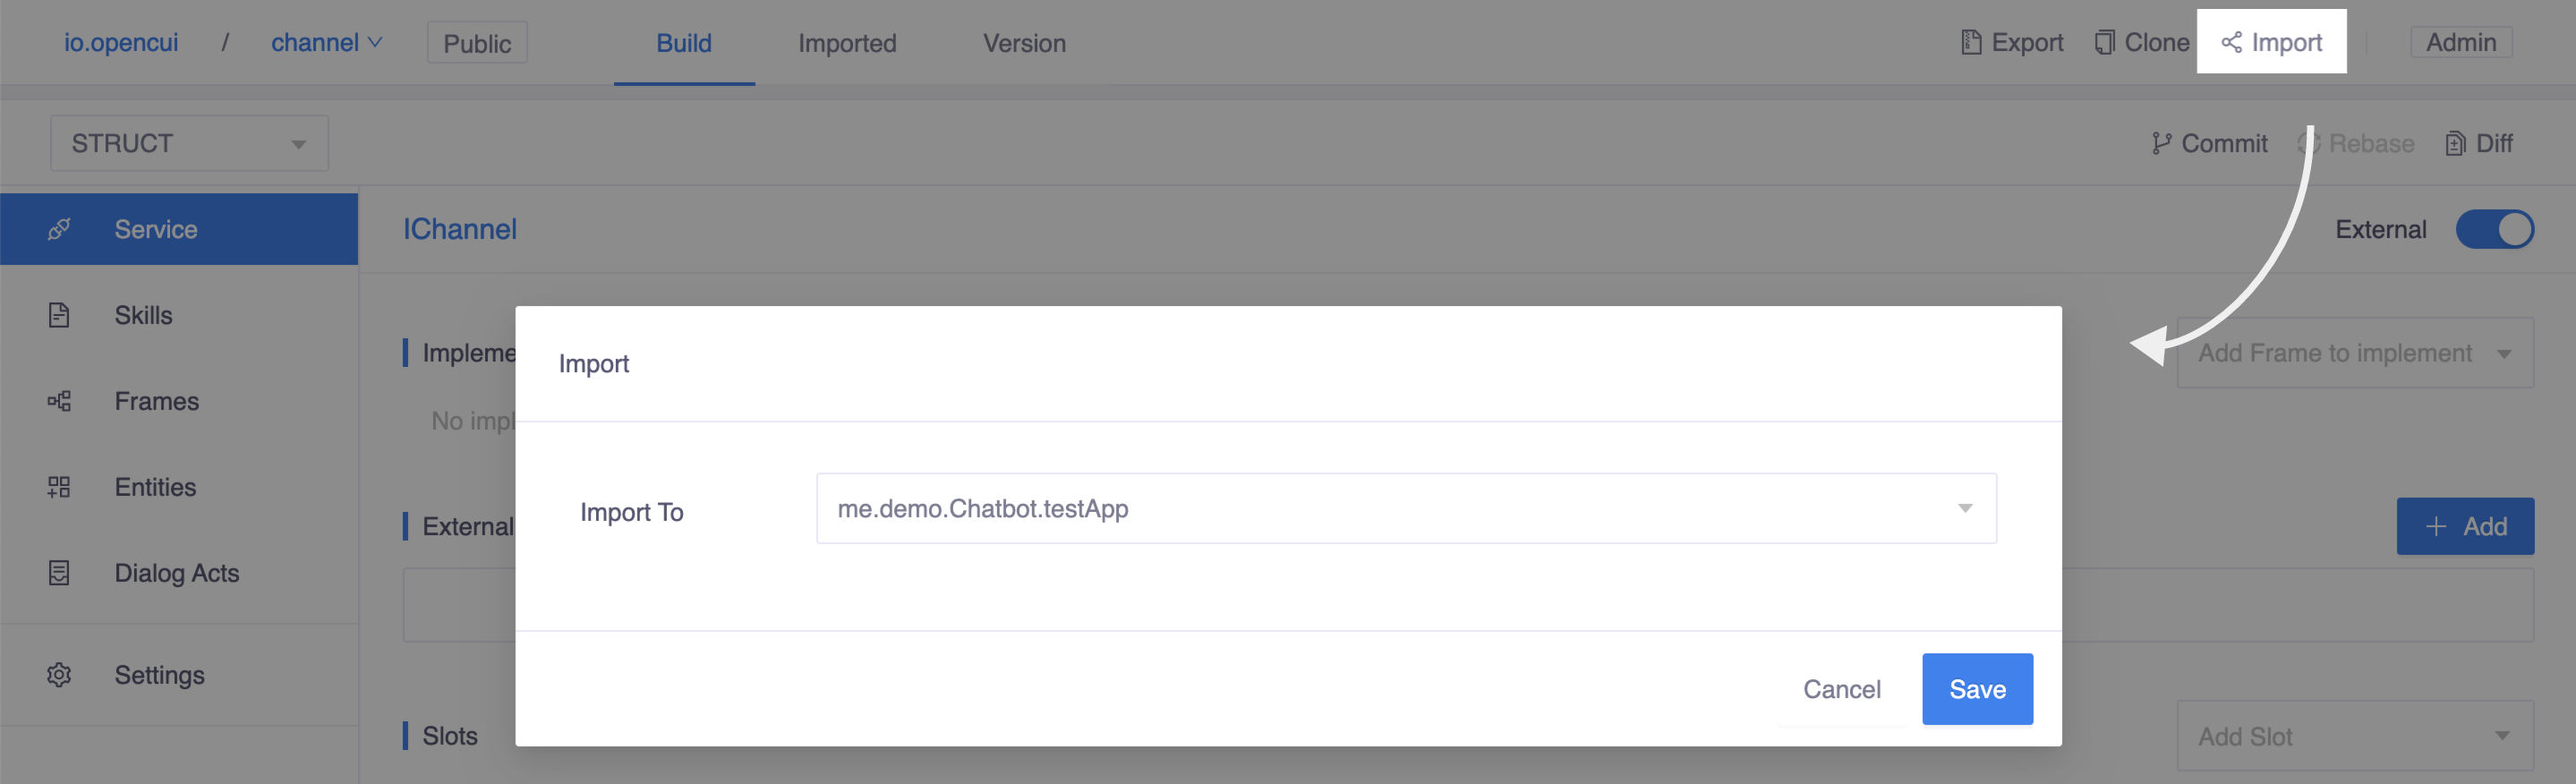
On OpenCUI platform, go to service component io.opencui.channel:
- Click Import button on the second topbar.
- Select the chatbot you want to configure Google Business Message channel and Save.
Once you have done, switch to your chatbot to wire Google Business Message channel:
- On STRUCT level, head to Settings page, in the Integrations tab, select the service you just import. In this case, please select io.opencui.channel.IChannel.
- A configuration dialog opens, at Service Provider field, select io.opencui.googleBusinessMessage to wiring Google Business Message channel.
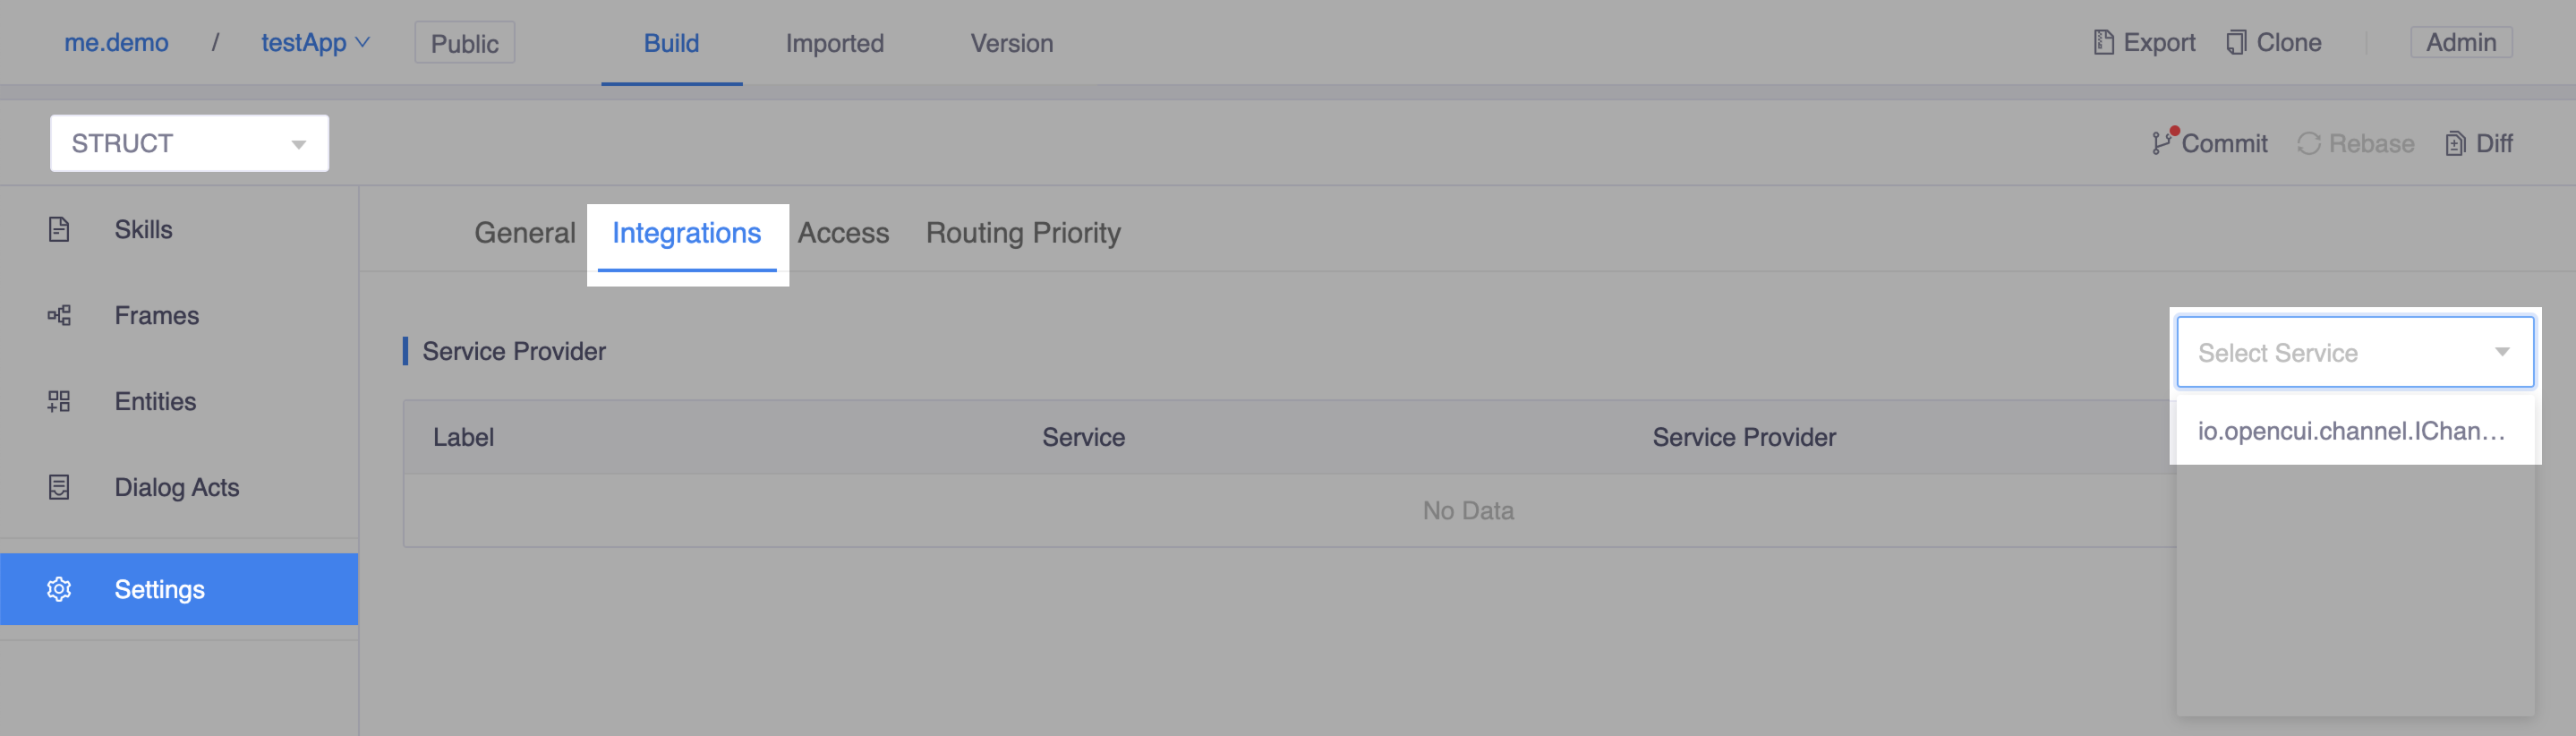 Select service io.opencui.channel.IChannel
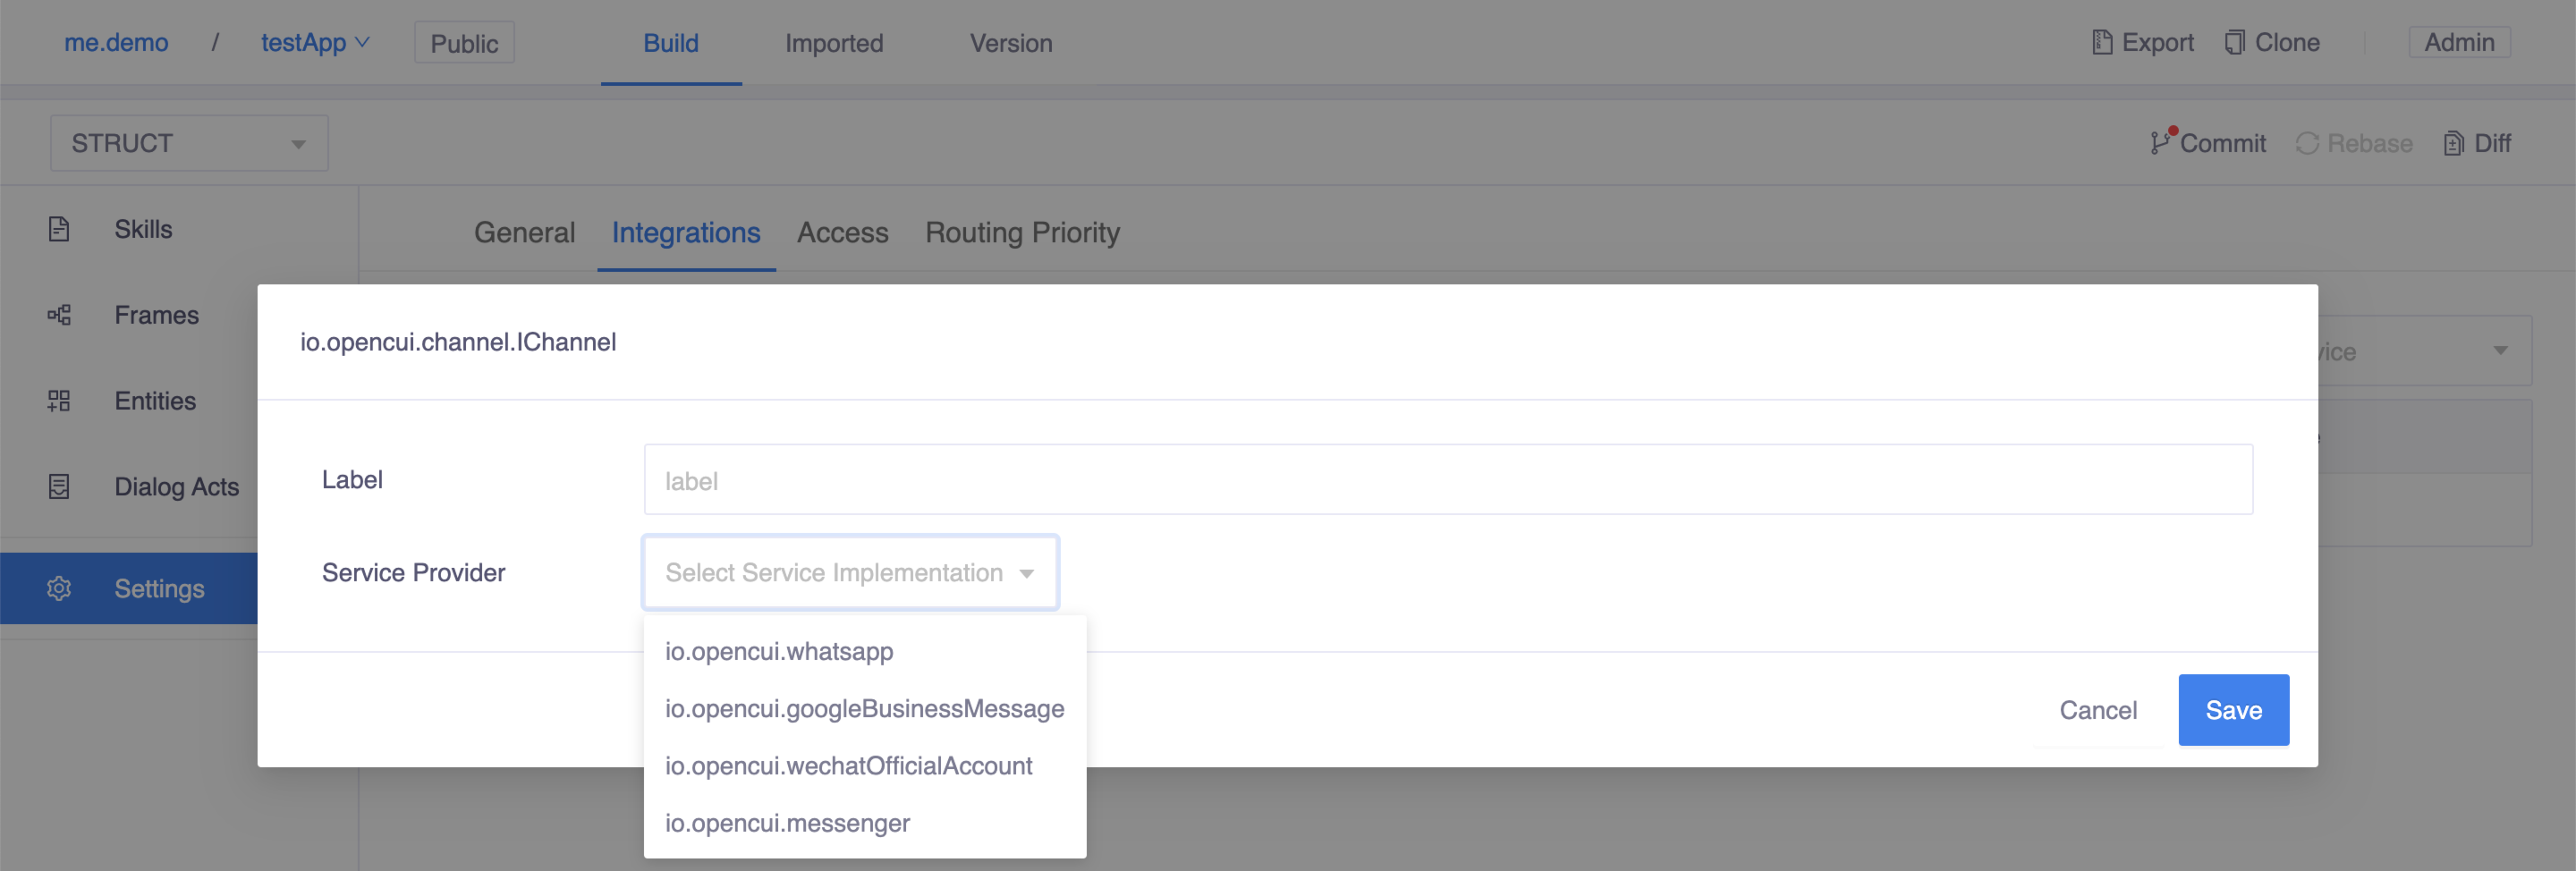 Wire Google Business Message channel
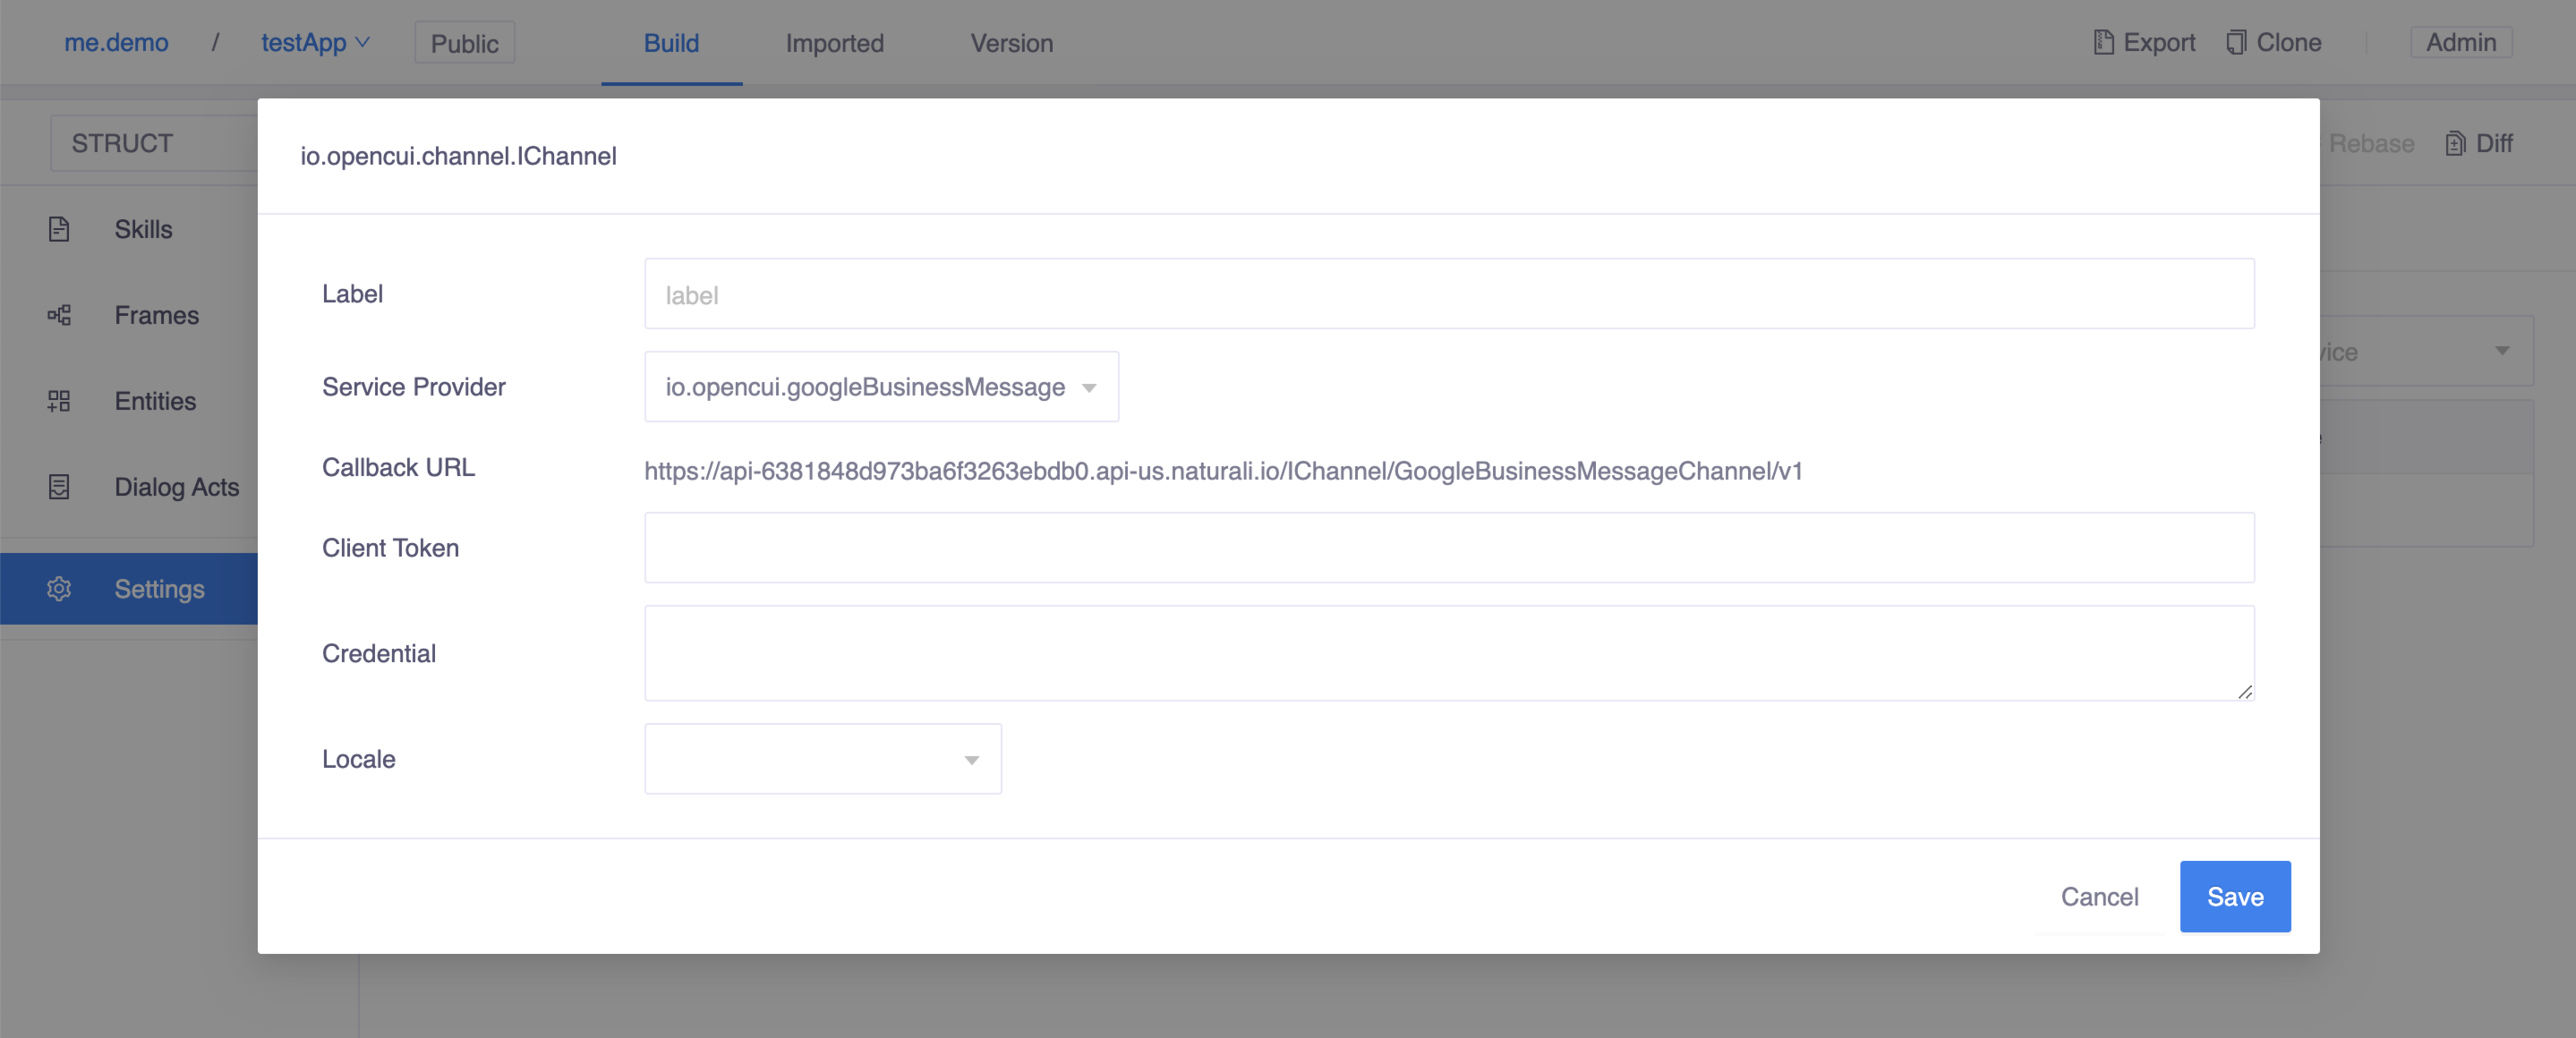
Continue inside the dialog, configure Google Business Message integration as following:
- Label: Enter channel label, should be unique.
- Client Token: Enter any private token you desire. 📋 Copy this value. This will be used to configure the Google Business Message Webhook.
- Credential: Copy and paste the service account key you downloaded from Business Communications Developer Console.
- Locale: Select locale which determines the default language used by your bot.
- Callback URL: 📋 Copy this value after setting the label and locale. This will be used to configure the Google Business Message Webhook.
Before you go to next step, don't forget to merge your changes into master and deploy your chatbot.
Finish Google Business Message setup
A webhook is a partner-created HTTPS callback that specifies how your agent should respond to messages and events. You can set your webhook either at the partner level or at the agent level. Partner-level webhooks apply to every agent you maintain, while agent-level webhooks each apply to one individual agent.
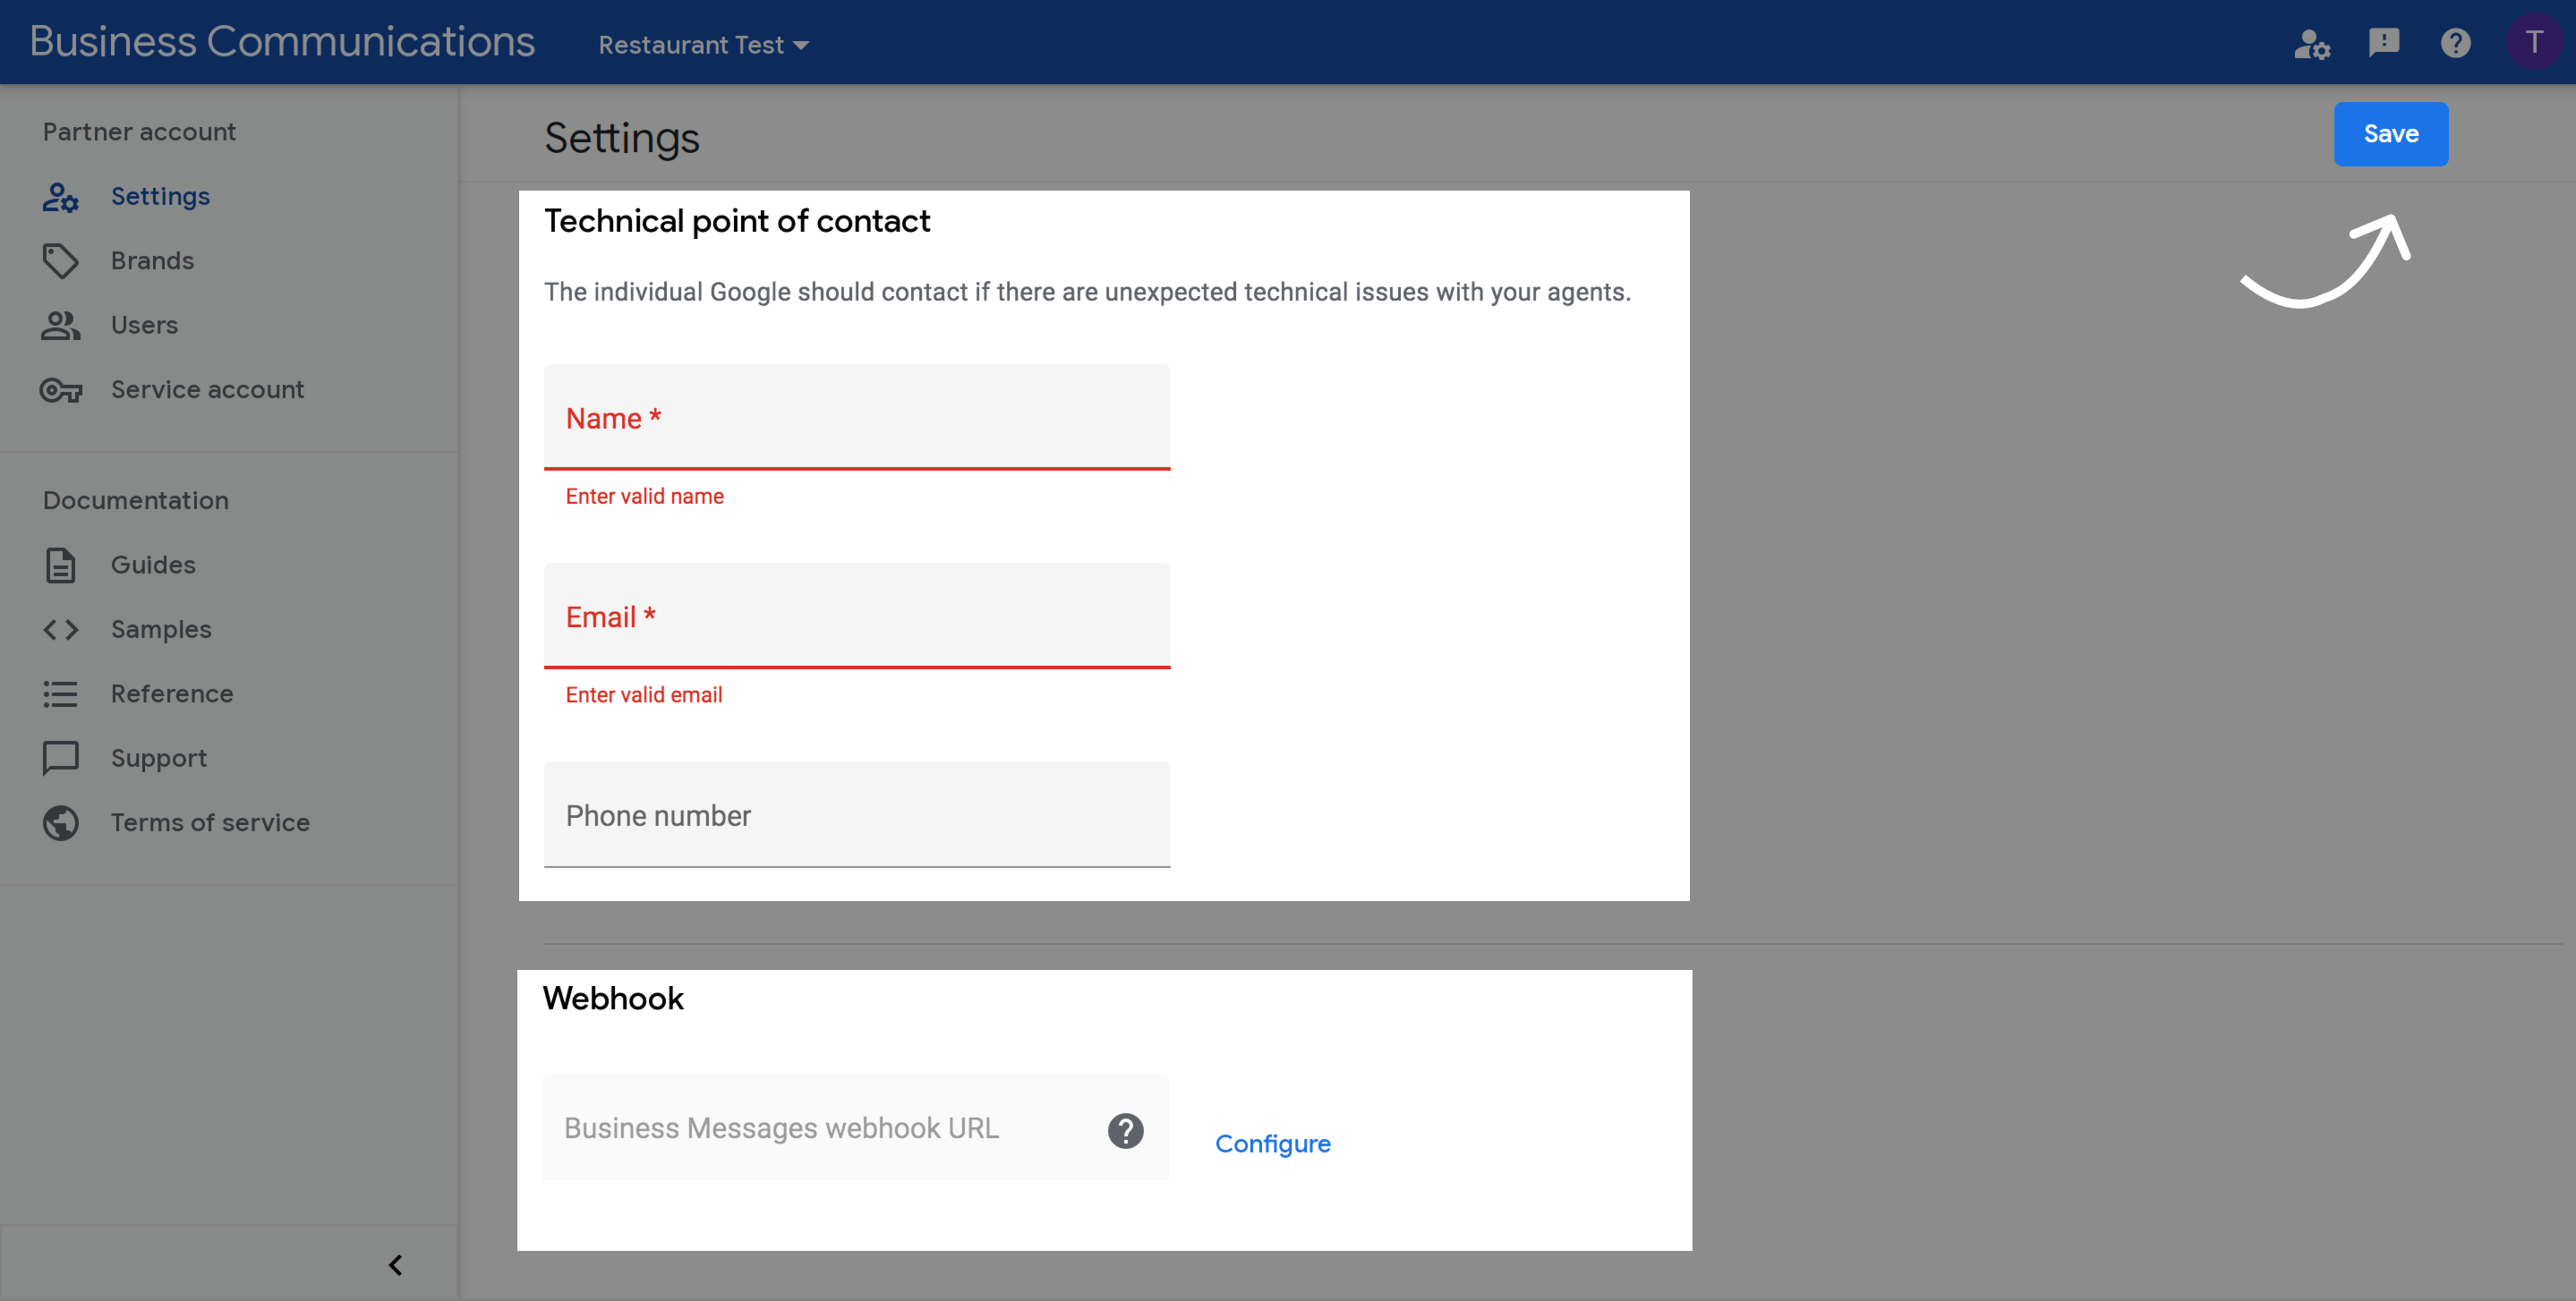
Set your partner-level webhook
- Open the Account settings in the Console.
- Make sure the correct partner account is selected.
- Set Technical point of contact.
- For Webhook, click Configure.
- For Webhook endpoint URL, paste the callback URL you copied when adding Google Business channel.
- For Client token, paste the client token you copied when adding Google Business channel.
- Click Verify and click Save in the top right corner.
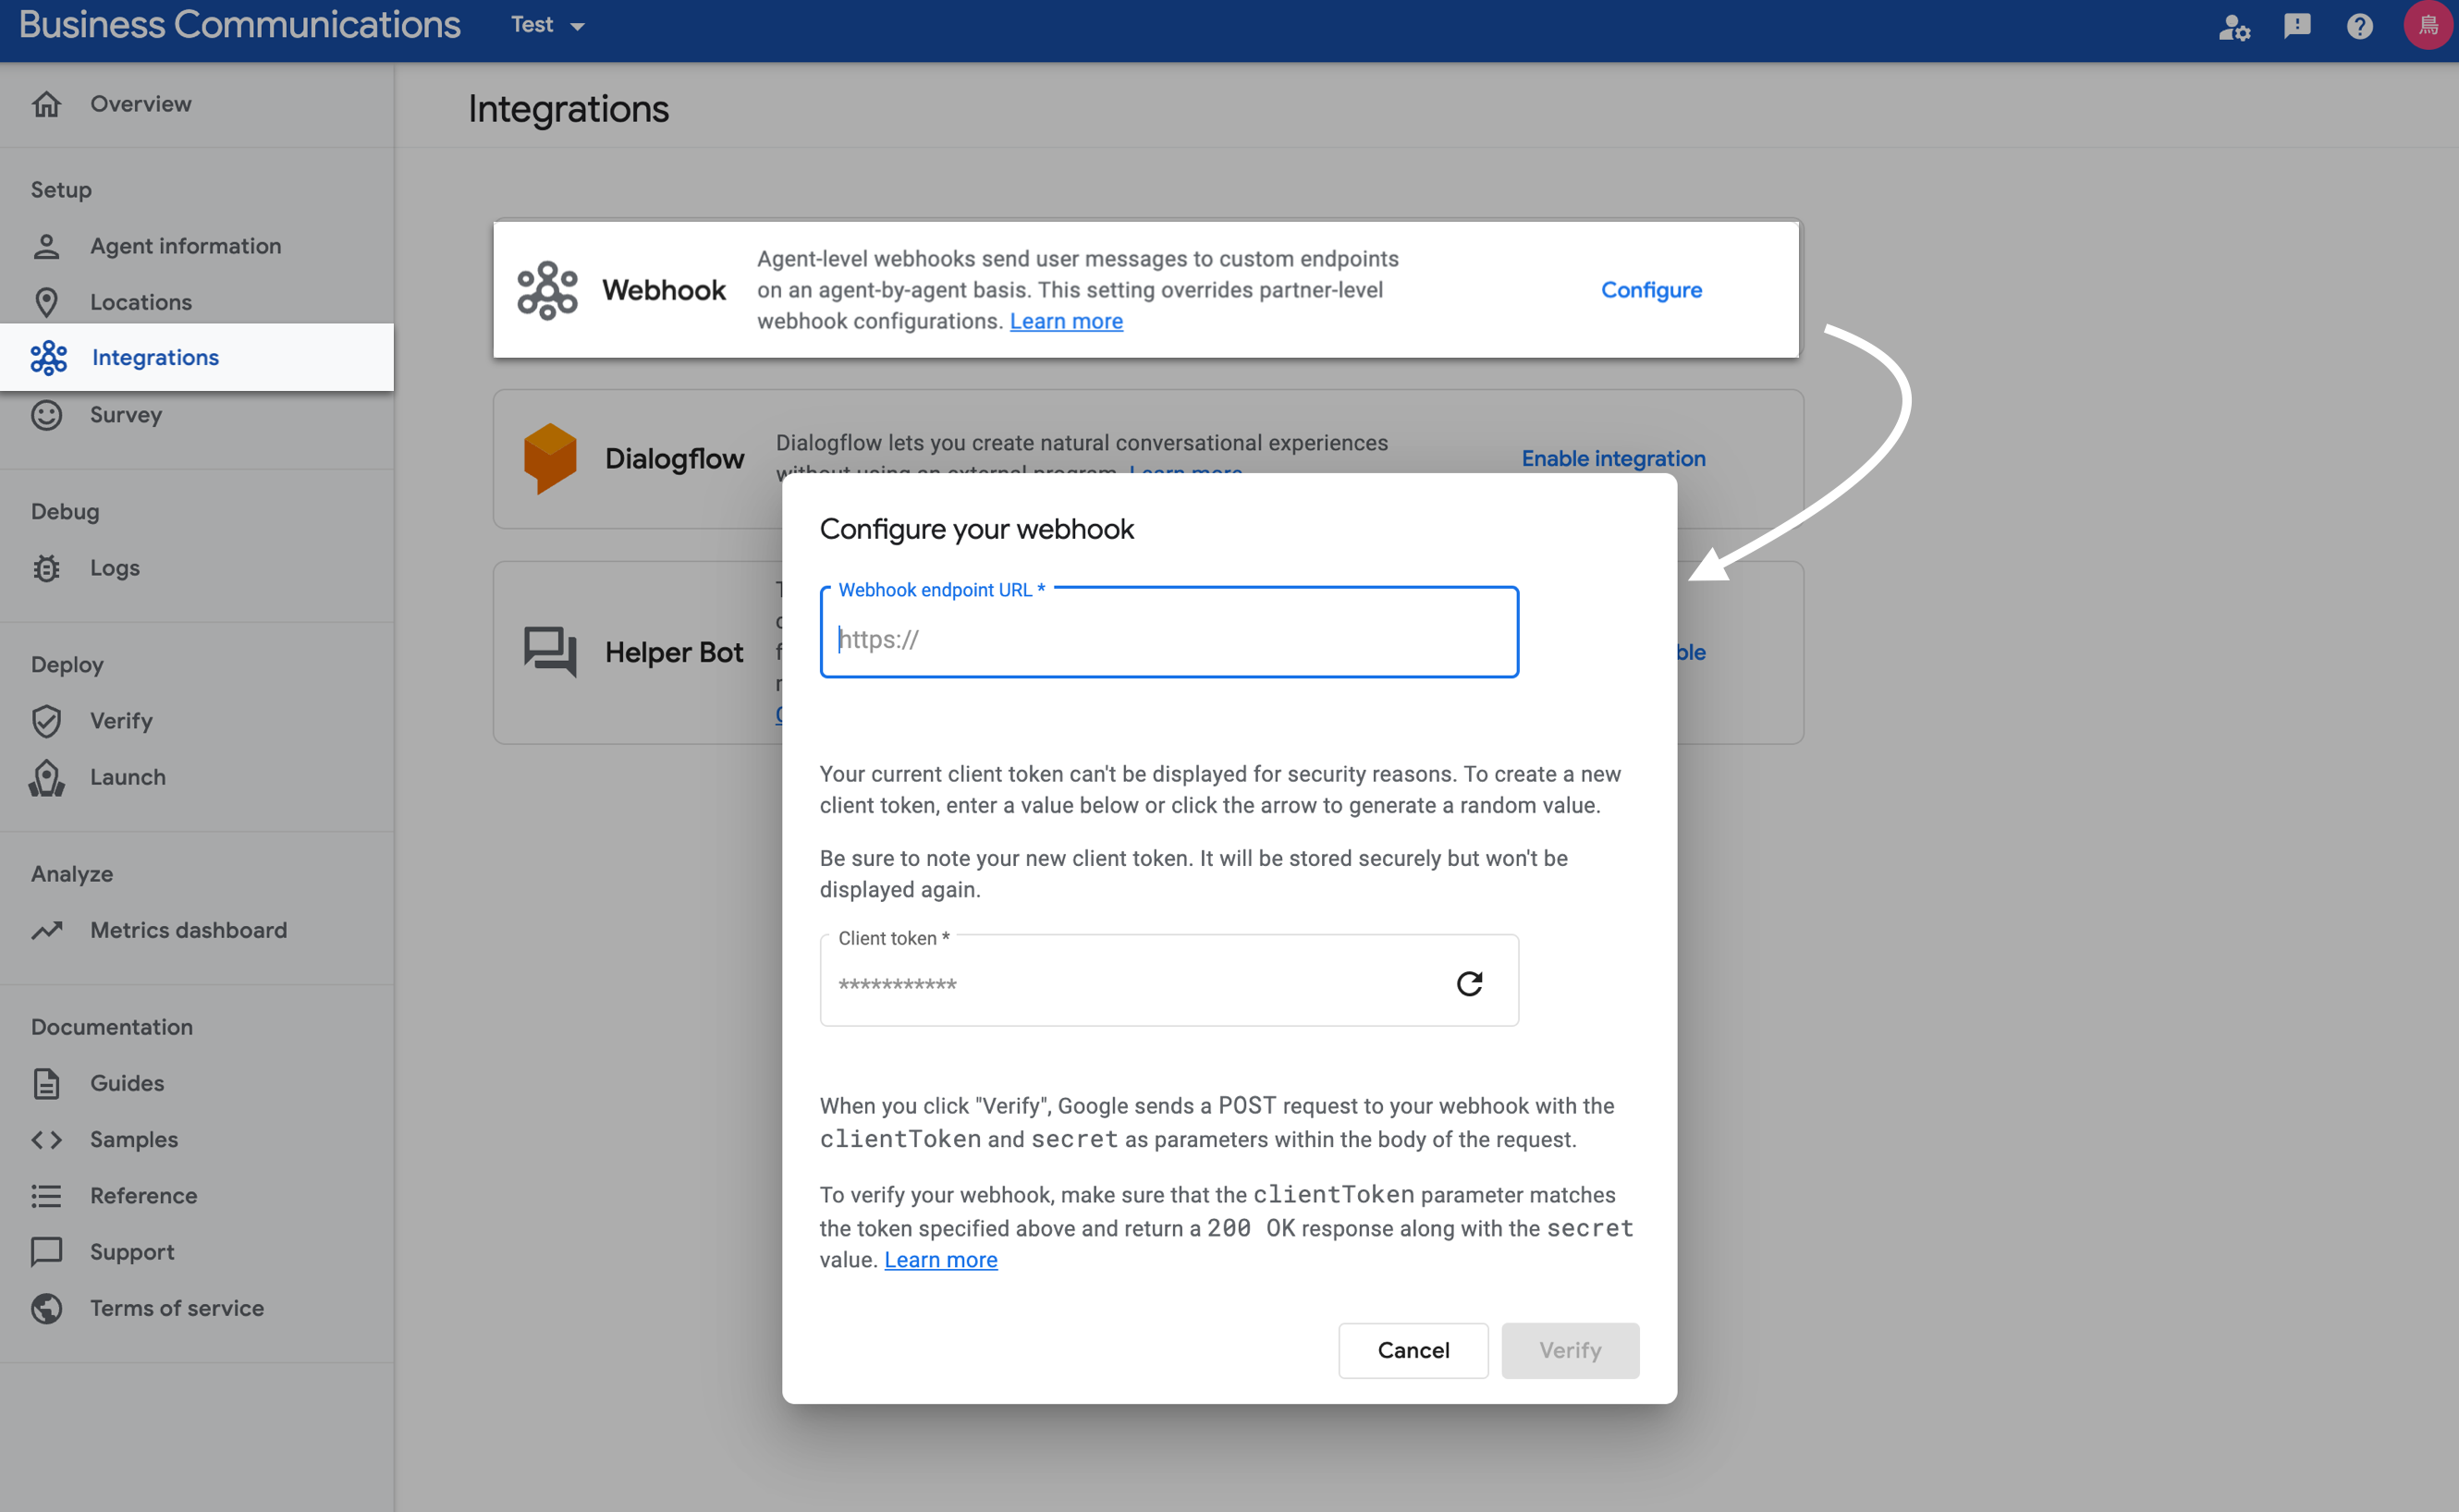
Set an agent-level webhook
- Click your agent.
- In the left navigation, click Integrations.
- For Webhook, click Configure.
- For Webhook endpoint URL, paste the callback URL you copied when adding Google Business channel.
- For Client token, paste the client token you copied when adding Google Business channel.
- Click Verify.
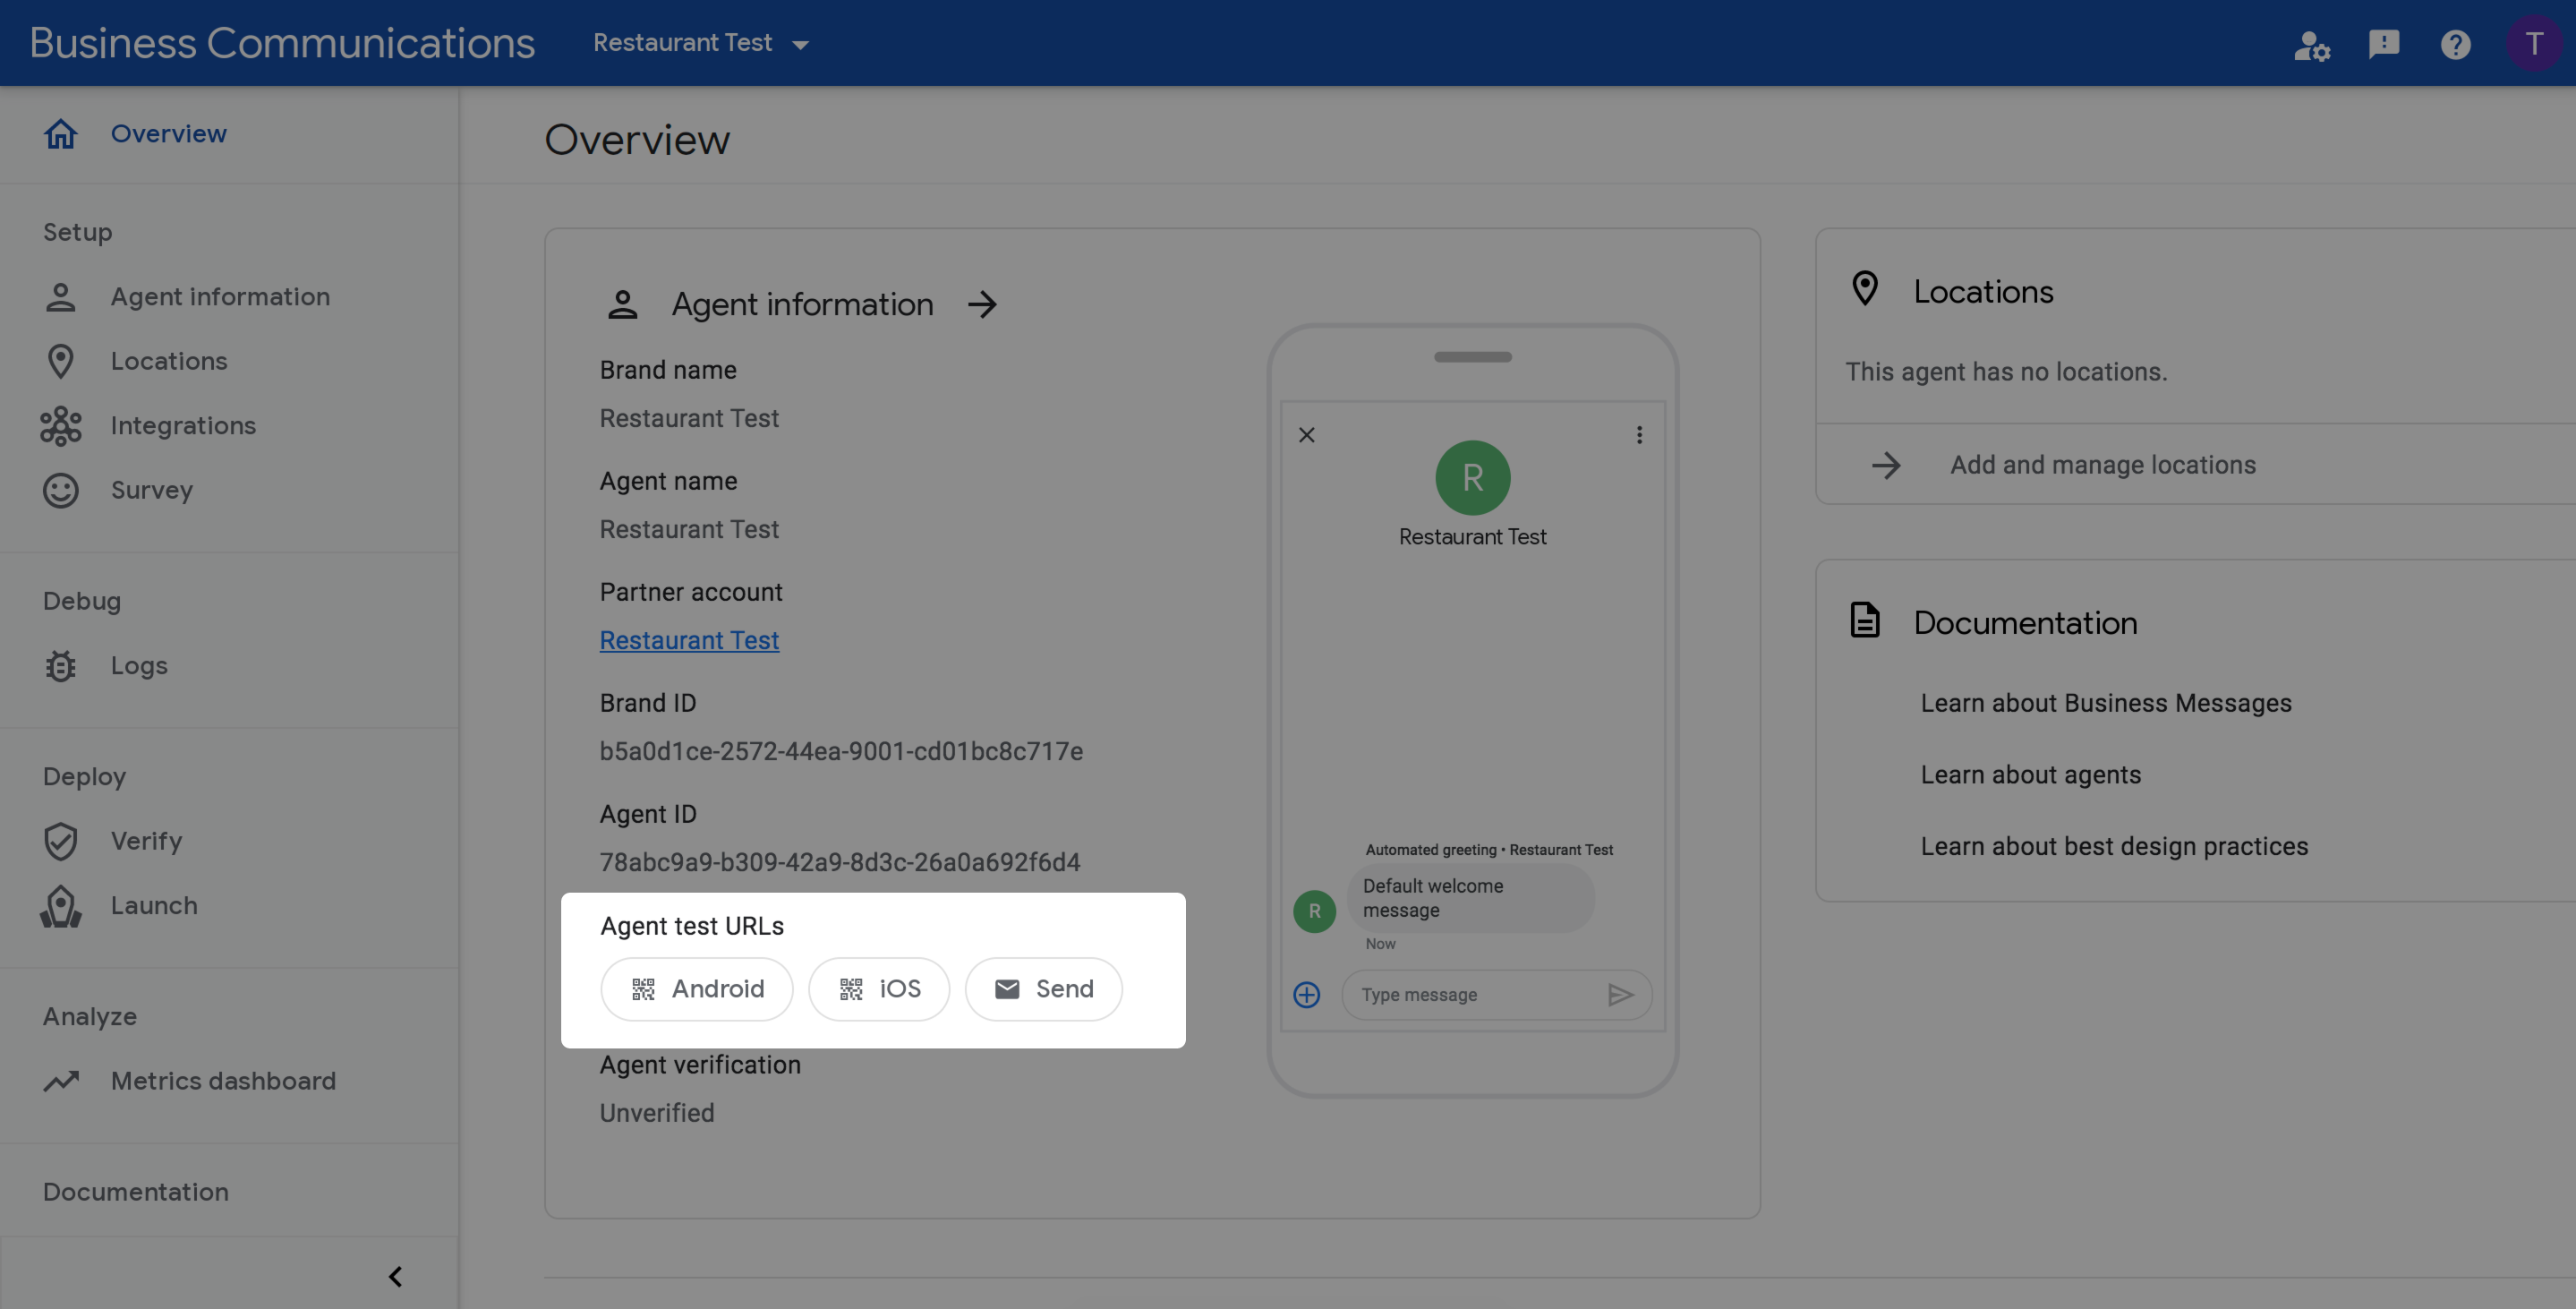
Test your chatbot
- Open the Business Communications Developer Console.
- Under Agent test URLs, click the Android button or iOS button.
- Scan the QR code with the corresponding mobile device, or click Copy Android URL or Copy iOS URL to copy the agent's test URL.
- You can also click Send to send the URLs to your email address.
- Open the URL in your mobile device. (iOS devices require the Google Maps app.)
- Now you can start a conversation with your chatbot. 🎉