Build an hours module
On OpenCUI, a module is reusable conversational functionality. While it is possible for a module to be self-contained, modules are commonly just frontends that conversationally expose a single service, with the actual implementation of the service developed and deployed separately. Using services to decouple the frontend and backend development has many benefits and is widely adopted for building user-facing applications.
The Service is a special singleton type in a module with service enabled. It allows you to declare a set of API functions that can be directly accessed by other types. With the service declared, you can define the conversational user interface to expose these functionalities in the same module. Such a module, when paired with a compatible provider, can add conversational functionality to any chatbot with little effort.
In the previous guide, we showed how your chatbot can handle various business hours queries using the "hours" module. In this guide, we will show you how to build such a module in two parts: first declare the service, then define the conversational user interface on top of that. Both essentially involve defining a set of types, with types needed by the service requiring no dialog annotations.
Before you start
- Log in to OpenCUI.
- Build a simple chatbot for how to build a skill with entity slots.
- Reuse a full-stack component to get familiar with the functionality you will build here.
Create module: hours
A module with service support allows you to focus on creating the conversational user interface, leaving the management of business information, like hours, as a separate concern.
To create a module with service support, follow these steps:
- Within an organization, go to the project list page, click Create and select Create module.
- In the pop-up window, complete the form for module basic settings and click Create:
- Project label: The unique identifier for the module. We suggest using a lowercase label. For example,
hours. - Languages: The languages your module supports, you can add multiple languages. In this case, select English(en).
- Enable service interface: Enable service interface to define a service interface in a module that can be used by the module to interact with the backend.
- Project label: The unique identifier for the module. We suggest using a lowercase label. For example,
Declare service
Declaring a service means that you declare the function type for each API in the service, which include function label, its input parameters and return. Clearly, you must first declare the data types for their input parameters and return values, which may need to be done recursively in case one of these data types is composite.
In this case, a hours service provides information about the business hours of a specific business, typically consists of the following:
- A data type
BusinessHoursto represent the business hours on a specific day. - A function
getHoursWeekto get the hours for the week. - A function
getHoursDayto return business hour for the specific date.
The getHoursWeek and getHoursDay functions can also be merged into one function. However, for the demo, we keep them separated to make the code more modular and easier to understand.
Here are the steps on how to declare the hours service in OpenCUI.
Build frame: BusinessHours
To return the business hours on a specific day, you'll need a data type contains the following information:
- dayOfWeek: The day of the week, like "Monday", "Tuesday", etc.
- ifOpen: Whether it's open on that day.
- openingTime: The time it opens.
- closingTime: The time it closes.
You will define a "BusinessHours" frame for this purpose since a OpenCUI frame is an user defined composite type.
Schema layer: declare a frame
At this layer, you will create a frame and add all of the necessary slots.
Create the frame
Inside the hours module and Types page, under the Structure view.
- Click Create button on the right side, and select Create frame to create a new frame.
- Enter
BusinessHoursas a label for the frame type and press enter.
Add slots
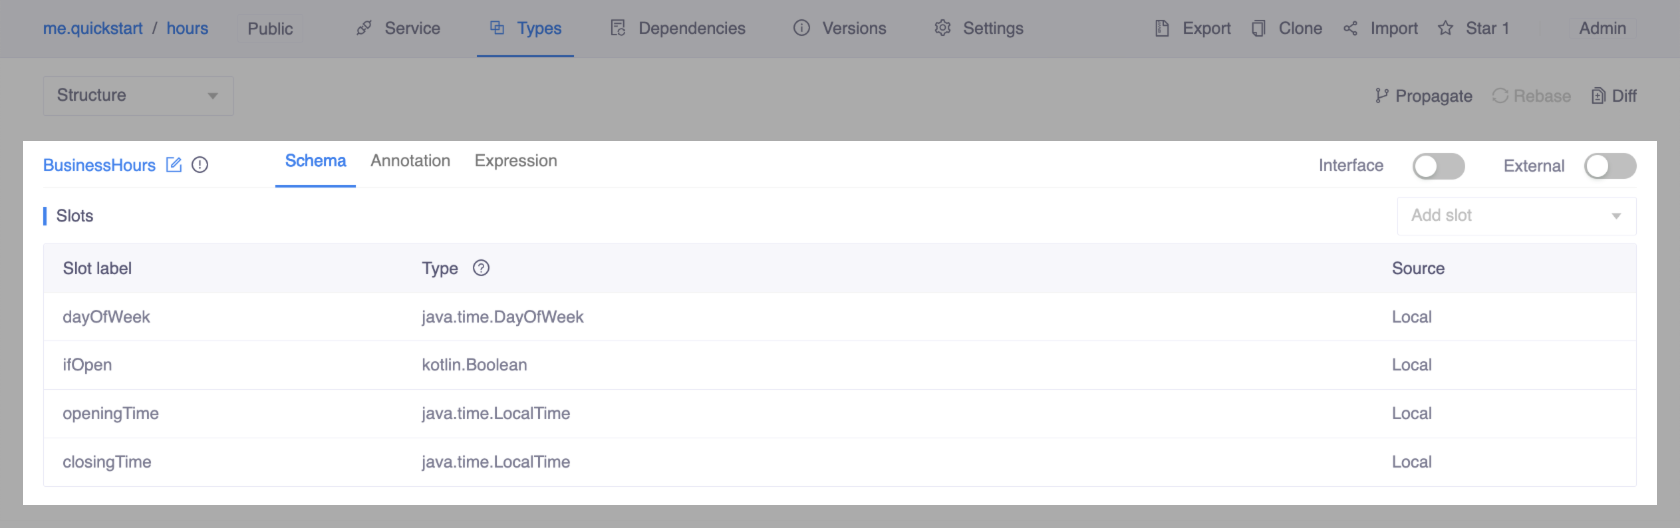
Inside the BusinessHours frame and Schema tab, under the Structure view.
- In the Slots section, select type Entity > java.time.DayOfWeek with the label
dayOfWeek. - Back to the
BusinessHoursschema page, repeat the first step to add the following slots:- Type kotlin.Boolean with the label
ifOpen. - Type java.time.LocalTime with the label
openingTime. - Type java.time.LocalTime with the label
closingTime.
- Type kotlin.Boolean with the label
Once finished, the frame should look like this:
Annotate type: BusinessHours
Since this type does not need to be exposed conversationally, there is no need to add dialog annotation.
Declare function: getHoursWeek
The function getHoursWeek gets the hours for the week. It returns a list of BusinessHours, where each represents the business hours for a specific day. To declare this function interface:
Inside the hours module and Service page, under the Structure view.
- In the Functions section, click Add.
- Enter
getHoursWeekas the Function label. - In the Return type section, select Frame > BusinessHours as Type. Turn on Multi-valued and turn off Nullable, then save.
Declare function: getHoursDay
The function getHoursDay returns business hour based on the specific date provided by customers. It takes a date as input and returns one BusinessHours, where the frame represents the business hours for the specified day. To declare this function interface:
Inside the hours module and Service page, under the Structure view.
- In the Functions section, click Add.
- Enter
getHoursDayas the Function label. - In the Parameters section, click + to add an input parameter.
- Enter
dateas a Name. - Select Entity > java.time.LocalDate as Type.
- Enter
- In the Return type section, select Frame > BusinessHours as Type and turn off Nullable, then save.
Once finished, the function interfaces should look like this:

Build CUI for the service
To provide functionality through a conversational user interface (CUI), you need to define a skill. A skill is essentially a function type with dialog annotations, allowing the chatbot to create a callable object for triggering the service through conversation. The input parameters of the function are captured by the skill's slots, and the function's return can be displayed using its response.
As always, when building a type, you should first define its dependent types, but all the types required by the skill are already defined, so you are good.
Build skill: ShowHours
Although there are two API functions that need to be exposed, only one skill is necessary. To determine which API functions should be grouped together, consider their simplest description without mentioning parameters or return values. If two API functions share the same description, they must be triggered by the same skill.
Schema layer: declare a skill
To create a skill for managing users' questions on business hours, you need to create the type, add the necessary slots and services.
Create the skill
Inside the hours module and Types page, under the Structure view.
- Click Create button on the right side, and select Create skill to create a new skill.
- Enter
ShowHoursas a label for the skill type and press enter.
Add slots
To prompt a user for a specific day, use the DatePicker frame. This frame simplifies the process of entering a date and is an official CUI component declared in the components module.
Before proceeding, ensure that the components module exists under the Dependencies tab. If it doesn't, import components module to the hours module first. After successful import, go back to hours module and refresh your webpage.
Inside the ShowHours skill and Schema tab, under the Structure view.
In the Slots section, add a slot of type io.opencui.components.dataEntry.DatePicker with the label
datePicker.To access functions, in the Services section, select IHours with the label
hoursand Save.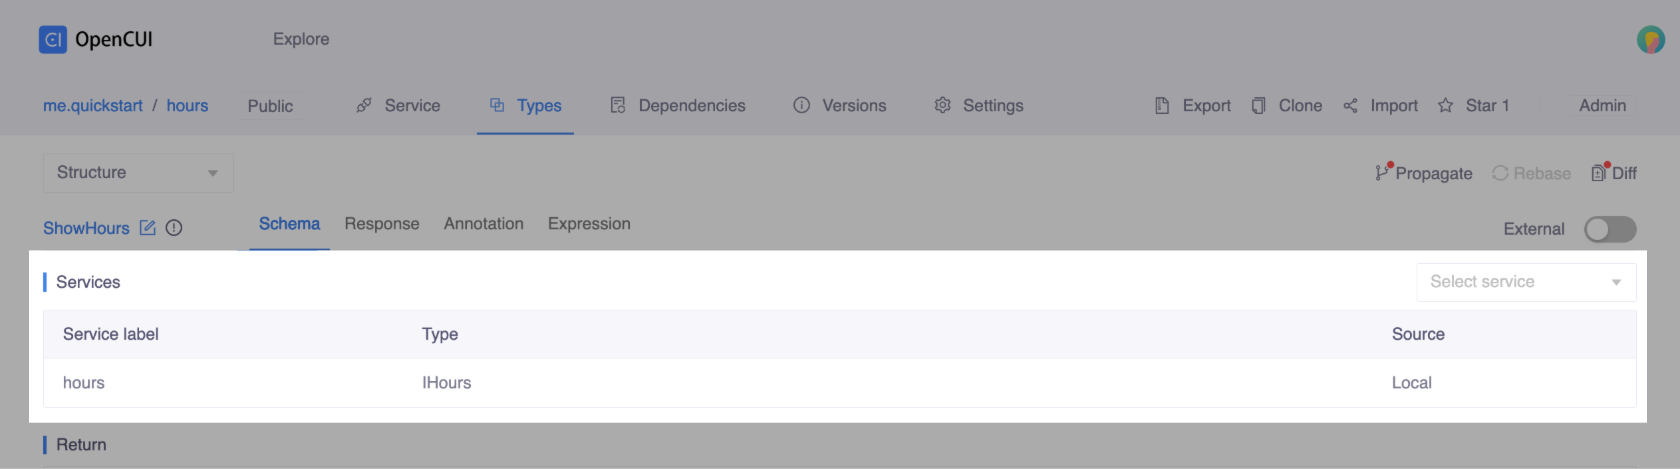
Annotate type: ShowHours
Based on analysis of the desired conversational behavior and business logic, pick the right annotation to add for desired conversation experience.
Add slot level annotation to datePicker
When a user triggers a skill, the chatbot follows the interaction logic based on the annotations attached to the skill. For this particular skill, the desired conversational experience is as follows:
- If the user doesn't mention a specific date, the chatbot should display the business hours for the week.
- If the user provides a date, and the business is open on that day, the chatbot should show the business hours. If the business is closed, the chatbot should inform the user that it's closed.
To make the chatbot respond directly when the user does not mention a date, you need to set Fill strategy to Recover only for the slot.
Interaction layer
Inside the ShowHours/datePicker slot and Annotation tab, under the Structure view.
- In the Fill strategy section, select Recover only.
Remember to propagate the change you made under the Structure view
- Both schema layer and interaction layer are defined under Structure view, but language layer is under corresponding language view, for example, for English, it should be under "Language/en".
- Before beginning work on the language layer, always propagate the changes made so far to the language layer, and then switch over to the corresponding language view.
Language layer
Inside the ShowHours/datePicker slot and Expression tab, under the Language/en view.
- In Names section, enter the names, such as
date.
Add type level annotation
For the ShowHours skill, only two type level annotations: names, utterance exemplars, are required.
Language layer
Inside the ShowHours skill and the Expressions tab, under the Language/en view.
- Add names. In the Names section, enter
show business hoursand press enter. - Add expressions. In the Expressions section, enter the following content:
- When do you open?
- Do you open $datePicker$?
Attention
Do NOT copy and paste the value wrapped by $. Please type the value instead.
Configure response
On OpenCUI, response comes with a default catch-all branch that has no triggering condition. You can also turn on the additional branch if you need to handle complex use cases. When branch is enabled, you can add one or more branches, each with a triggering condition and the corresponding action.
OpenCUI supports two types of actions: messages and system actions. System actions are related to dialog management, such as closing the current session. Messages are used to render some structured data into natural language.
If the data you want to render is a single item, you should use a single value message. A single value message only needs a template to demonstrate how that data item should be rendered into natural language.
If the data you want to render is a list of items, you need to use a multiple value message. Such message requires you configure a source and a template structure. The source should be a Kotlin code expression that evaluates to a list of items of some data type. The template structure consists of a header, a body, and a footer, each used for a different purpose:
- The header helps users quickly understand the purpose and context of the list.
- The body contains the rendering of one item in the list. You can use "it" to reference the item itself.
- The footer provides additional context or actions related to the list.
When there are multiple branches, the ordering of these branches matters, OpenCUI runtime will go from top to bottom, and find the first branch with its triggering condition evaluated to true and execute its action. If no additional branch is triggered, OpenCUI will execute the actions in the default branch.
The responses for this skill depend on a number of the things: whether datePicker slot is filled and whether the business is open on that day. In particular, there should be three branches:
- If the specific date provided by the customer is closed, inform customers it closed and show the business hours for the week.
- If the specific date provided by the customer is open, show the business hours for the specific date.
- No specific date is provided, show the business hours for the week.
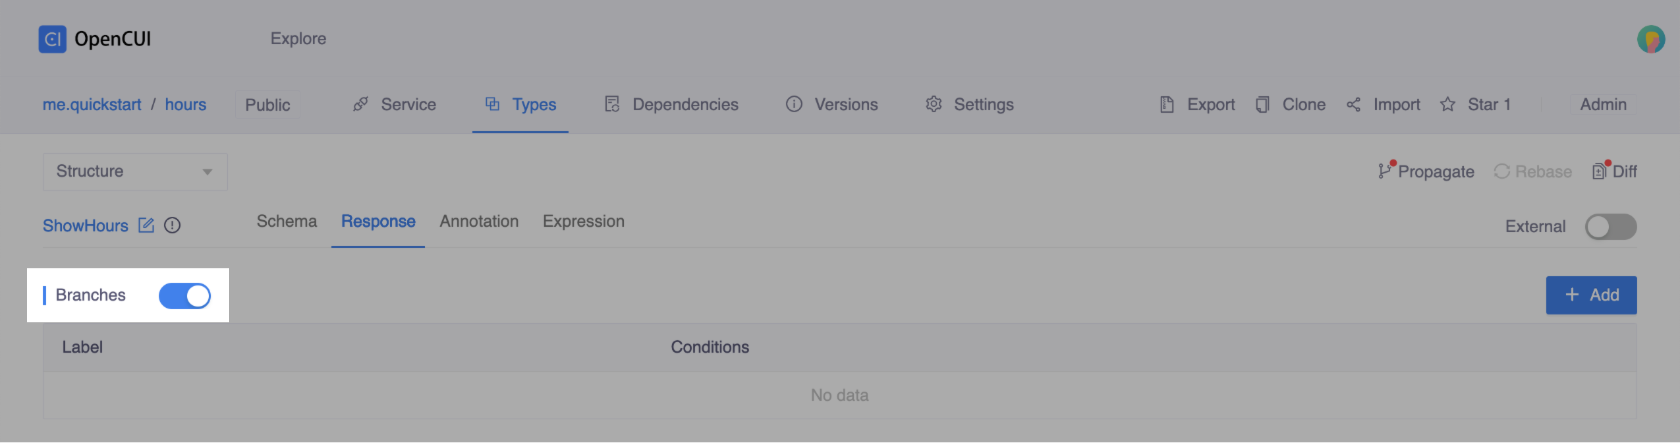
Clearly, you need to enable Branches:
Inside the ShowHours skill and the Response tab, under the Structure view.
Turn on Branches.
Now you can define each branch one at a time, first in interaction layer, then in language layer, once for each language you want to support. However, this guide assumes that only English is supported.
TIP
Remember to propagate the change in the structure view before you switch to language view, to make sure the annotation you can fill language part is made available.
Define branch: OpenDay
To show the business hours on a user-mentioned date if it's open on that day.
Interaction layer
Inside the ShowHours skill and the Response tab, under the Structure view.
In the Branches section, click Add:
- Set branch label, such as
OpenDay. - Set Conditions:kotlin
// If the date you are open datePicker?.date != null && hours.getHoursDay(datePicker!!.date!!).ifOpen == true - Add Action sequence. In this branch, select Single value message.
Language layer
Inside the OpenDay branch, under the Language/en view.
- Configure Single value message:kotlin
We are open on ${datePicker!!.date!!.expression()} from ${hours.getHoursDay(datePicker!!.date!!).openingTime!!.expression()} to ${hours.getHoursDay(datePicker!!.date!!).closingTime!!.expression()}.
Define branch: ClosedDay
If you are closed on the date that users are interested in, you will first inform them that you are closed, and then list regular weekly hours.
To add this branch, repeat the steps in the previous branch, but only the key points are listed here.
- Set branch label, such as
ClosedDay. - Set Conditions:kotlin
// If the date you are closed datePicker?.date != null && hours.getHoursDay(datePicker!!.date!!).ifOpen == false - Add Action sequence:
- Single value message, this will inform users that your business is closed.kotlin
Sorry, we don't open on ${datePicker!!.date!!.expression()}. - Multiple value message, this will display a list of your regular weekly hours, so the user can get additional information to make a choice.kotlin
//Source: hours.getHoursWeek() //Header: Our business hours in a week are //Body: ${it.value.dayOfWeek!!.expression()} ${if (it.value.ifOpen == true) it.value.openingTime!!.expression() + " – " + it.value.closingTime!!.expression() else "Closed"}
- Single value message, this will inform users that your business is closed.
Default branch
If the user does not specify a date, simply respond with the business's regular weekly hours.
In the default branch, you only need to add the actions. Repeat the steps in the previous branch, but only the key points are listed here.
- In Default branch, add Multiple value message, this will display a list of your regular weekly hours.kotlin
//Source: hours.getHoursWeek() //Header: Our business hours in a week are //Body: ${it.value.dayOfWeek!!.expression()} ${if (it.value.ifOpen == true) it.value.openingTime!!.expression() + " – " + it.value.closingTime!!.expression() else "Closed"}
Once you have finished building a module, you can create a pull request, merge it into the master. You can then go back to the chatbot you used in the previous guide, replace the module you imported with this one, and experiment with it.