Extension
OpenCUI is built on an open architecture, making it easy to make functionality available to chatbots. The core of this architecture is the separation between interface and implementation, allowing conversational behavior to be defined on the interface while implementation can take various forms.
On OpenCUI, we abstract the interface for every built-in functionality that might have more than one implementation, such as channels and supports, and we encourage you to do the same thing for application-level functionalities, such as payment processing.
There are two kinds of extensions:
- External extensions are those that the OpenCUI platform does not have access to the source code for and can only be used by you with a privately deployed chatbot.
- Internal extensions are those that the OpenCUI platform does have access to the source code for (inside OpenCUI or Framely). Chatbots using Framely extensions cannot be exported for private deployment."
Extend with native provider
To develop extensions with Native Provider, you should follow these steps below. To use existing extensions, you can go Wire and configure directly.
Describe interface If the service interface you need has not been created yet, you should create a new one and describe its schema on OpenCUI platform. System service interfaces are already created for you, if you want to connect to other channels, you can use them directly, like
io.opencui.channel.IChannel.Generate Code Stub If the service interface you need has already been created, you need to export it. When exporting, OpenCUI platform will generate stub code in kotlin, and you will get the generated file which will be used in implementation.
Develop Extension The standard way to develop extension is to do it inside extension repo.
git clone https://github.com/opencui/extensions.gitOpenCUI use gradle as build system, so you can create a subdirectory to host your subproject. Using the existing building system in this repo will make it easy for you to contribute your native provider back OpenCUI community. The implementation can then be developed as standard Kotlin project. Make sure your project actually builds before you move to the next step.
./gradlew your_project:buildRegister Native Provider Regardless if the extensions are external, you need to register their native provider on the platform so that OpenCUI can generate the frontend code for them. To register native provider, follow steps in the Build native provider documentation to accomplish the following:
- Create native provider.
- Declare service interface.
- Configuration setup.
When you're done, make sure you merge all of your changes into master.
Quickstart with Helloworld
Now lest's use helloworld extension as an example to show how extension is developed. This simple hello word extension gets name from configuration, and then simly return hello $name.
Describe interface
Create service interface. Go to one of your org, select Components in left side menu, click Create on the right side. In the Create popup window:
- Enter a label for service component. For example, our hello world example uses
component_0915as label. - Turn on service toggle, enable service.
- No need to add language. As a service that provides an interface for extensions does not need to add language.
- Click Save.
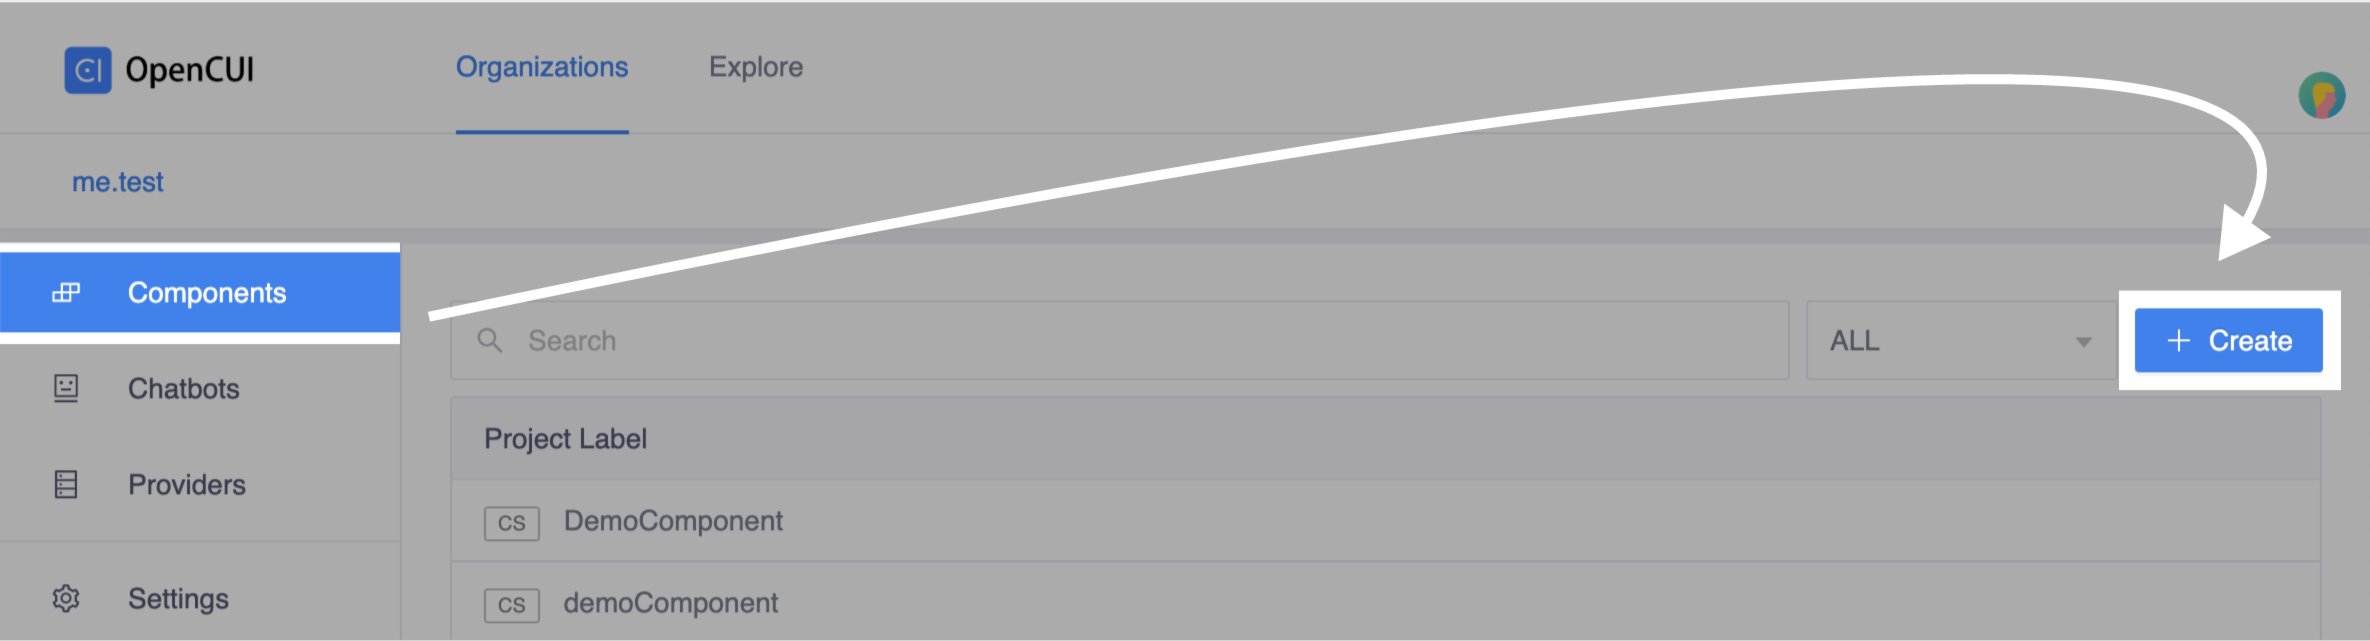 Click Create
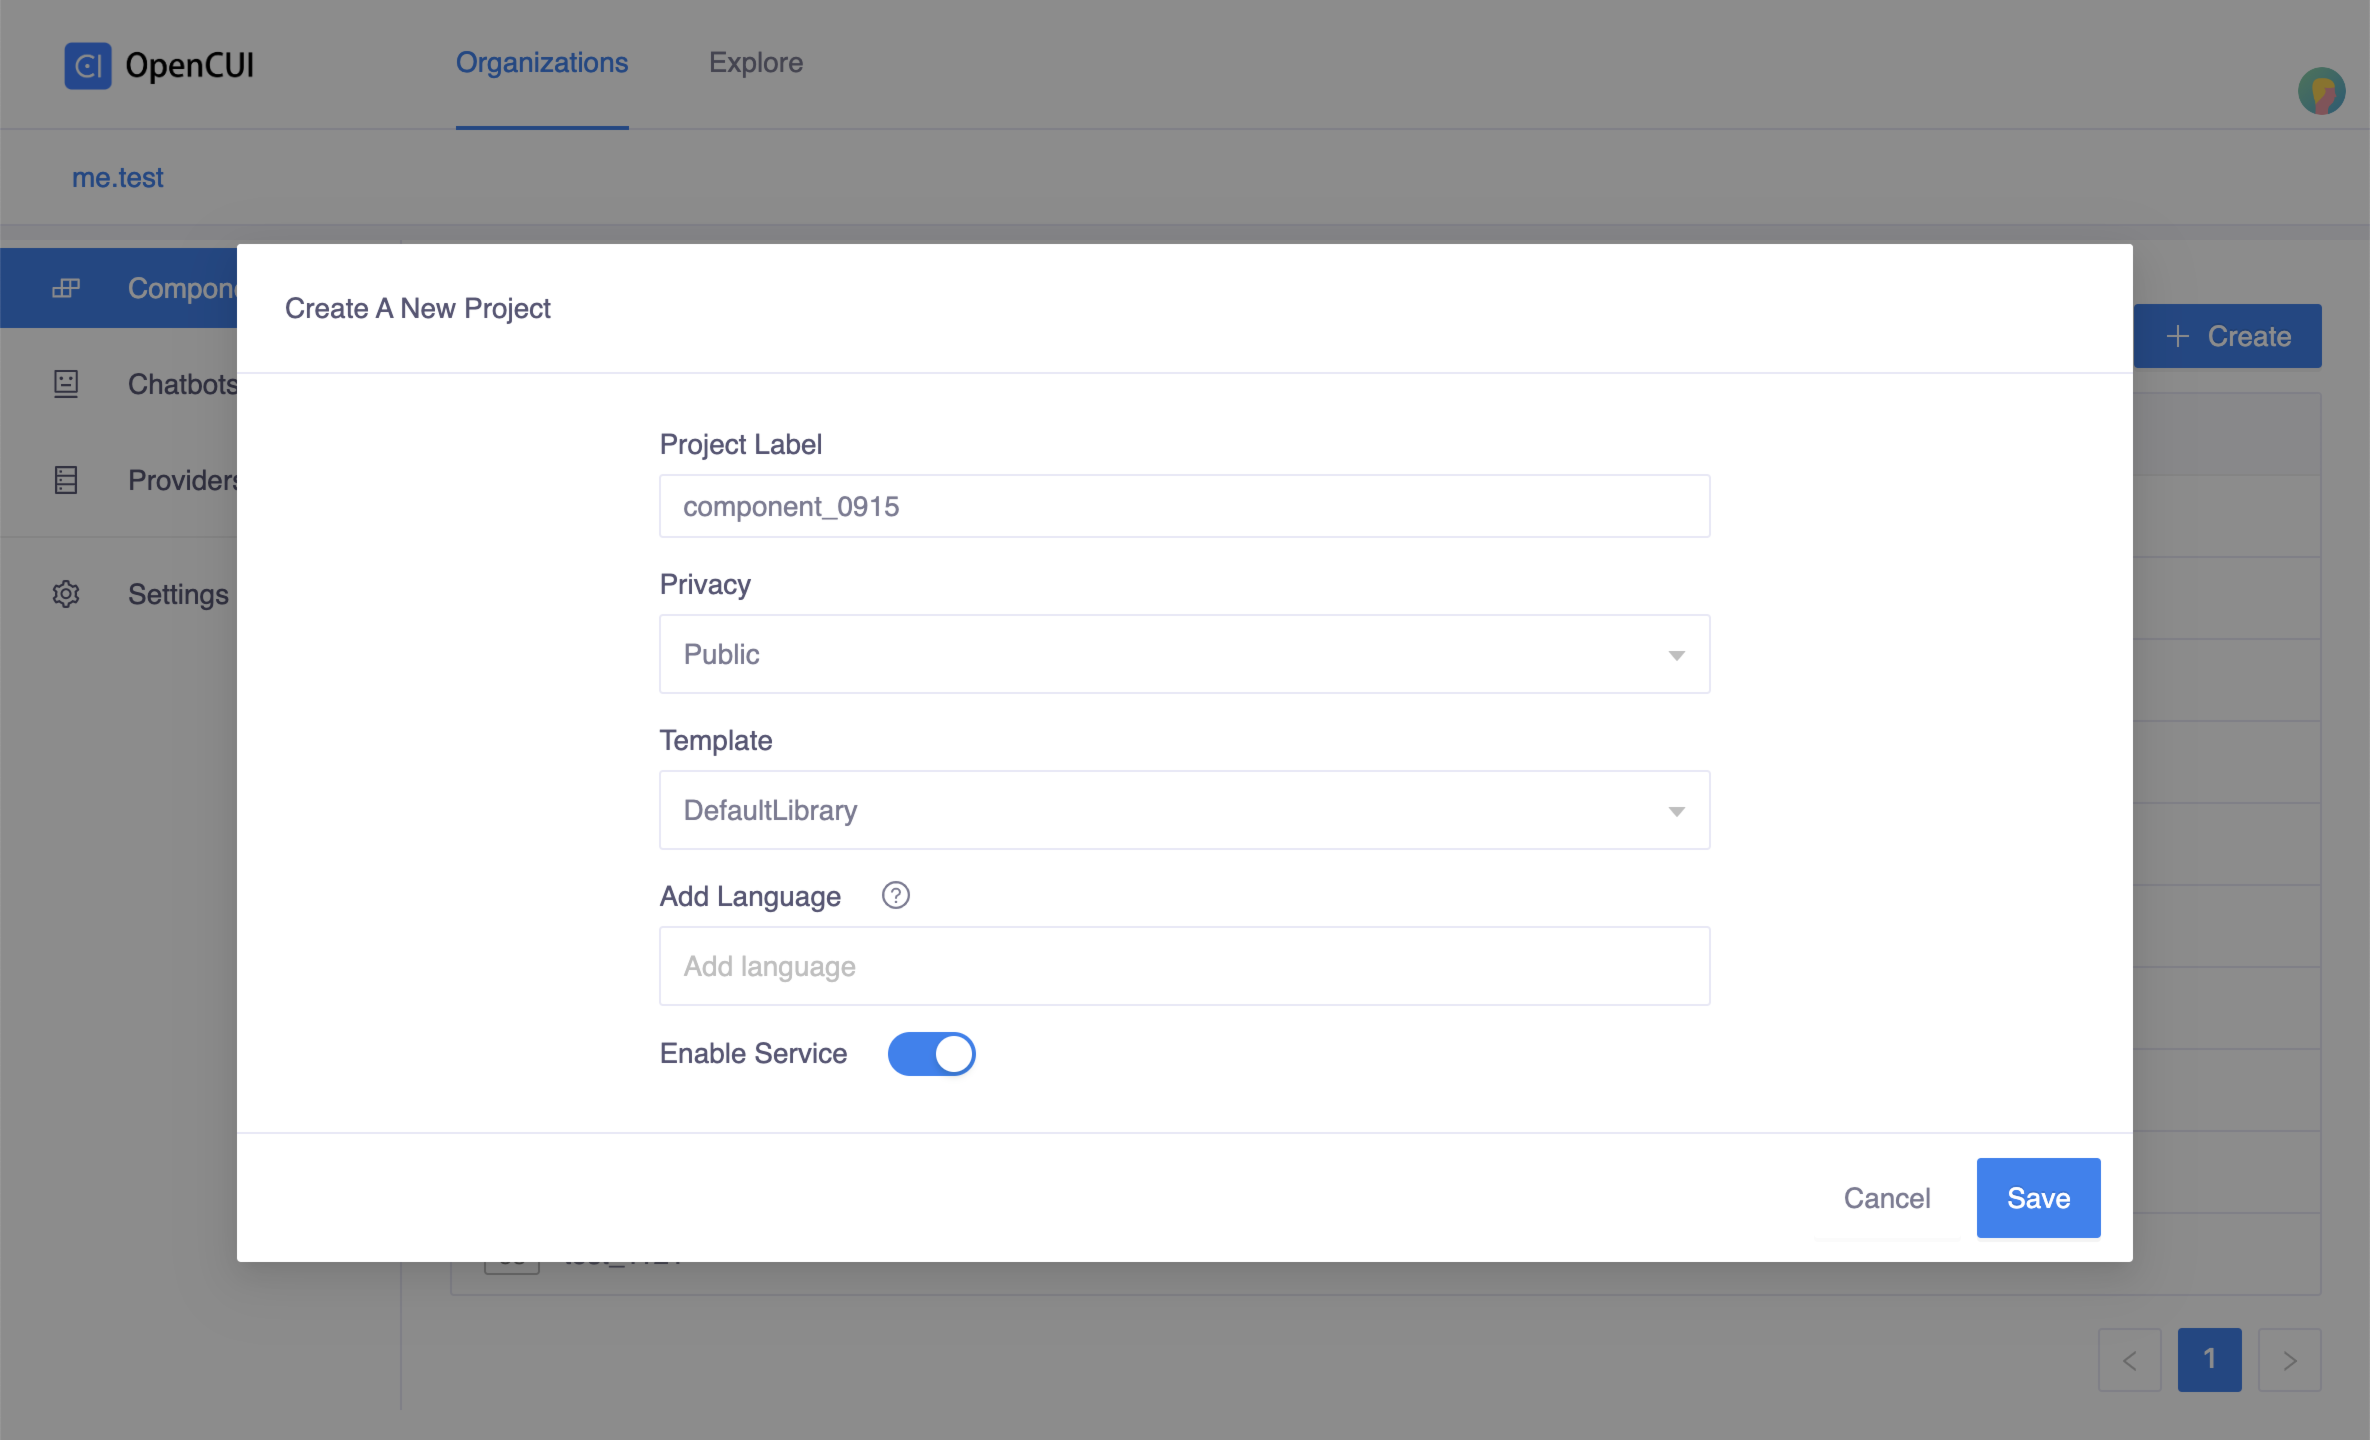 Create popup window
- Enter a label for service component. For example, our hello world example uses
Declare function. Head to Service page, in the Functions section, click Add to declare function signature. In helloworld example, we declare a simple function labeled as
testFunction, which takes a string as input parameter namedstr, and return a string.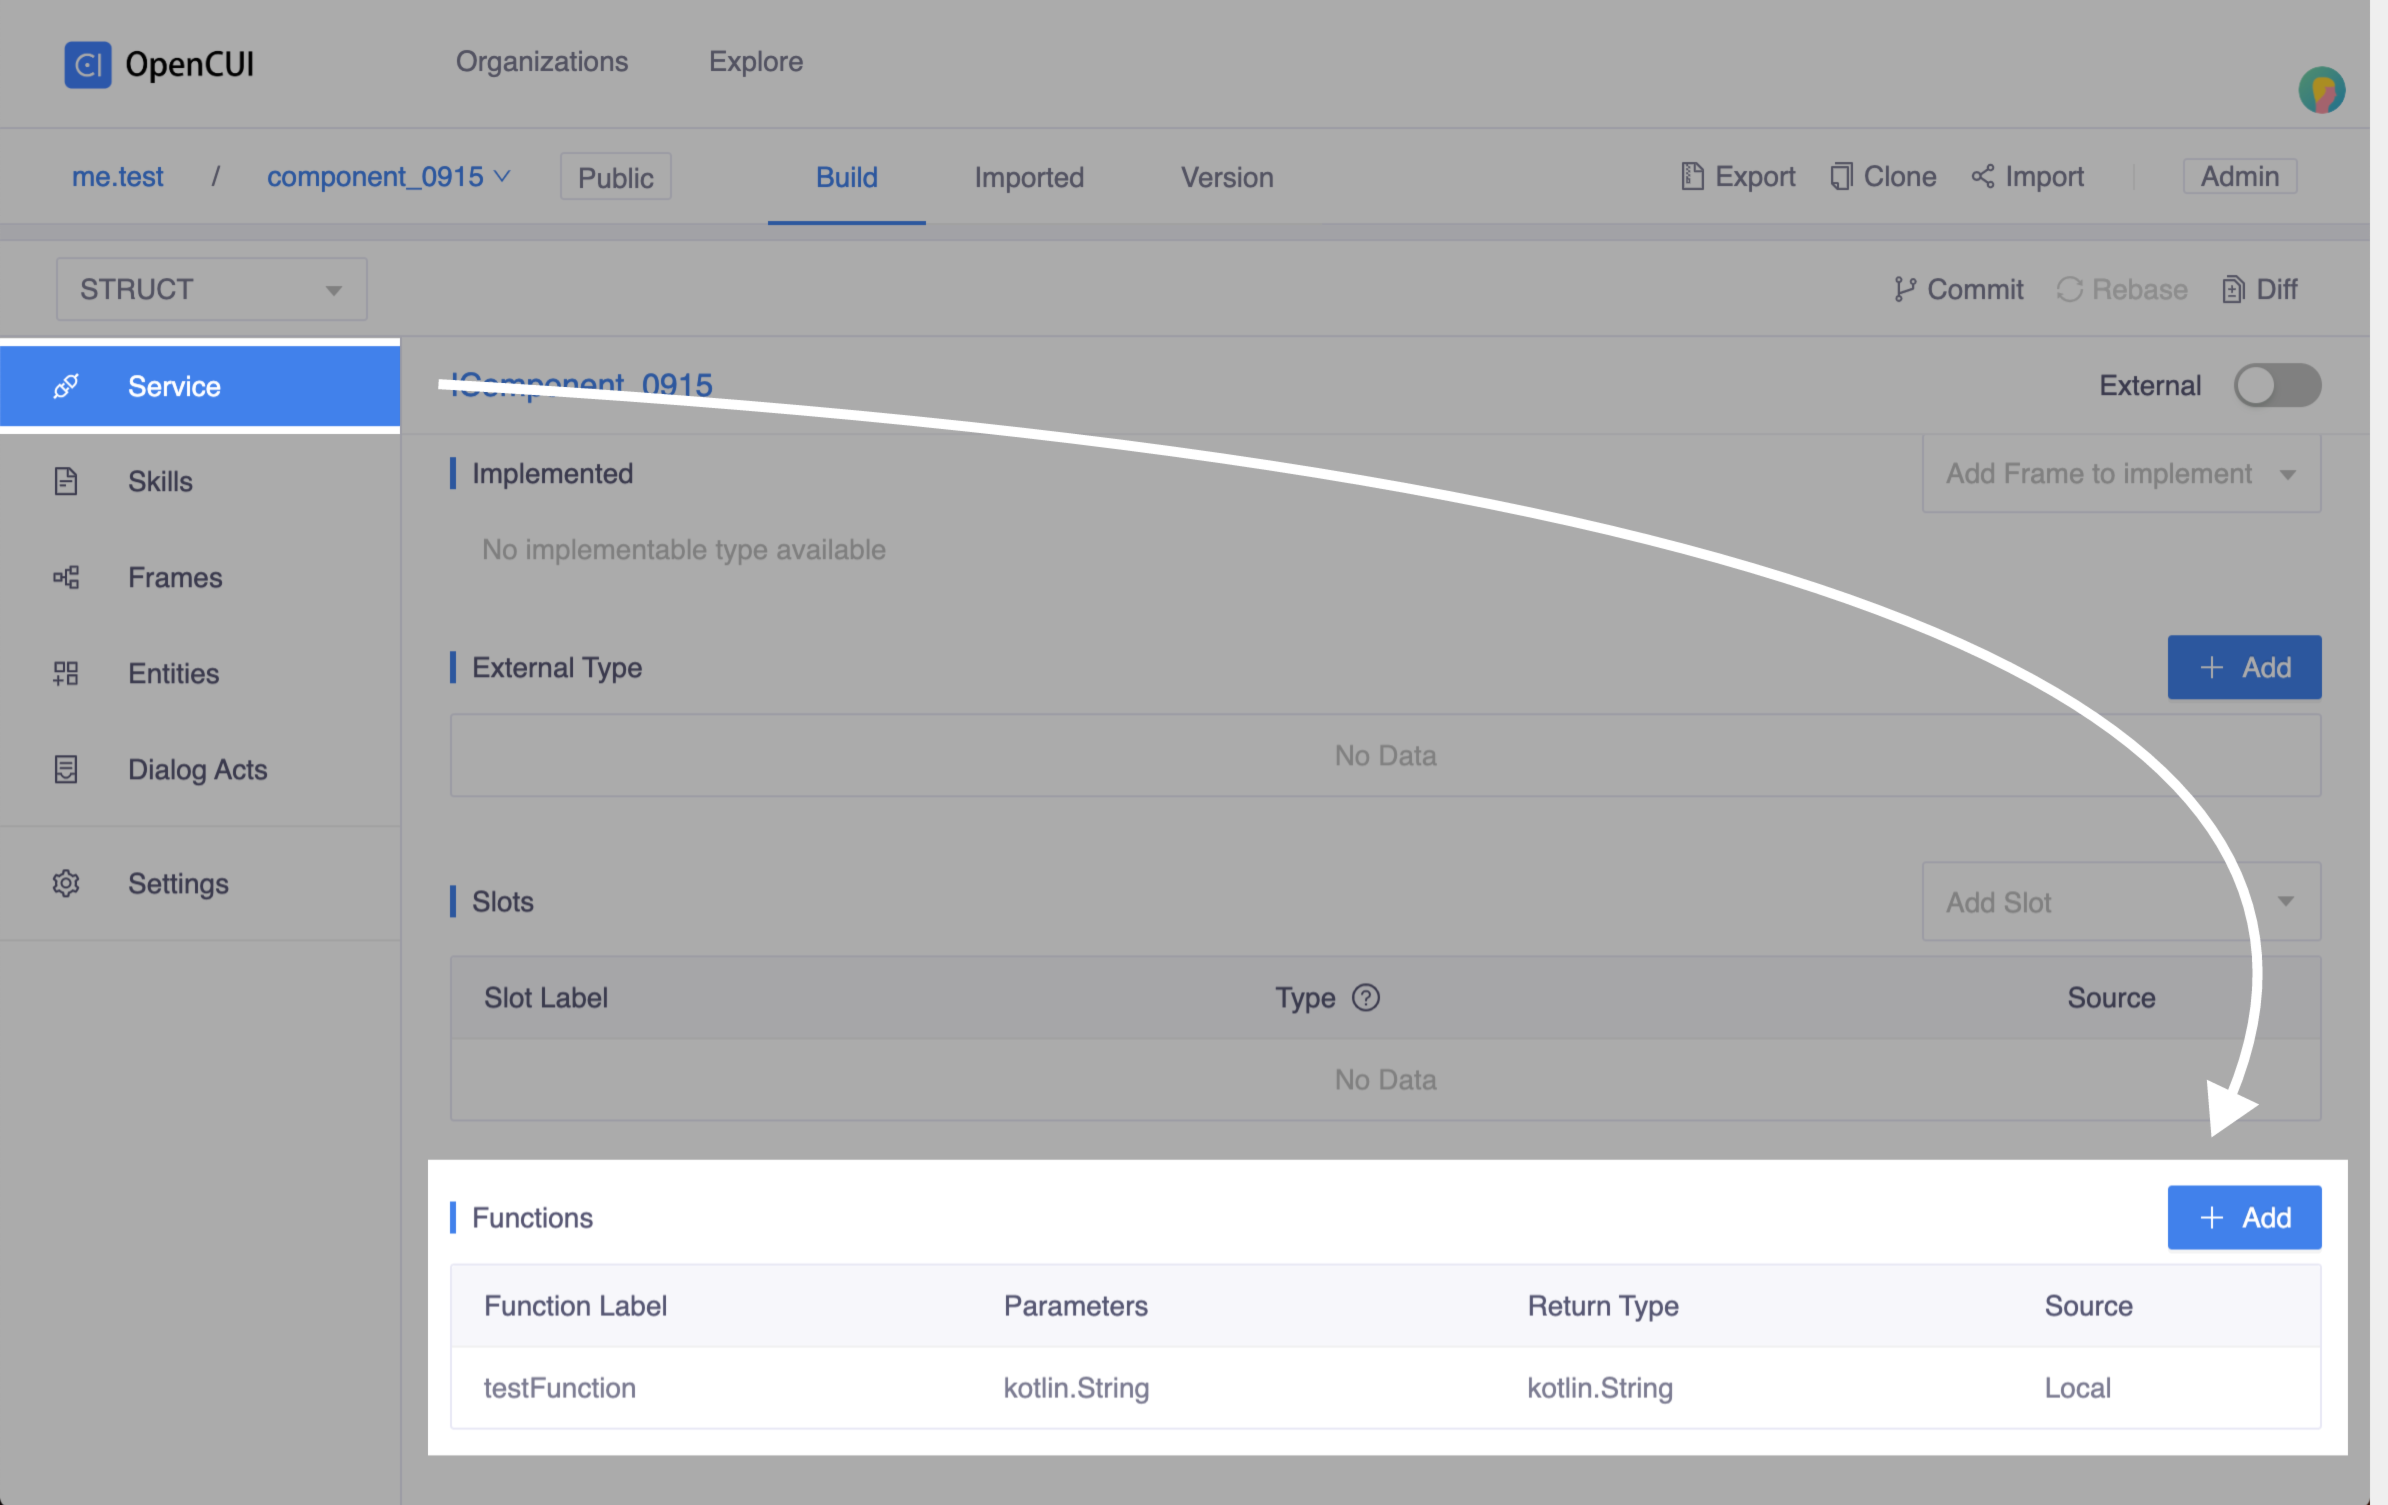 Click add function
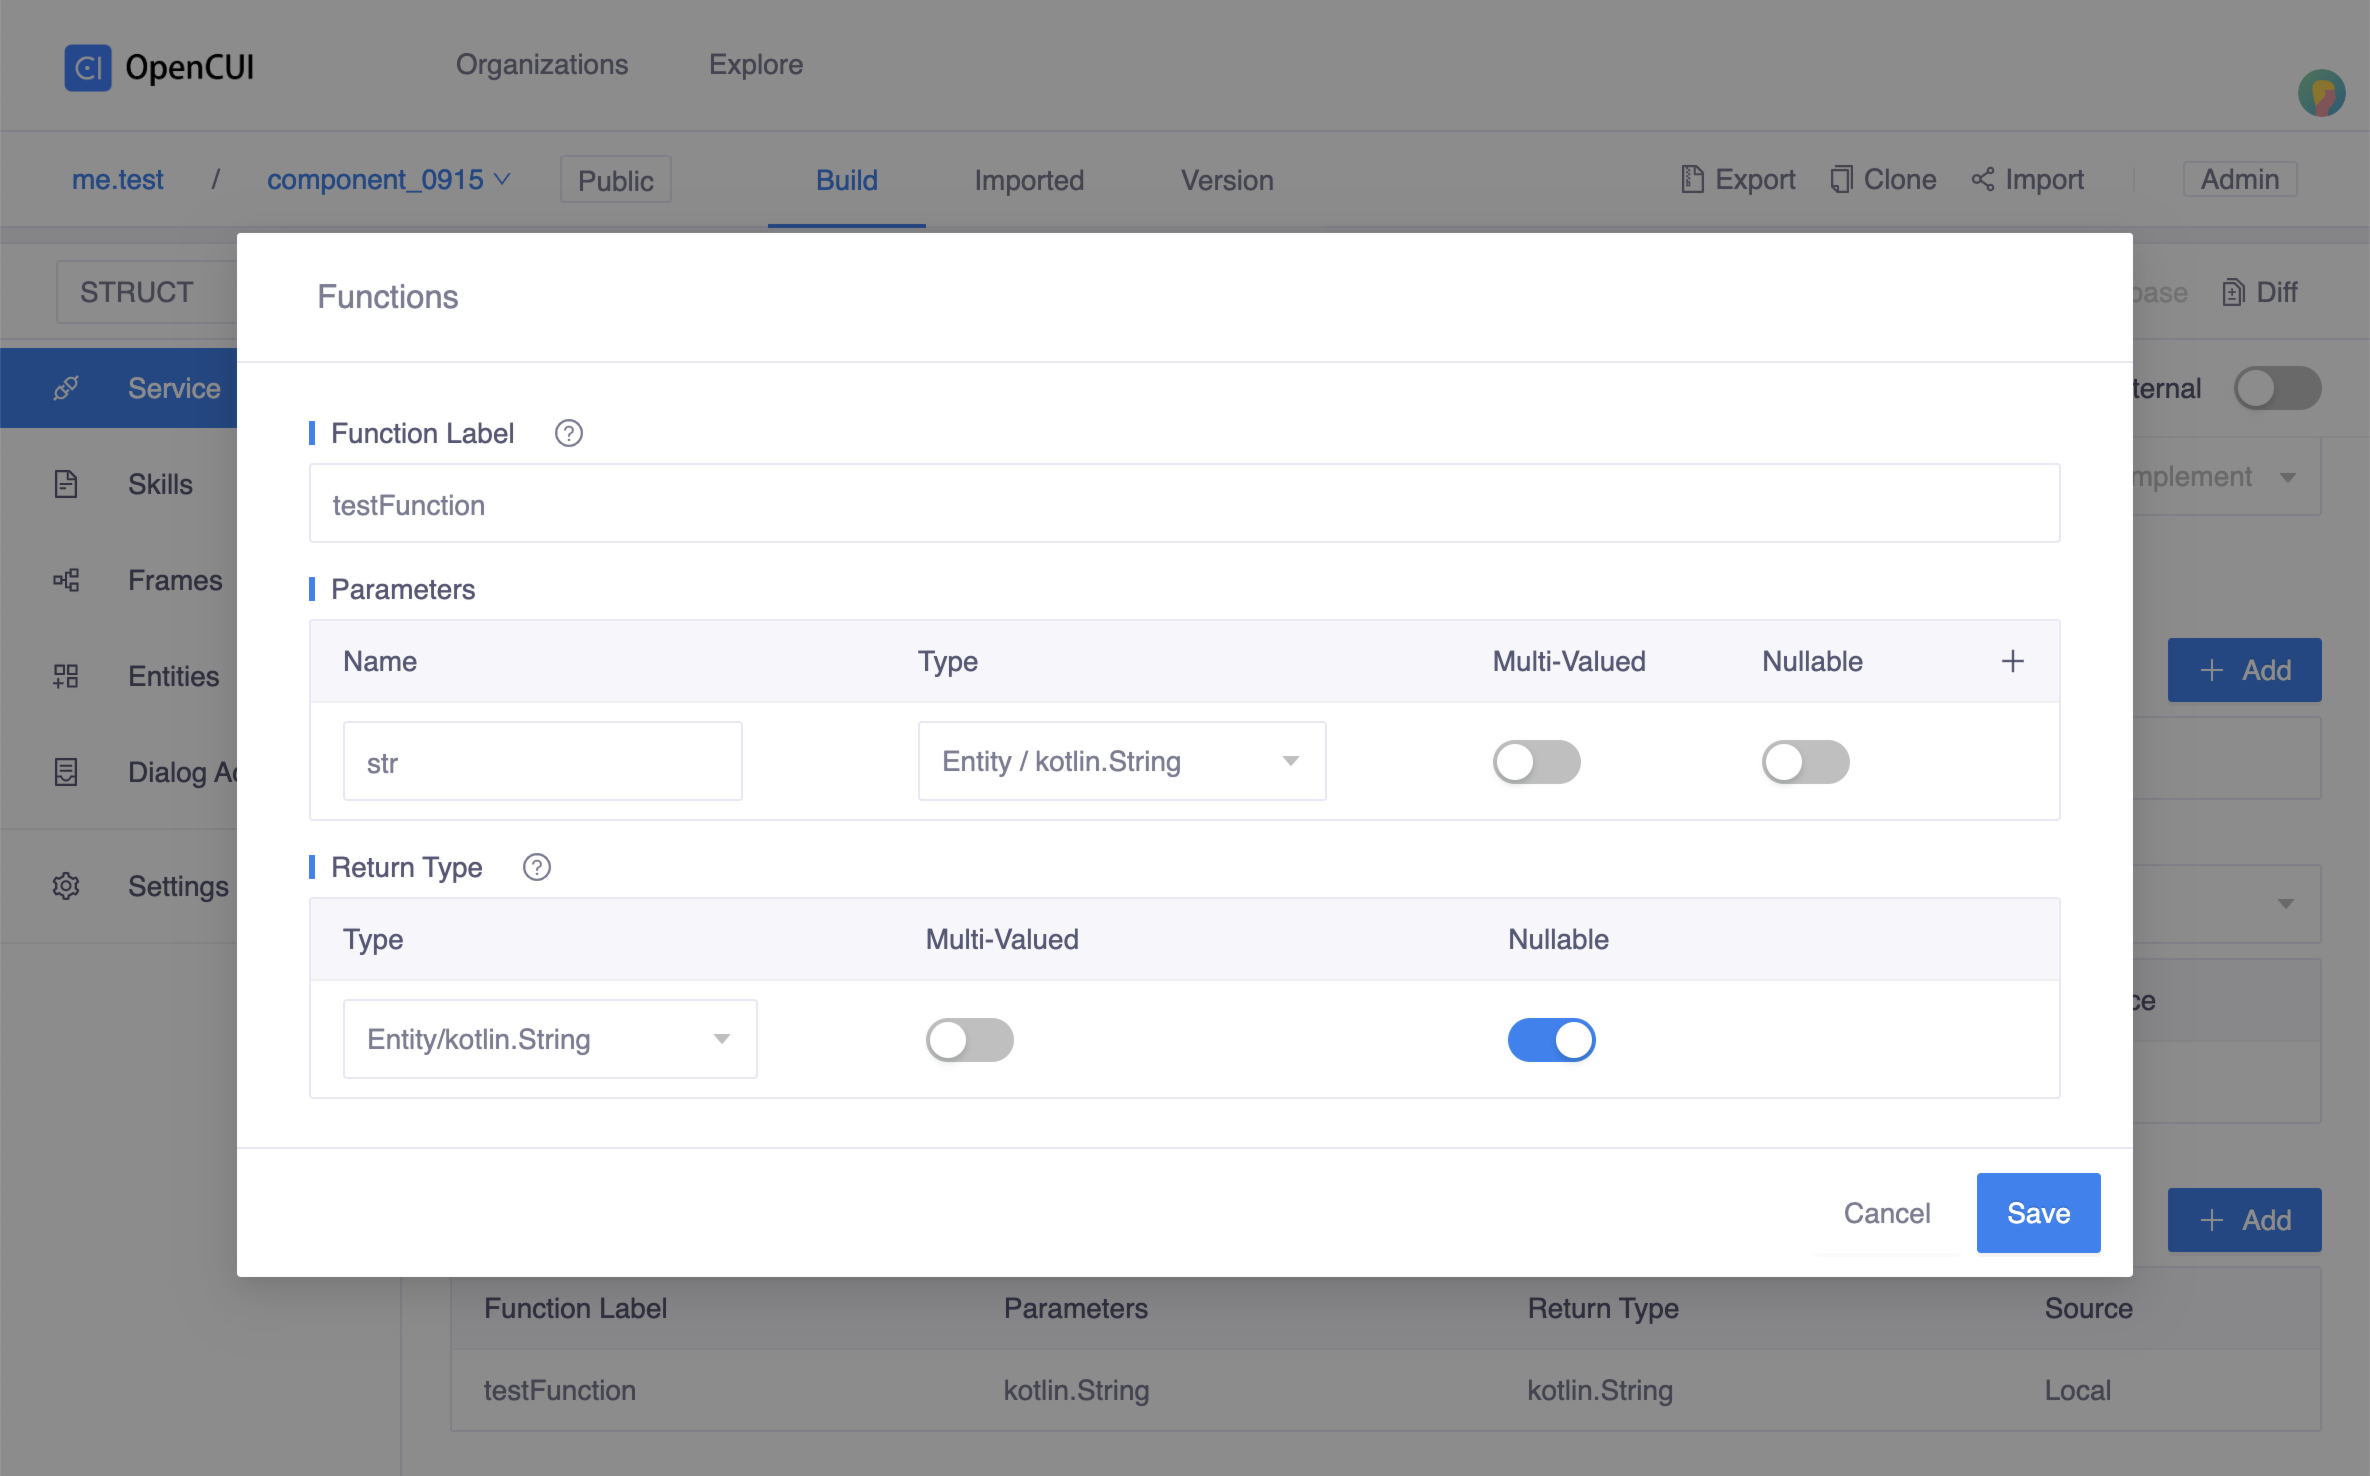 Function popup window
Review your changes and merge them into master.
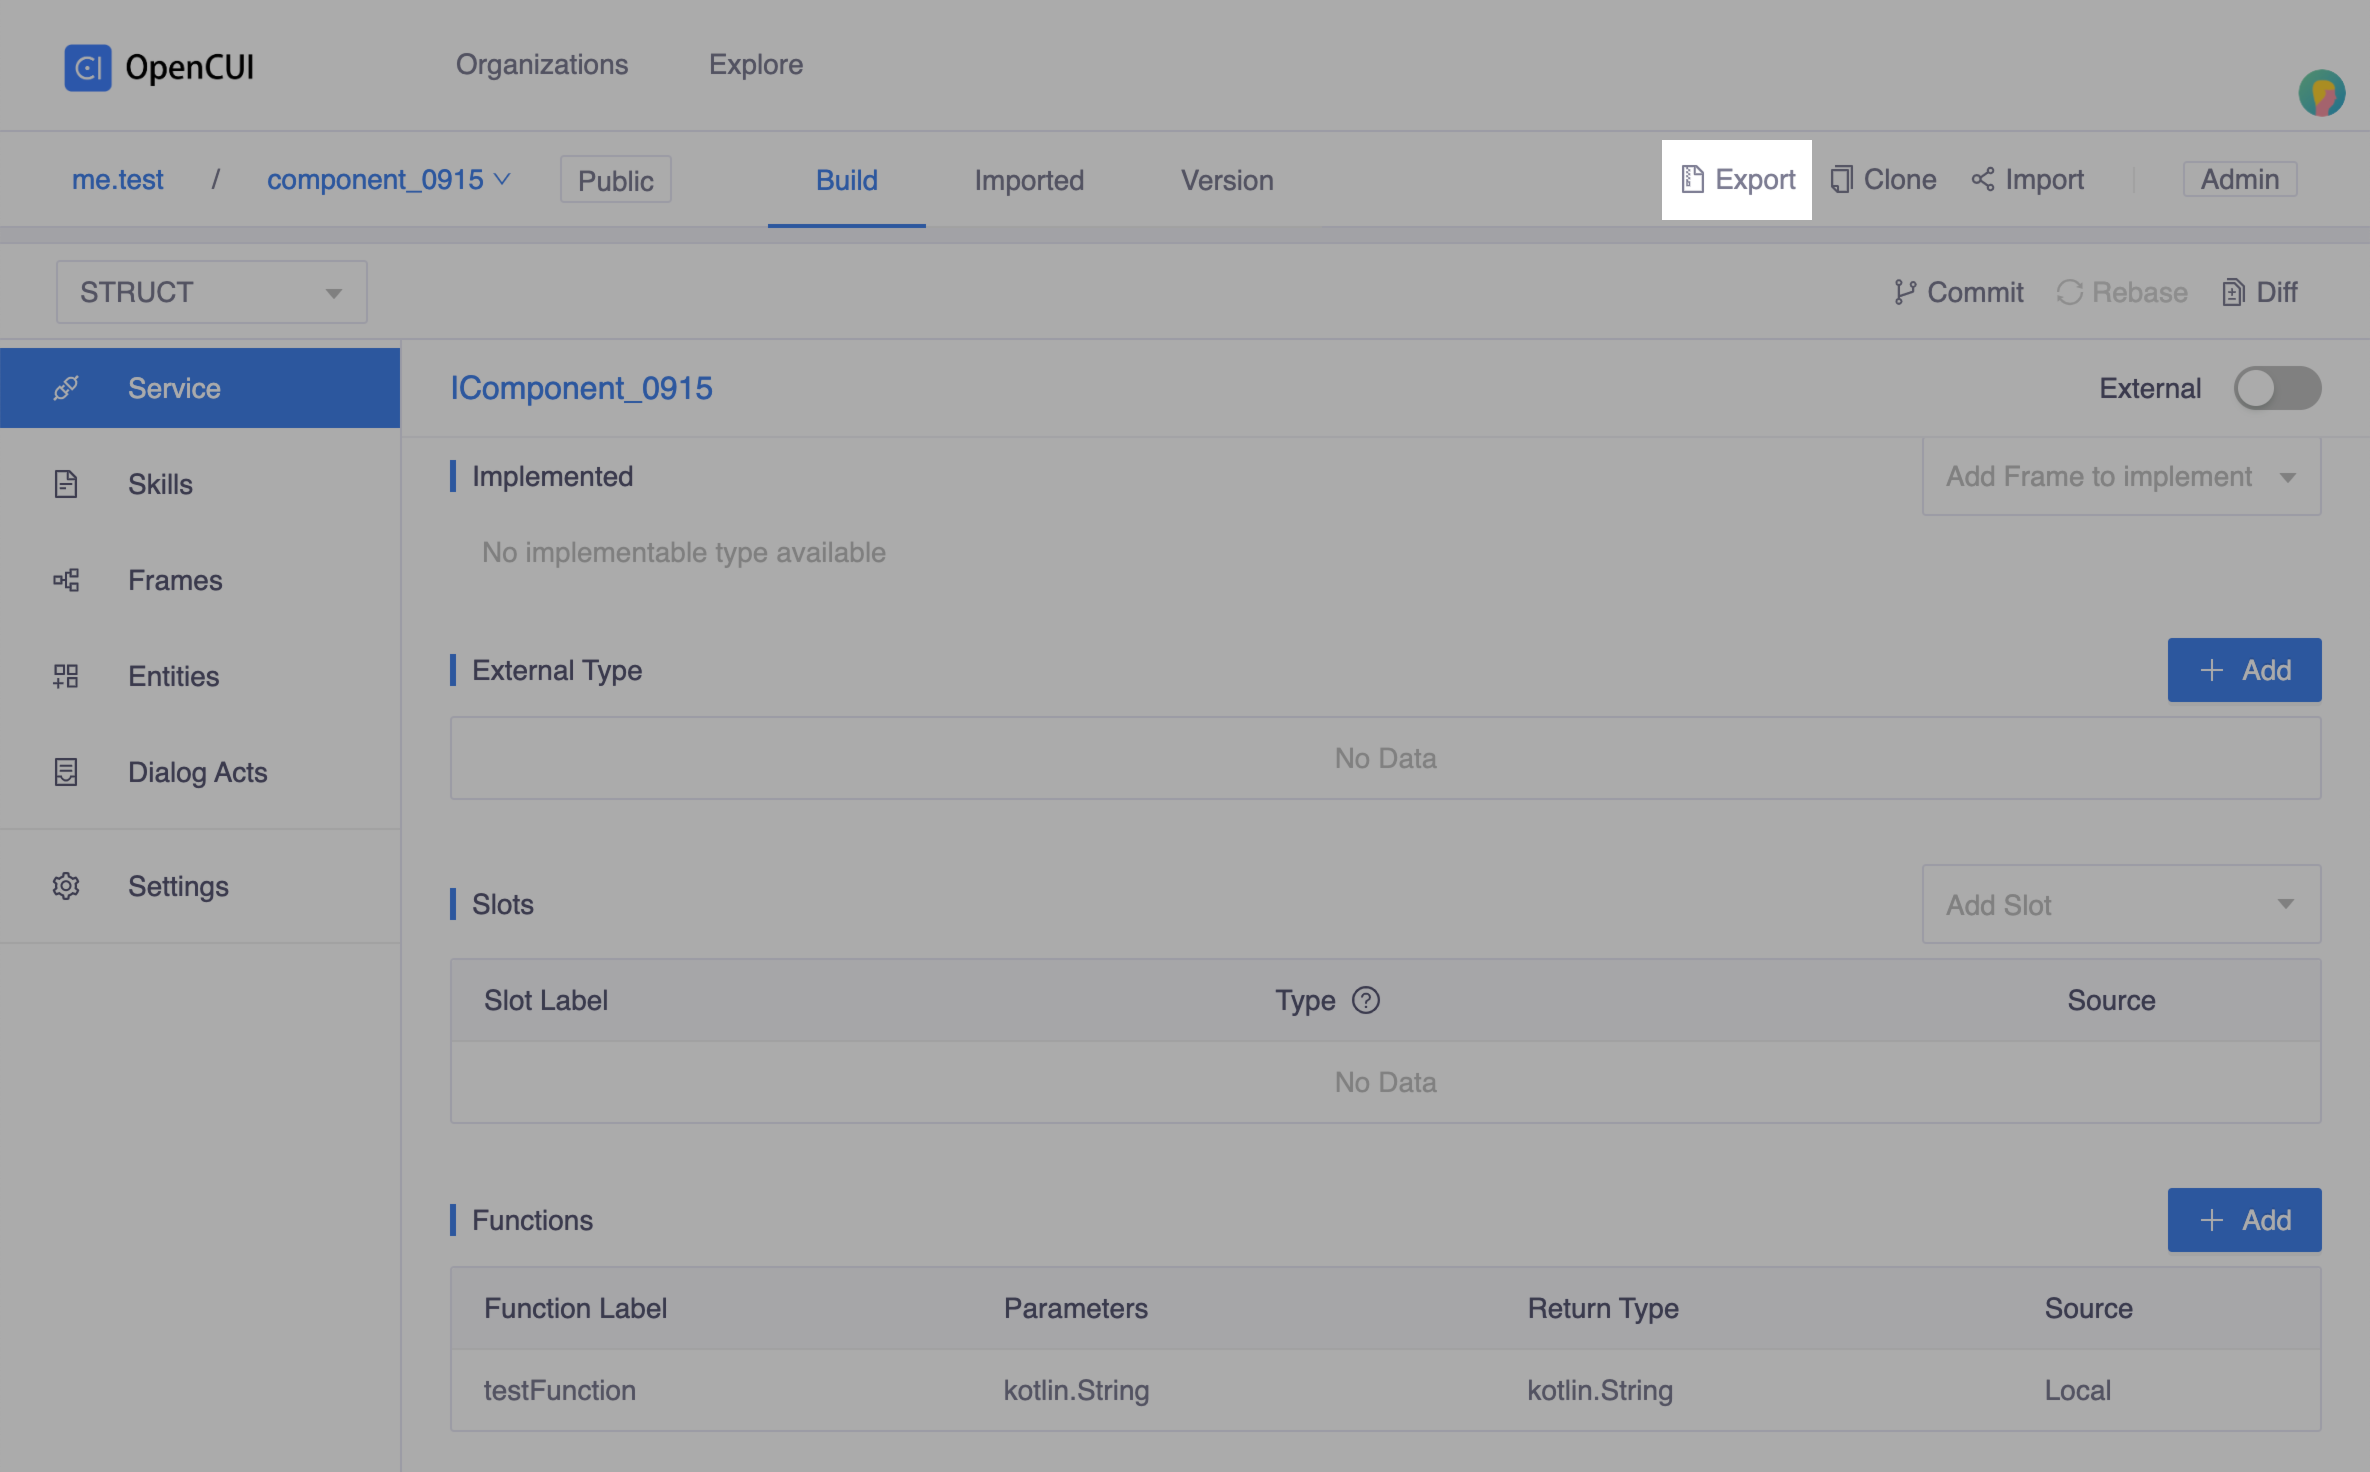
Generate code stub
In the service you described, click Export on the second navigation bar to extract the generated file.
Develop extension
Clone extensions repo, create a subdirectory to host your subproject. Here we create
helloworldunder extensions.git clone https://github.com/opencui/extensions.gitImplement the service interface, you can develop it as standard Kotlin project. The implementation code example of
helloworldis like:kotlindata class HelloWorldProvider( val config: Configuration, override var session: UserSession? = null): IComponent_0915, IProvider { override fun testFunction(str: String): String? { return "hello ${config["name"]}, $str" } companion object: ExtensionBuilder<IComponent_0915> { override fun invoke(config: Configuration): IComponent_0915 { return HelloWorldProvider(config) } } }Make sure the project actually builds before you move to the next step.
./gradlew your_project:build
For a full overview, see helloworld in OpenCUI extensions repo.
Register native provider
Create a native provider. Go to one of your org, select Provider in left side menu, click Create on the right side. In the Create popup window:
- Enter a label for provider. For example,
testas label. - Select Native Provider in Provider Type field.
- Select OpenCUI-hosted in Deploy Mode field as
helloworldis one of OpenCUI extensions. - Click Save.
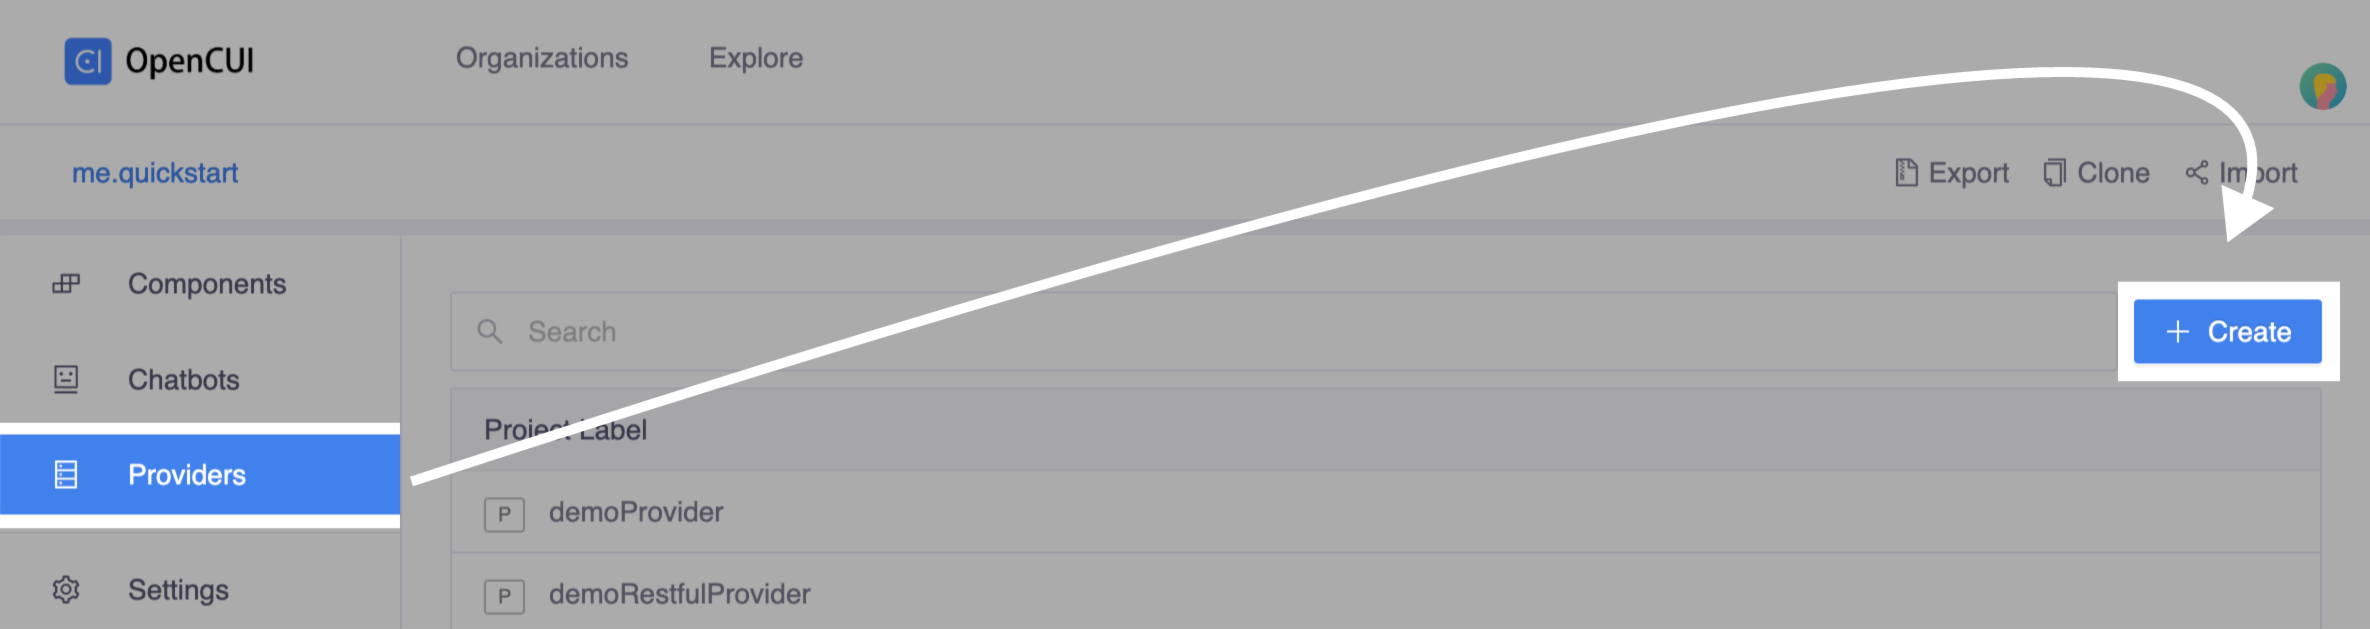 Click Create
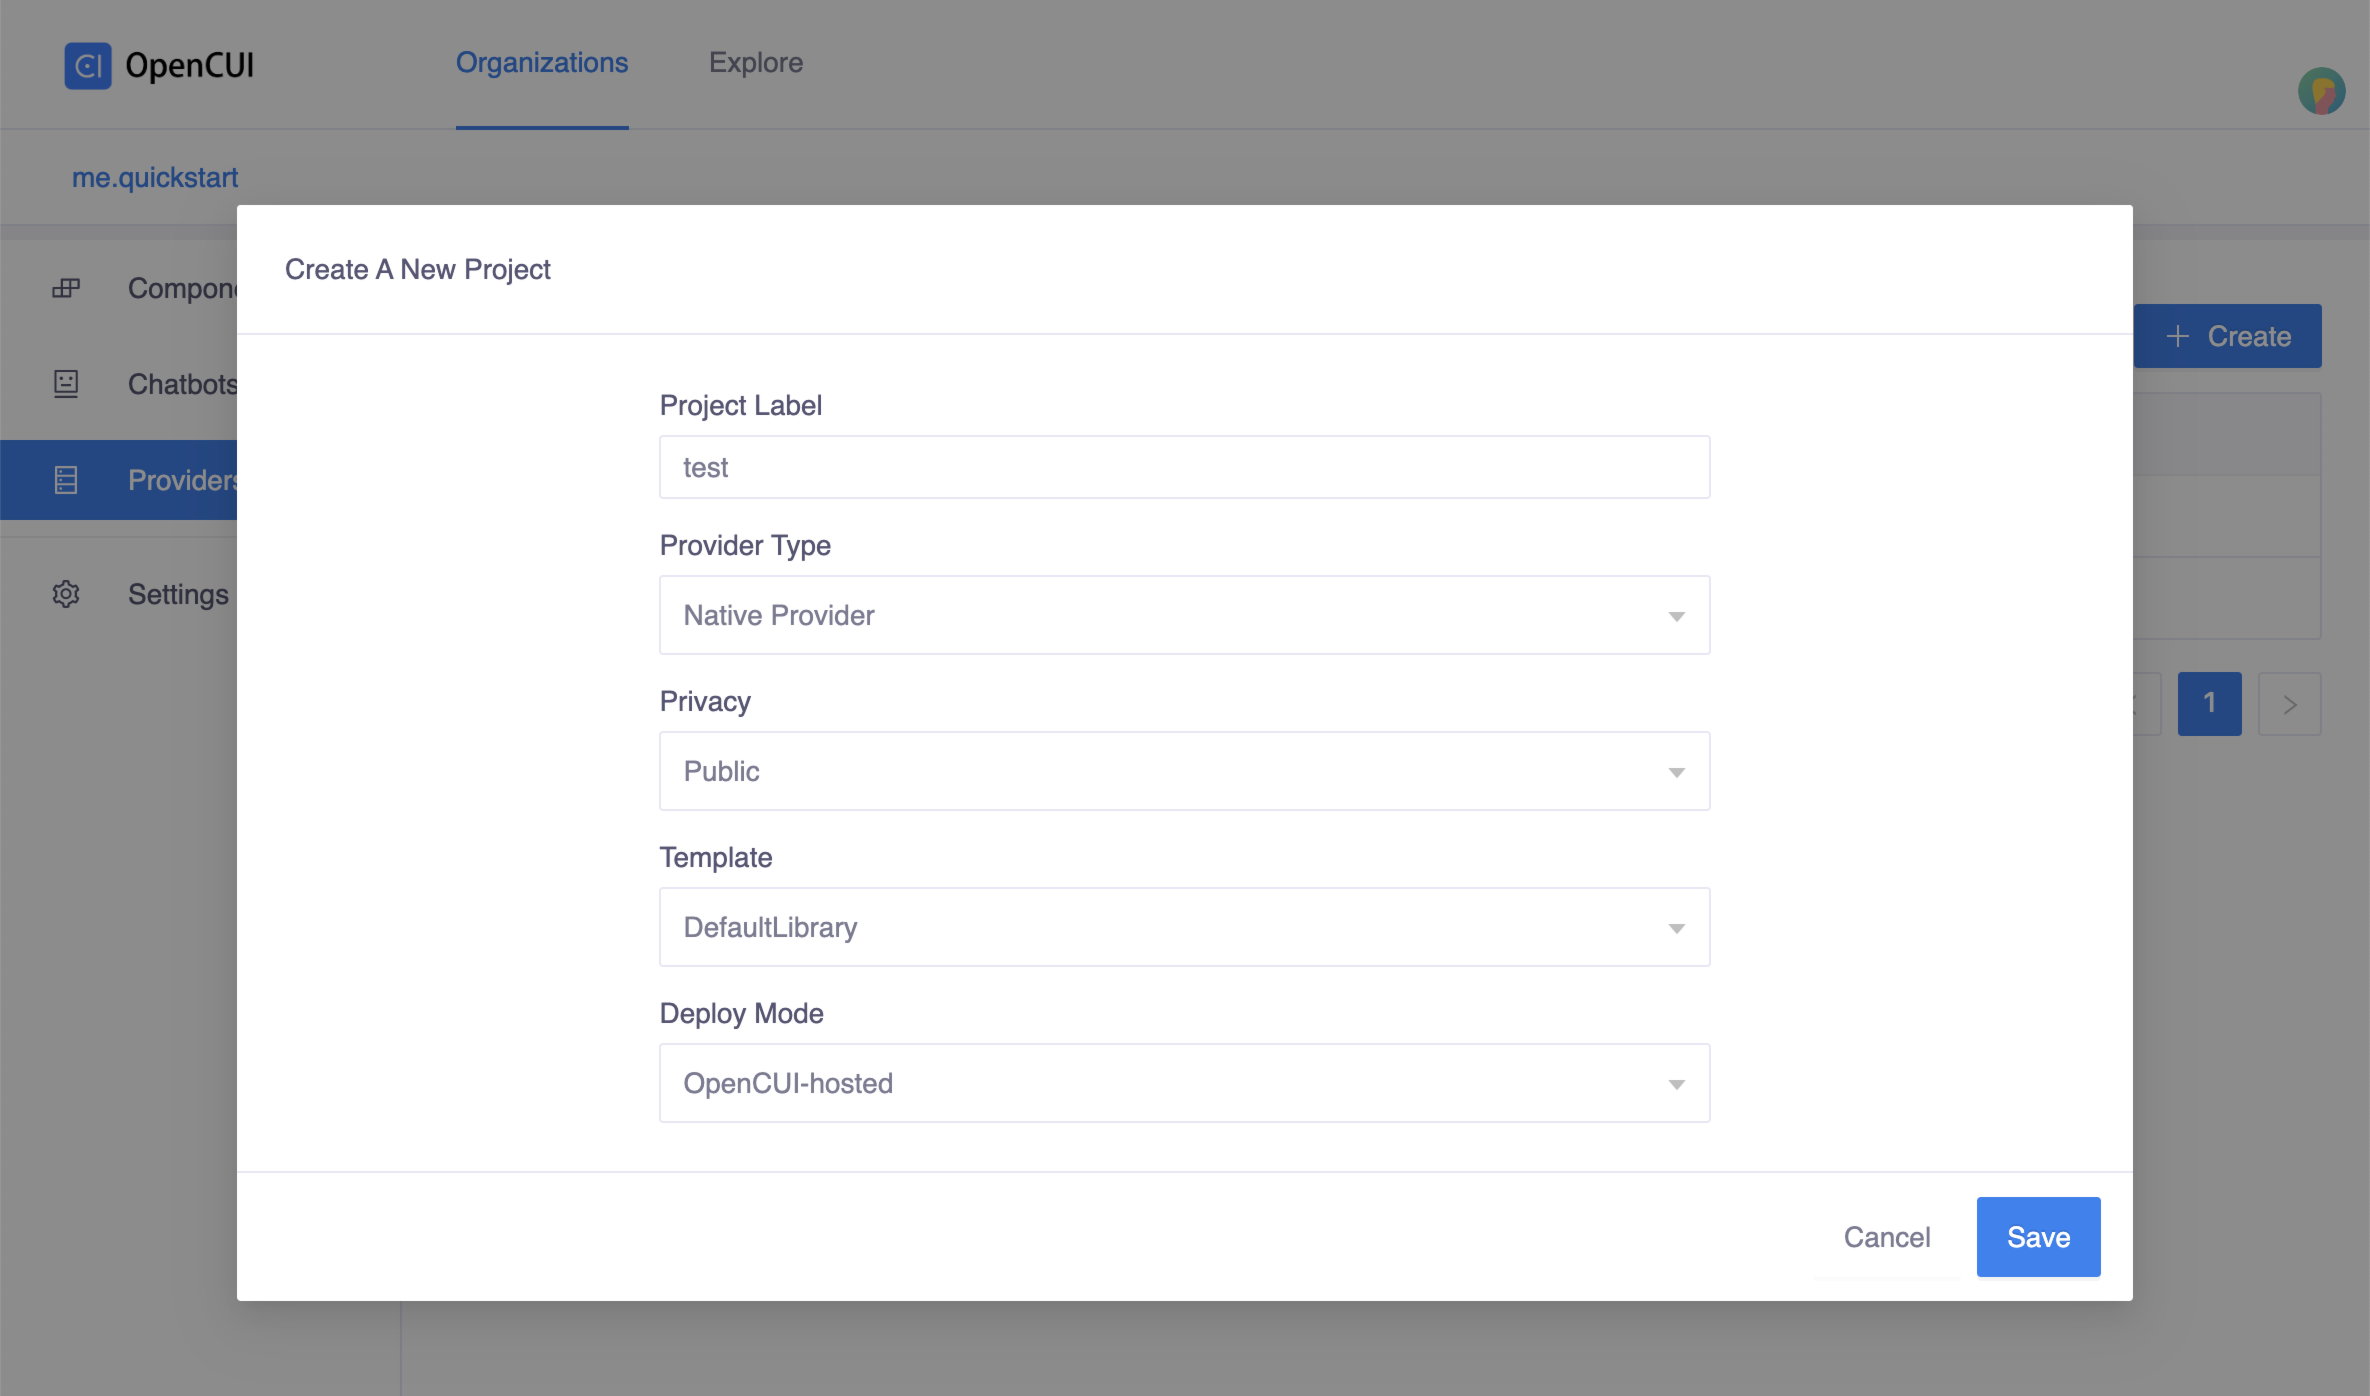 Create popup window
- Enter a label for provider. For example,
Declare service interface
component_0915in native provider:Go to service
component_0915, click Import on the second navigation bar. In the popup window, select your native provider, in this case we selecttest, and Save.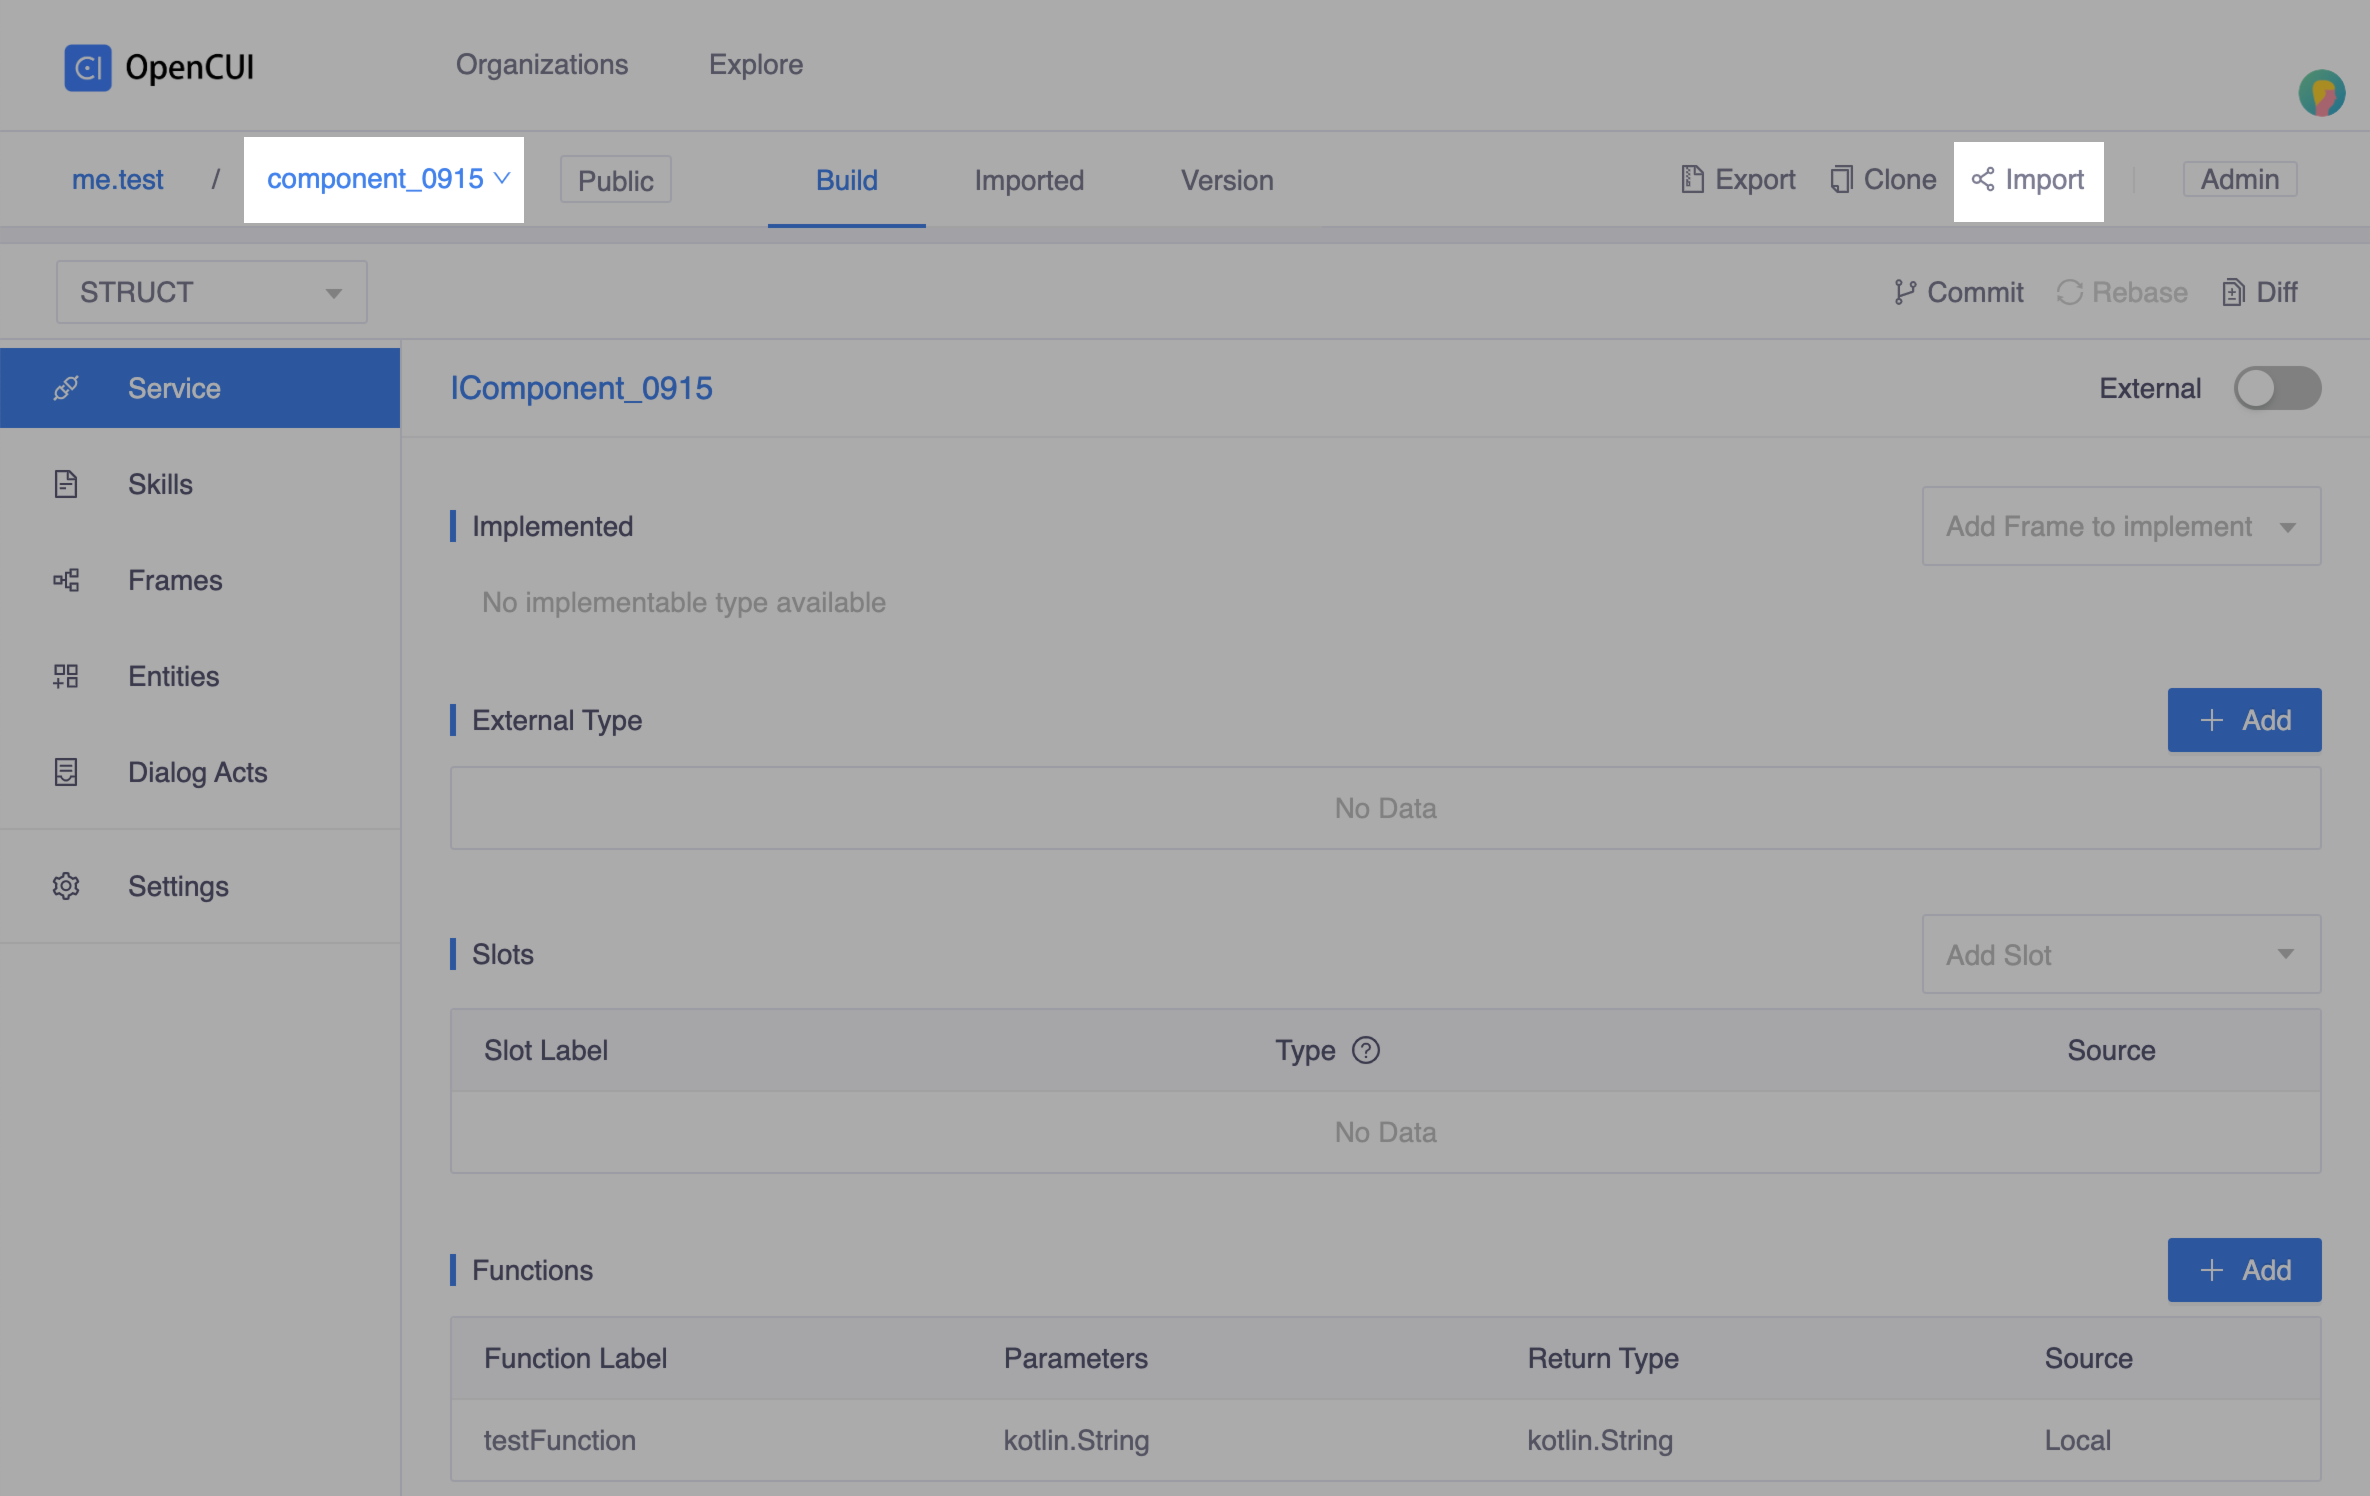
Back to the
testnative provider, heading to Service page from the left side menu. In the Implemented section, selectcomponent_0915.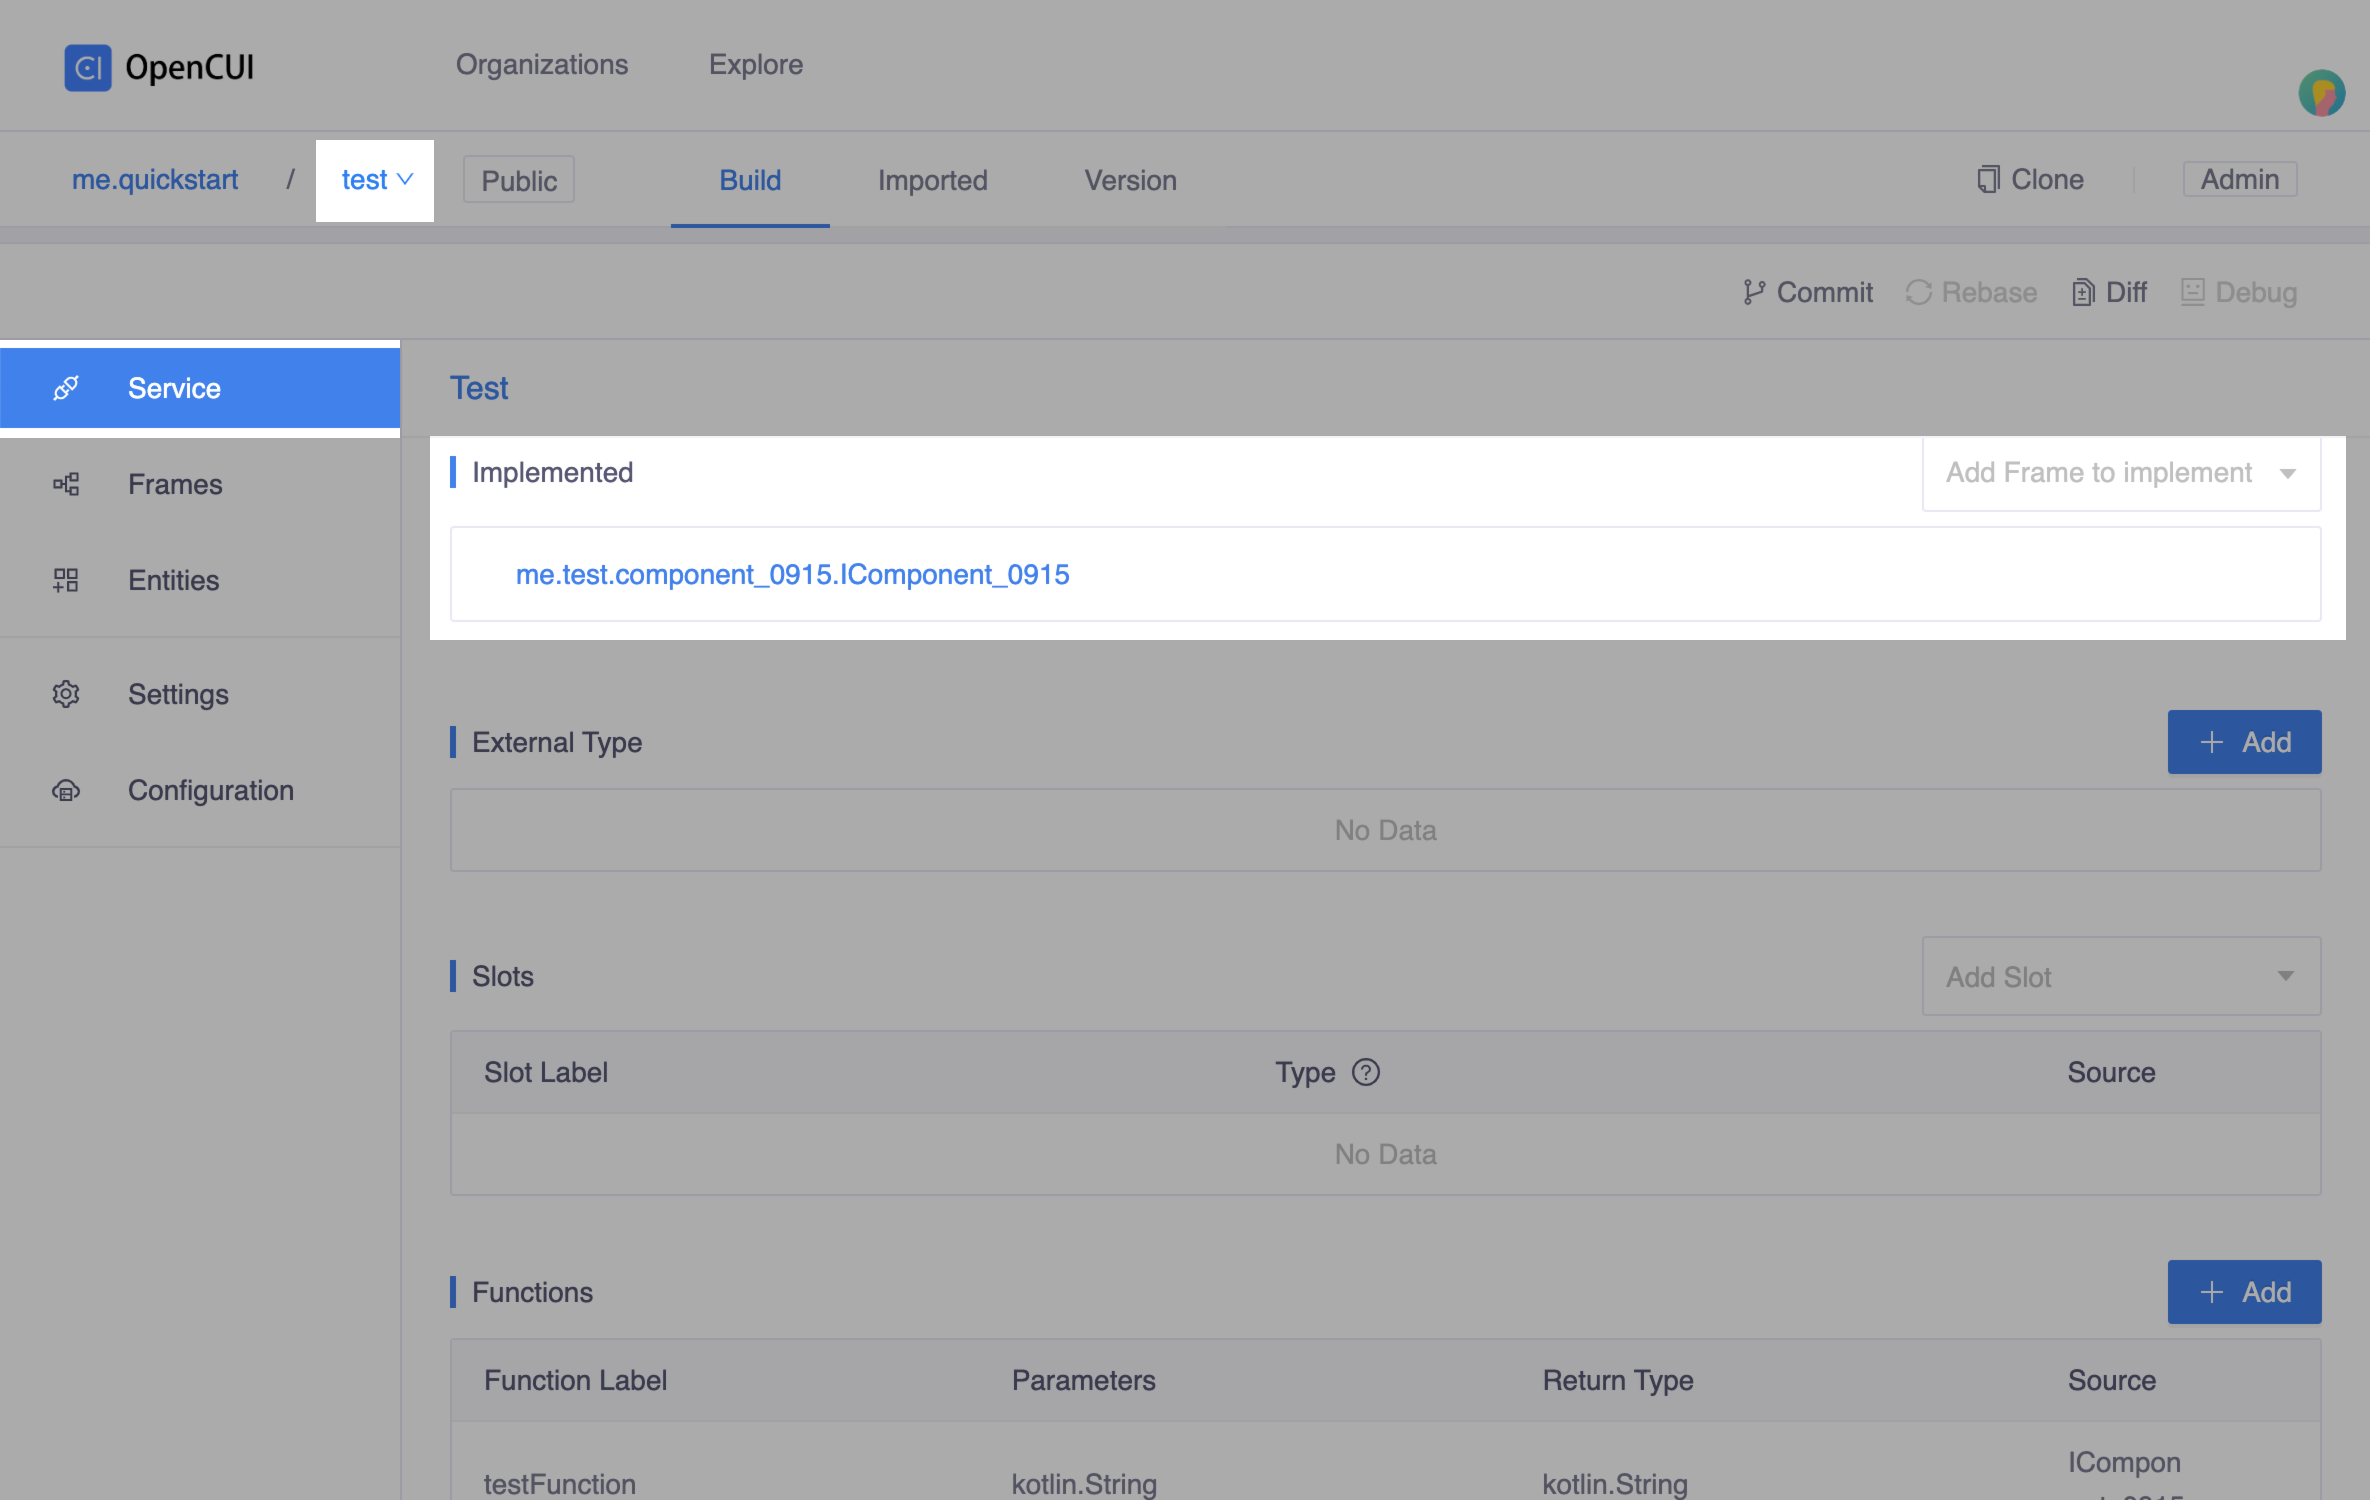
Configuration setup, heading to Configuration page from the left side menu:
Enter Provider Class Name, a fully qualified name of this implementation class. In this case, enter
me.test.component_0915.HelloWorldProvider.Set Configuration Meta as following:
json[ { "key": "name", "label": "Name", "type": "String" } ]Enter
io.opencui.extensions:helloworld:1.0-SNAPSHOTin Implementation field. The format of this field should begroup:project:version. Normally, thegroupandversionfield can be found in the build.gradle file.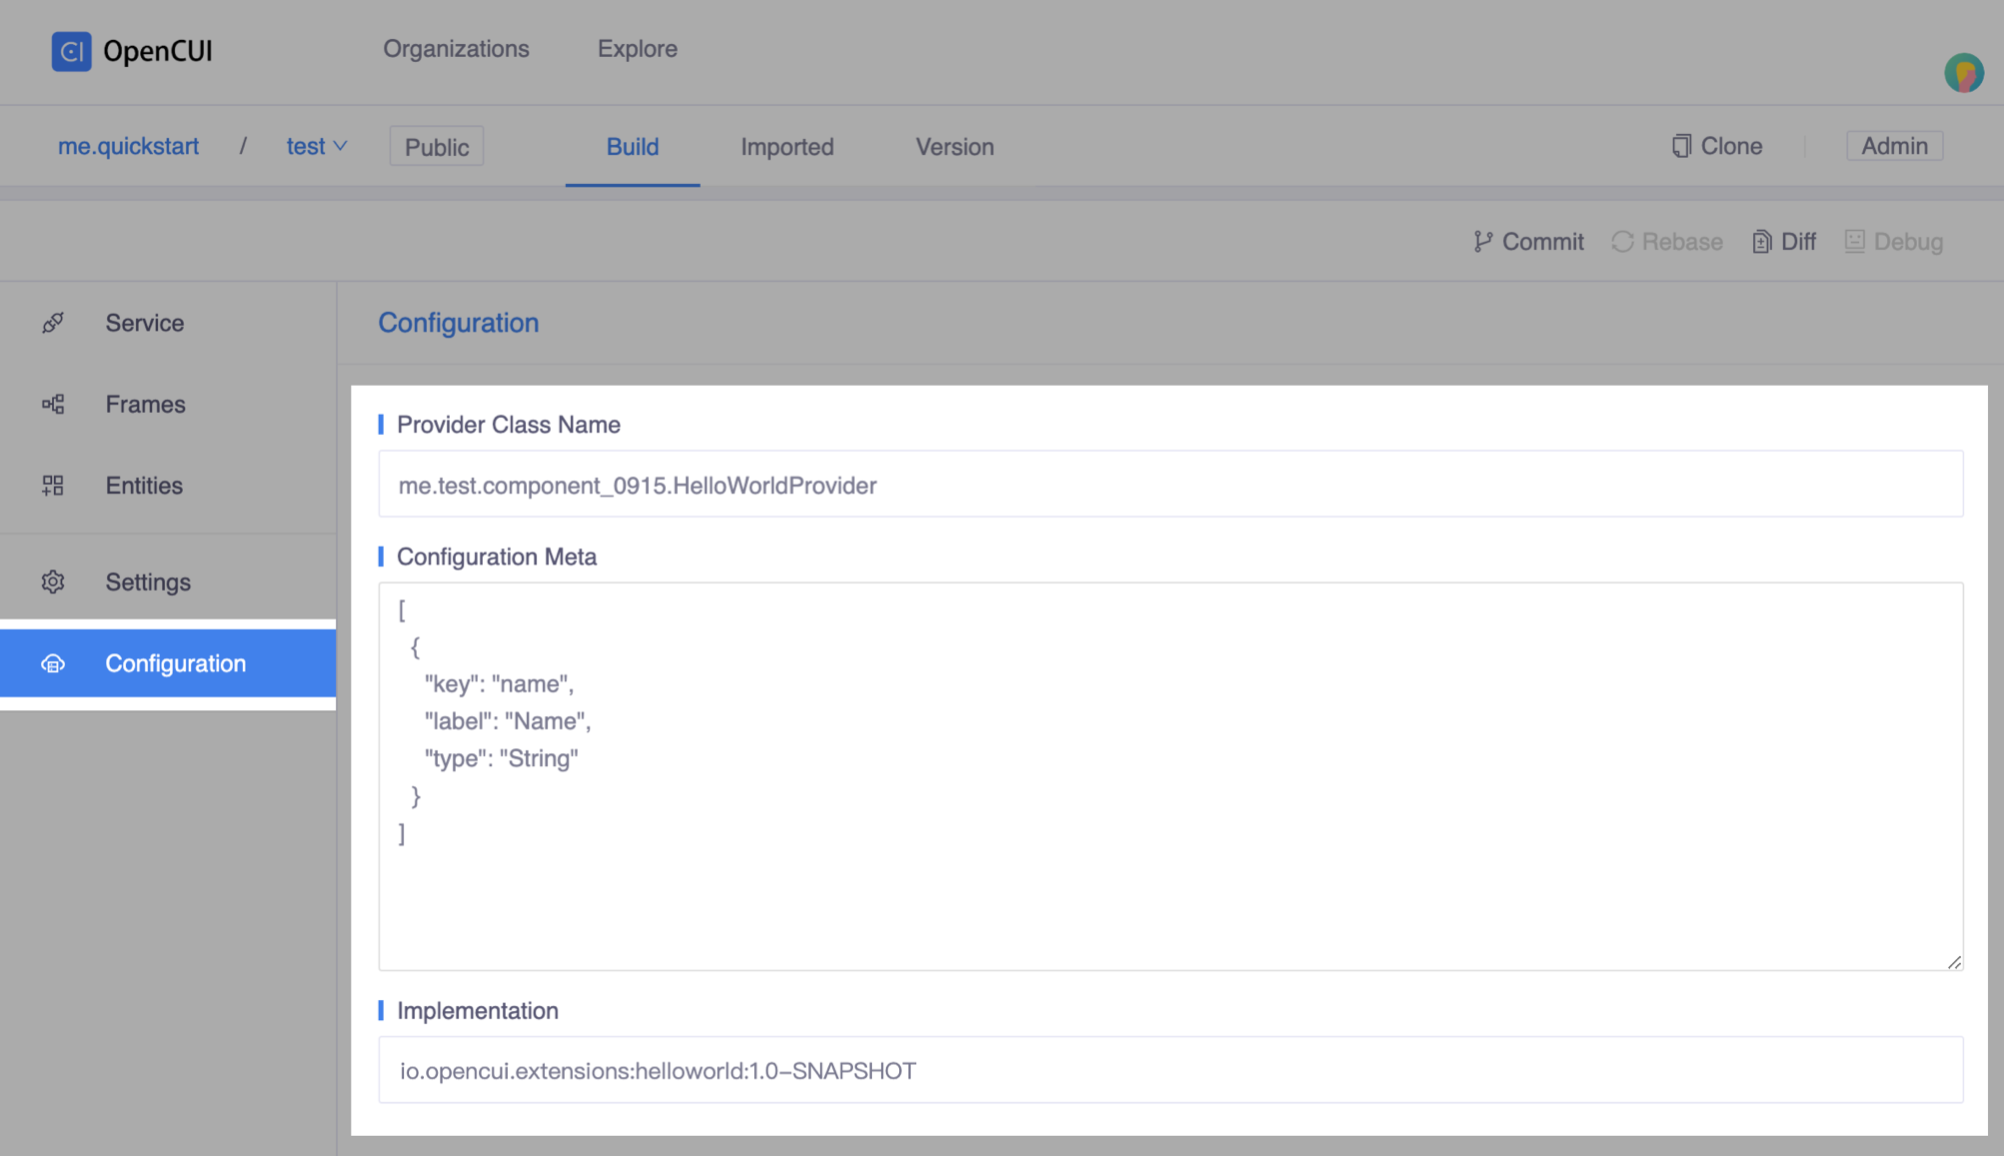
Review and merge your changes into master.
Wire and configure in chatbot
If you have not already created a chatbot, create one now. Inside your org, head to chatbot list page by clicking Chatbots in the left side menu, then click Create on the right side.
- Enter your chatbot's label in the Project Label field, for example
helloworld. - Select your preferred Region.
- Select the languages for your chatbot in the Add Language field, we selcet
English(en)here.
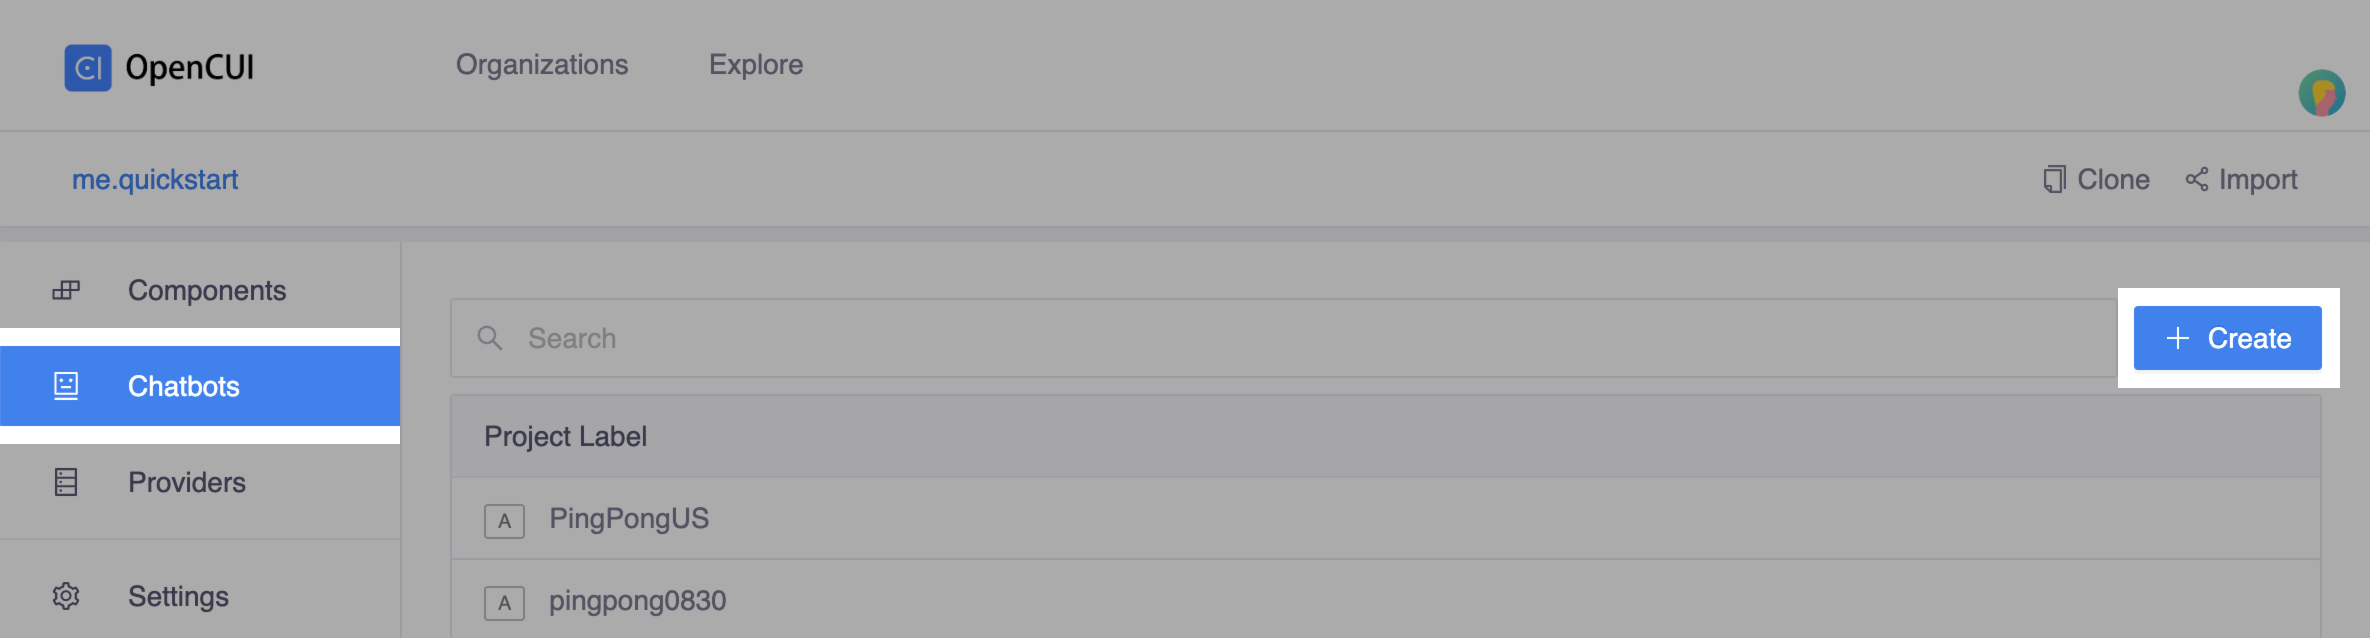 Create chatbot
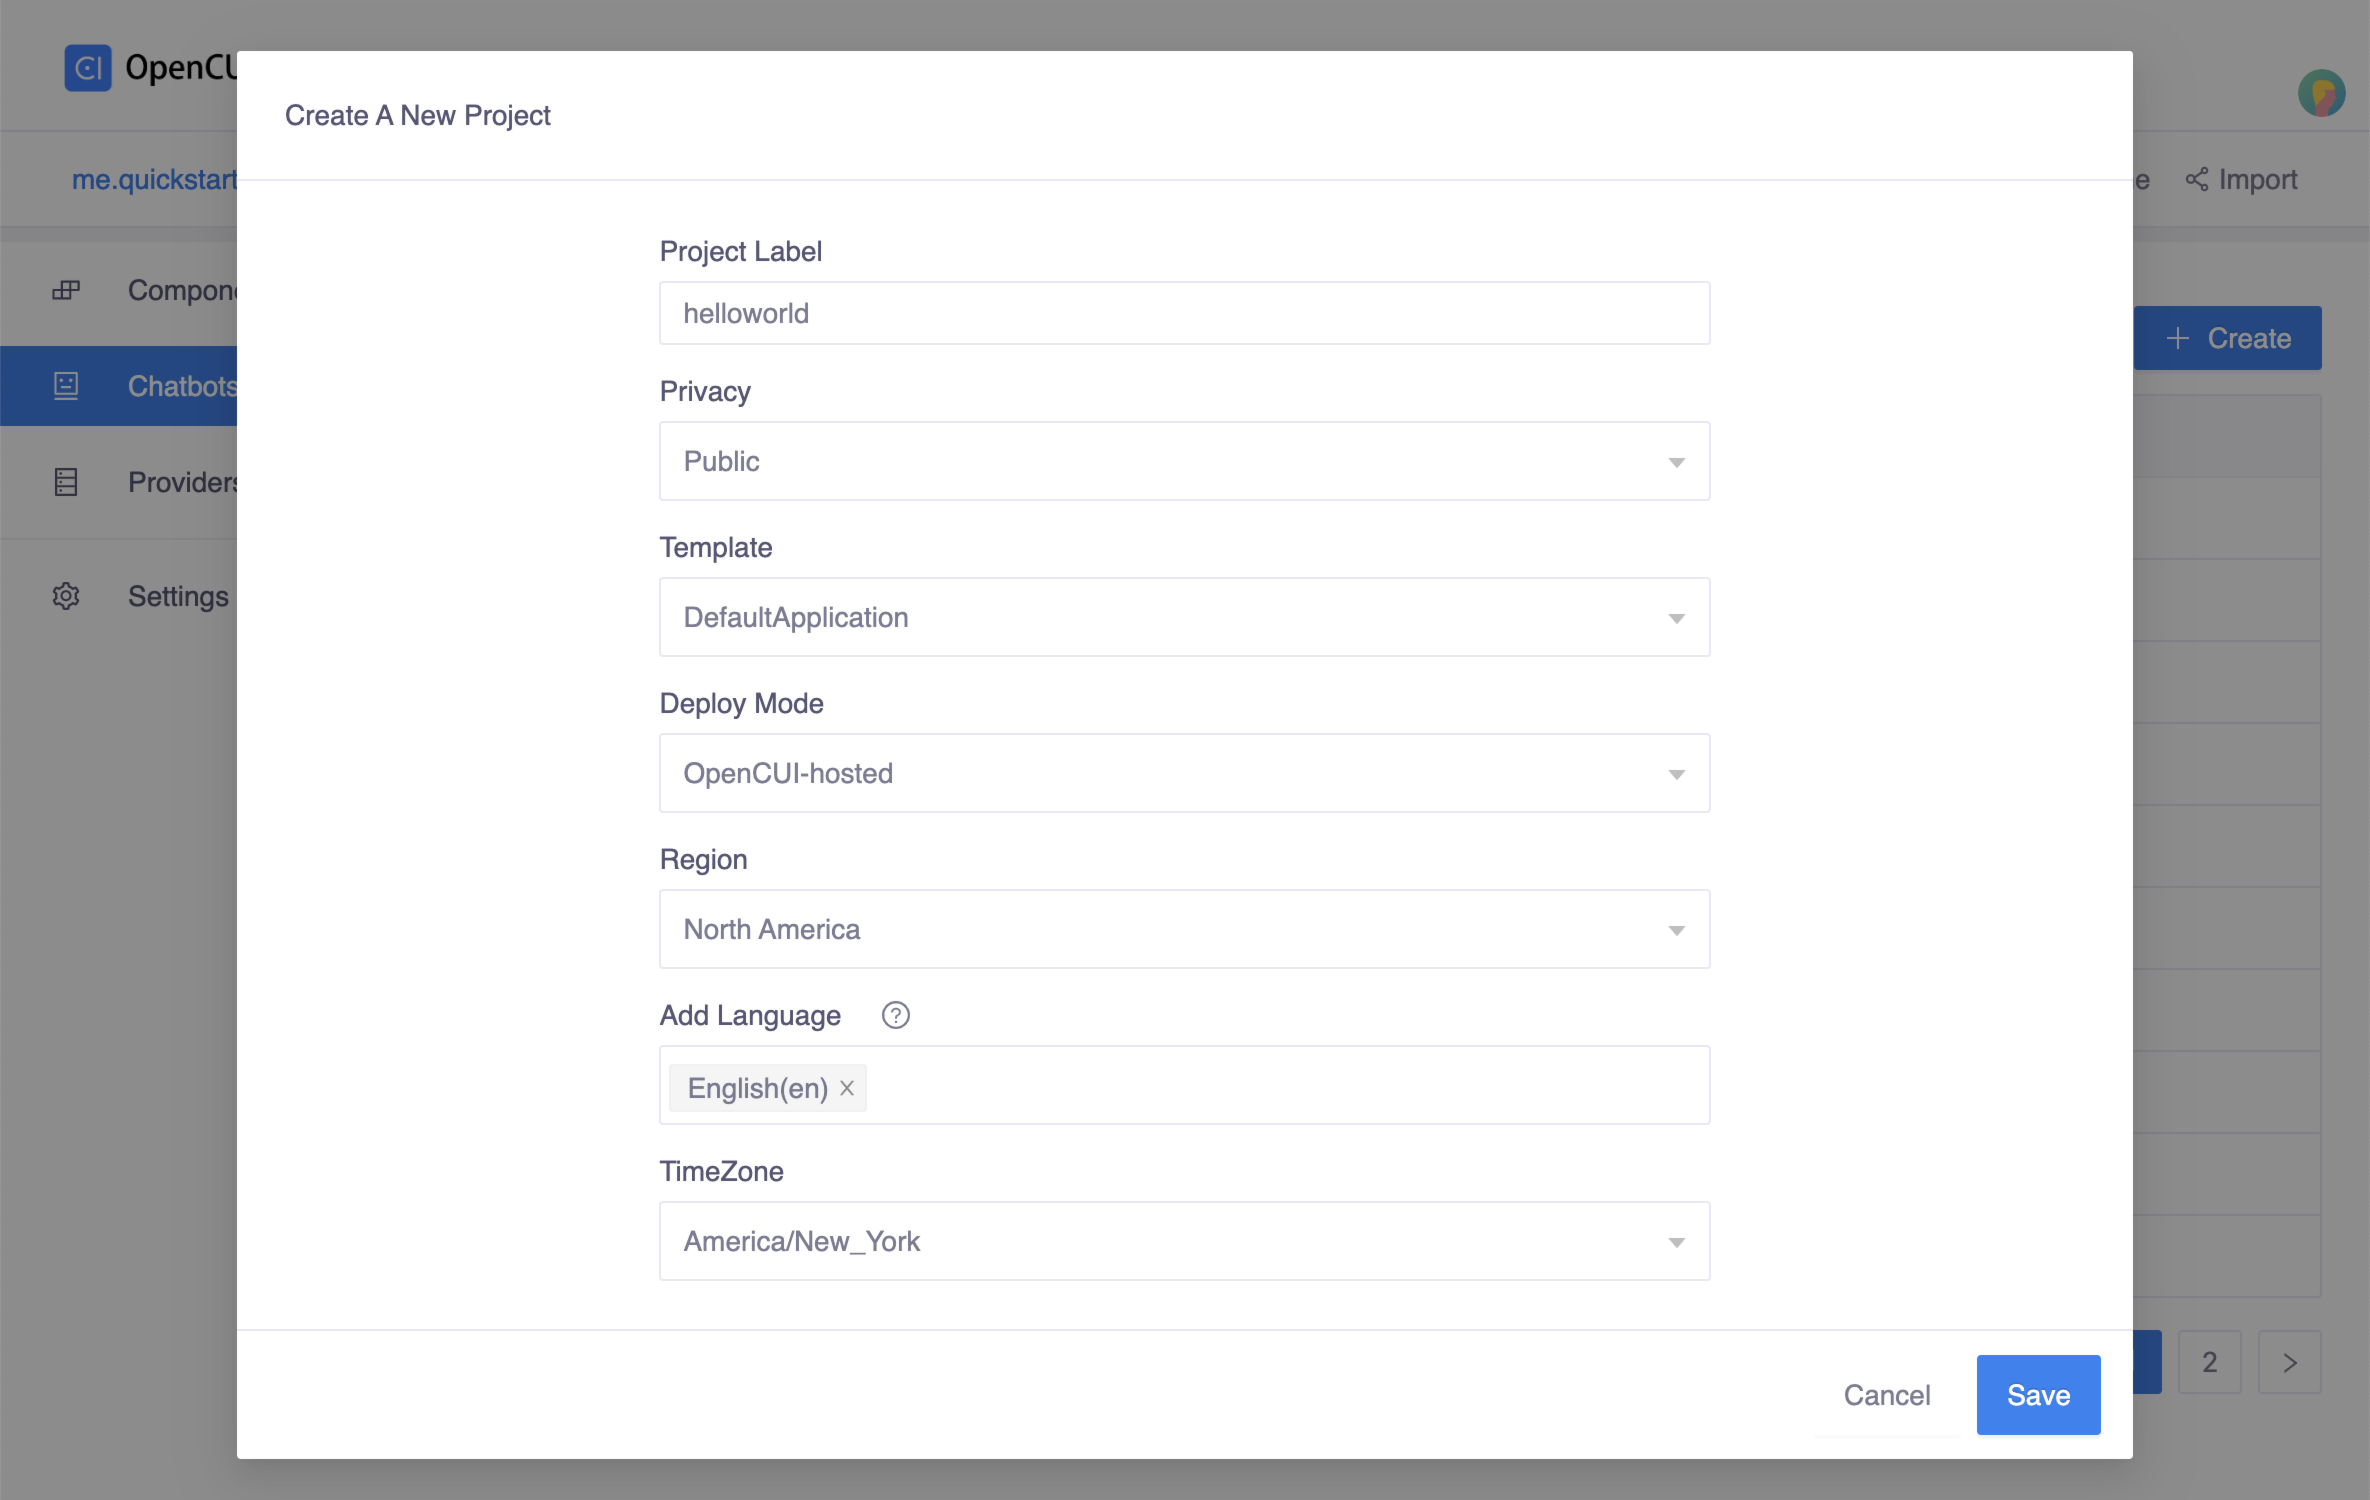 Create popup window
- Enter your chatbot's label in the Project Label field, for example
Import service
component_0915into chatbothelloworld. Go to servicecomponent_0915, click Import on the second navigation bar. In the popup window, select your chatbot, in this case we selecthelloworld, and save.Switch to your
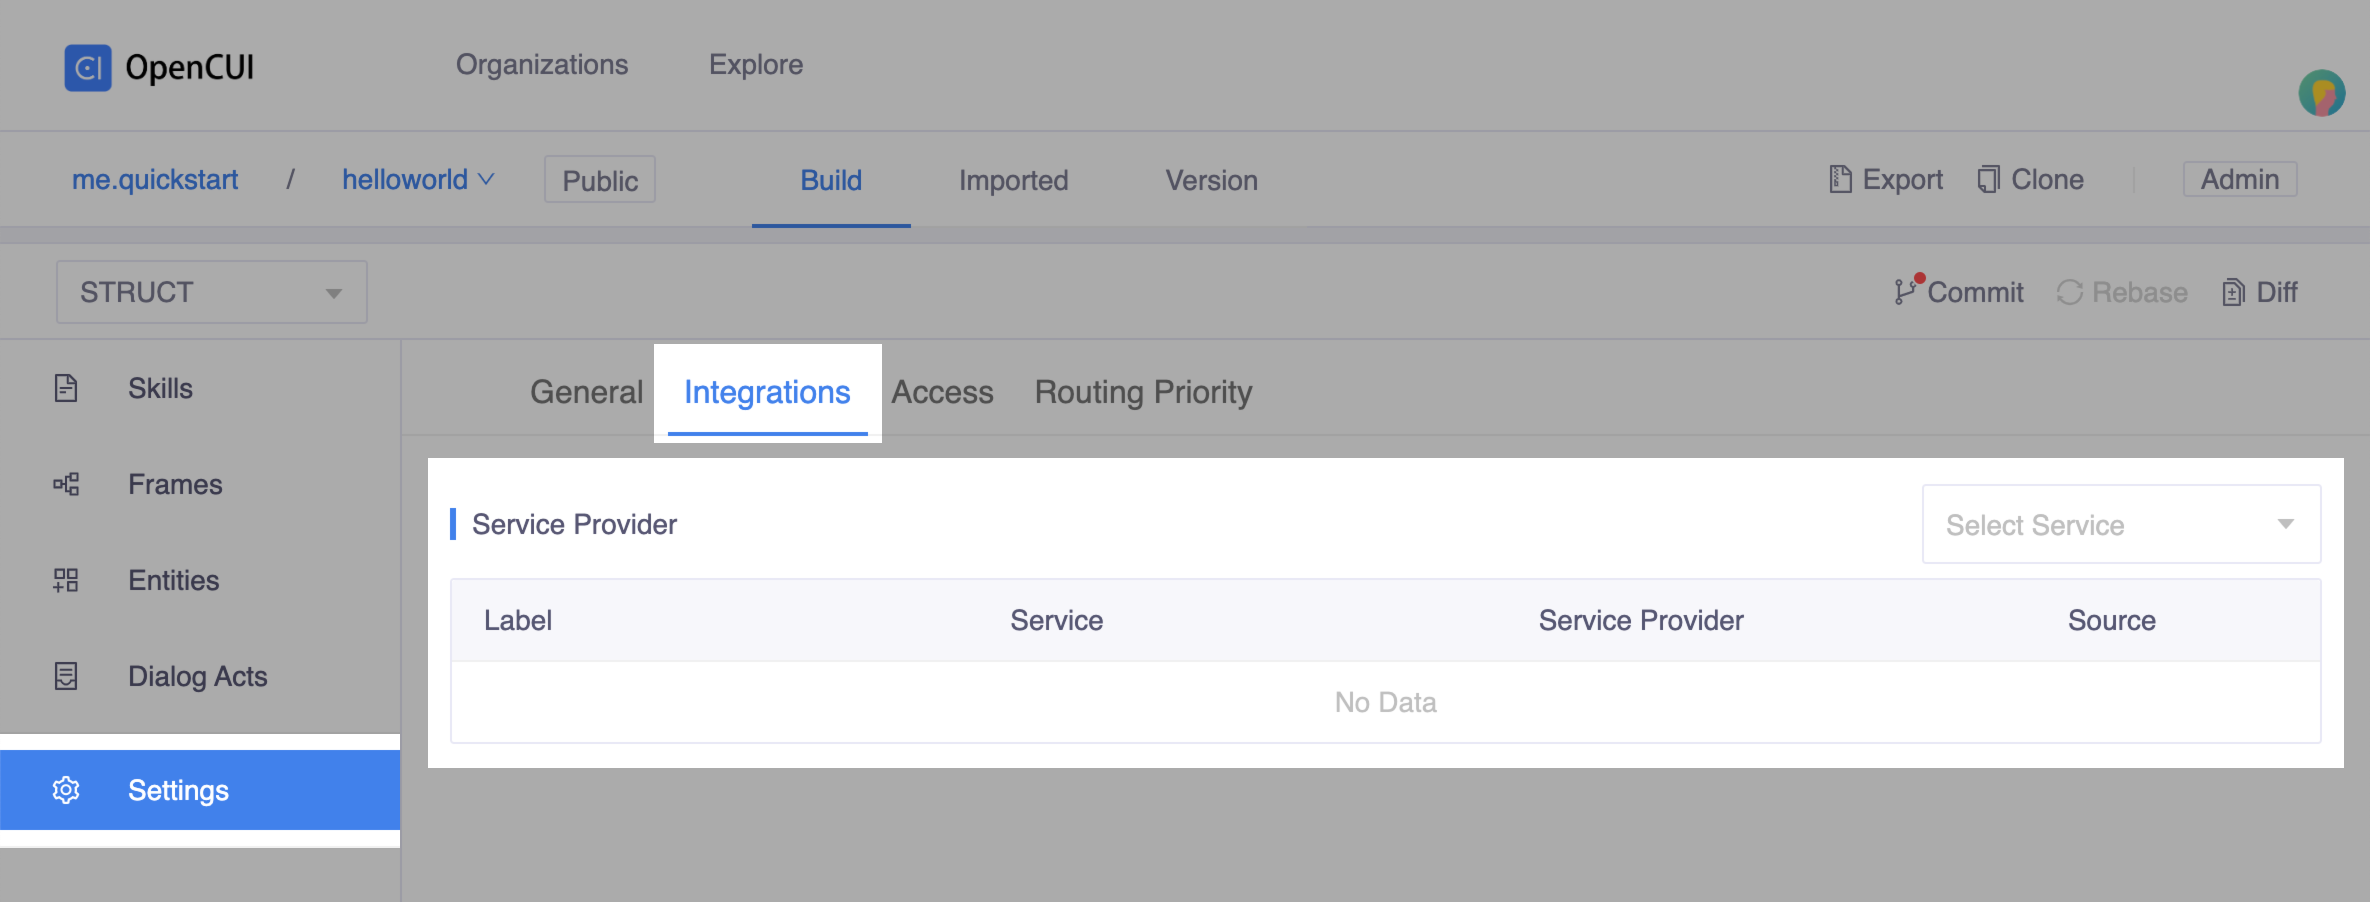
helloworldchatbot, wiring the implementation and configure the integration.- Heading to Settings page, in Integrations tab, select the service interface you just imported and the native provider that implements it.
- Finish the configuration form and save.
 Wired the implementatio
 Configuration popup window
Don't forget to merge your latest changes to master.