Deploy a chatbot
Once you have developed and tested your chatbot, you can deploy it and start serving your user on one or more channels. A channel is an OpenCUI extension that connects to applications where users can send messages, which can be in the form of text messages (such as Messenger, iMessage, and RCS), or in the form of voice (such as Echo or Siri).
Let's use Messenger as an example to understand how it works. When a user sends a message using the Messenger client software, the Messenger platform gets the messages and forwards that message to the endpoint that your channel implementation is listening on. Once your chatbot receives the user input, it produces output and asks the channel implementation to send the reply to the endpoint that the Messenger platform is listening on, which will then forward the reply to the end user. Clearly, you need to configure both the external channel platform and OpenCUI so that they know where to send messages to.

Before you start
The steps in this guide build upon the chatbot created in one of the previous guides.
Set up channels
On OpenCUI, it is possible to configure multiple channels of the same or different channel types. In this guide, we will show you how to configure a Messenger channel. You can repeat this process for any number of channels you like. To learn more about each type of channels, please refer to the Channel section.
Create a Messenger channel
In the Settings tab and under Integrations page.
In the Deploy service provider section, select
io.opencui.channel.IChannelfor setting up channel.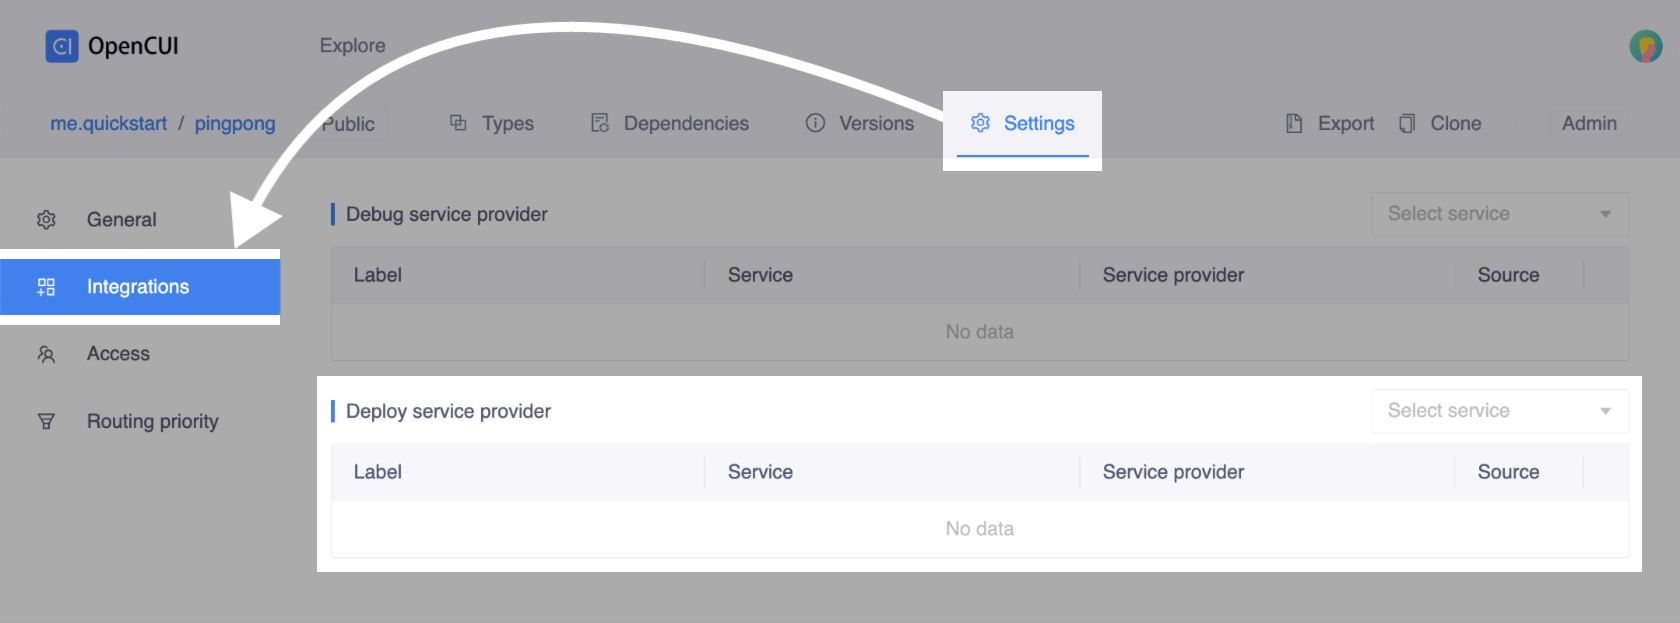 Deploy service provider section
A popup window will appear. In the Service provider dropdown, select
io.opencui.messengeras channel type. Then the necessary configuration information required by the Messenger channel will be displayed in the same window.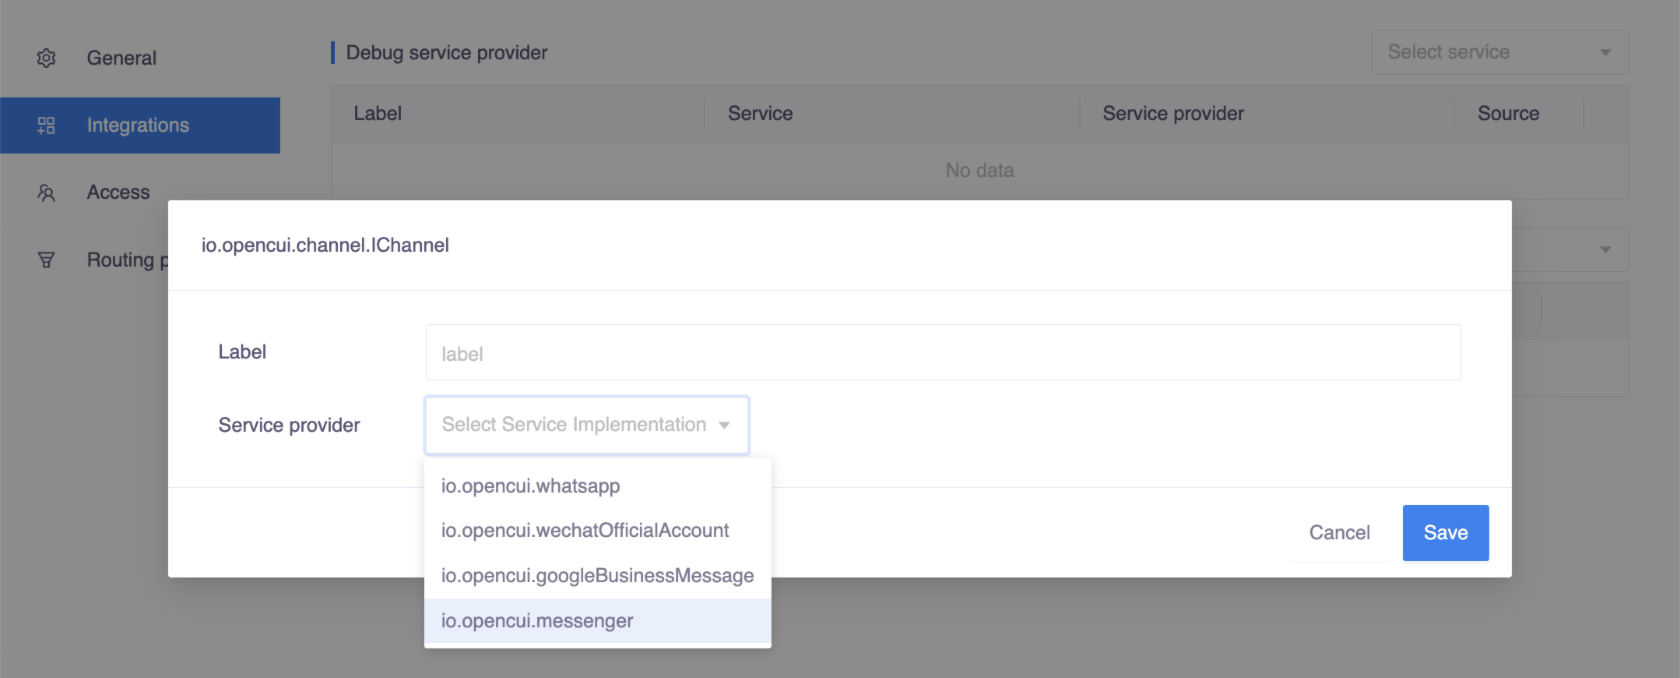
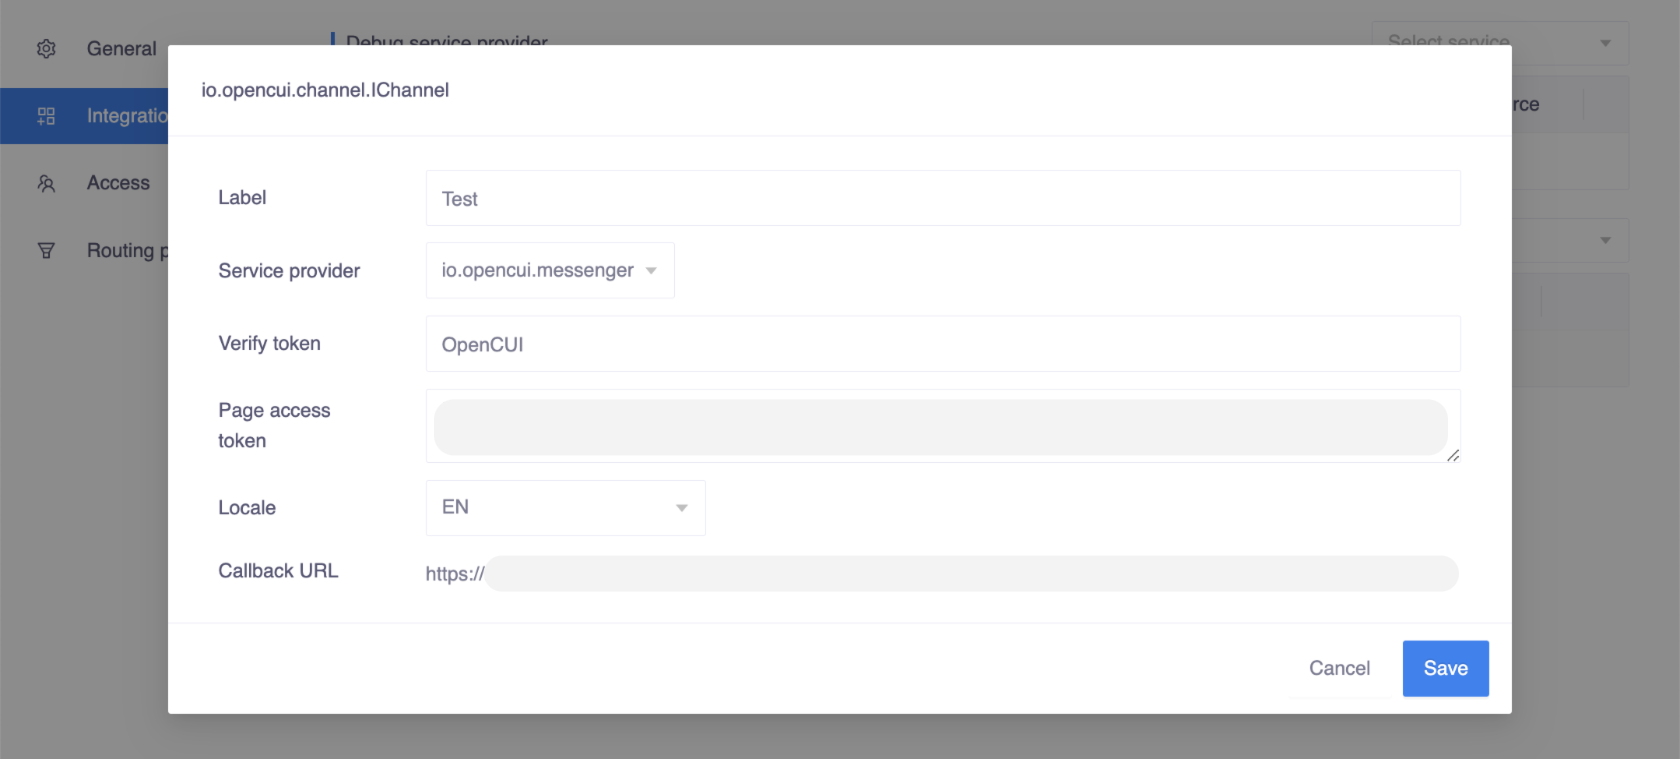
Configure the Messenger channel
To integrate the Messenger into OpenCUI, both sides need to be set up simultaneously.
Follow the steps in Set up Messenger to set up your Meta application, remember to copy the token from generate access token, as you will need that here in OpenCUI.
Configure the following settings in the window just popped up and save:
- Label: Set a label for this channel type, should be unique in the chatbot.
- Verify Token: Enter any private token you desire. This value will be needed to configure Messenger Webhook on Meta's side.
- Page Access Token: Enter the access token you copied from Messenger when you set it up.
- Locale: Select a locale that determines the default language used by your chatbot.
- Callback URL: Copy this value after setting the label and locale. This will be needed to configure Messenger Webhook.
Deploy chatbot
After you finish configuring your channel, the next step is to deploy your chatbot into the OpenCUI production environment, since channels are only supported there. Furthermore, only the master branch can be deployed to the production environment, so make sure that you merge all your changes into the master branch before deploying.
Under Versions tab, and deploy your chatbot by clicking Deploy button.
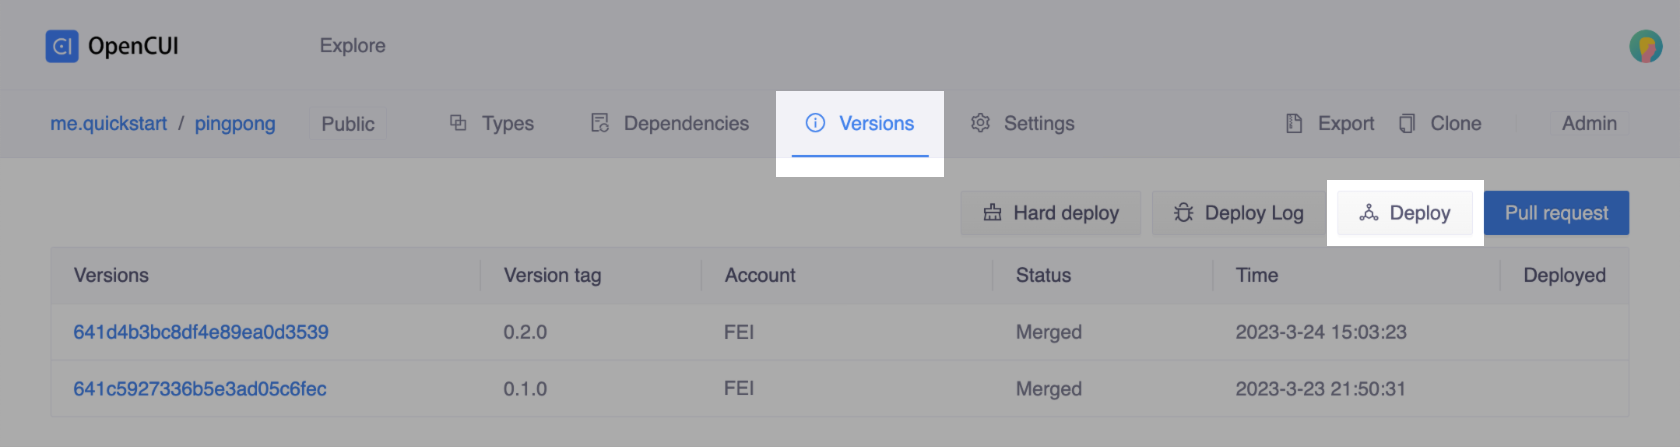
If the deployment is successful, a Green Checked Icon will appear to indicate the currently deployed version.

You can now use the Callback URL and Verify token values that you copied earlier to complete the setup of your Meta app by following steps in the Finish Messenger setup, and start interacting with your chatbot in the Messenger app.