PostgreSQL provider
OpenCUI also supports the backend component in form of PostgreSQL provider. The backend component can be declaratively defined in two steps: First, create database tables needed by service by adding storage annotation to frames, secondly, provide function implementation using SQL to express business logic. Using backoffice annotation, you can specify how the operation team can access these tables via backoffice.
There are several advantages of using the backend component approach to build a service provider:
- In addition to declaratively building a database as a content management system, the OpenCUI backend component allows you to implement the service declaratively using SQL. This makes it possible for the business analyst to build the backend.
- Since tables are created based on the data type in the API schema, no explicit conversion code is needed, and rows in the table or view in the database are automatically converted into an object in OpenCUI.
- The admin interface or backoffice can also be automatically created based on annotations so that the operation team can use backoffice to provide the service.
- Backoffice components can be reused by cloning for OpenCUI hosted solutions.
Create a PostgreSQL provider
To create a PostgreSQL provider:
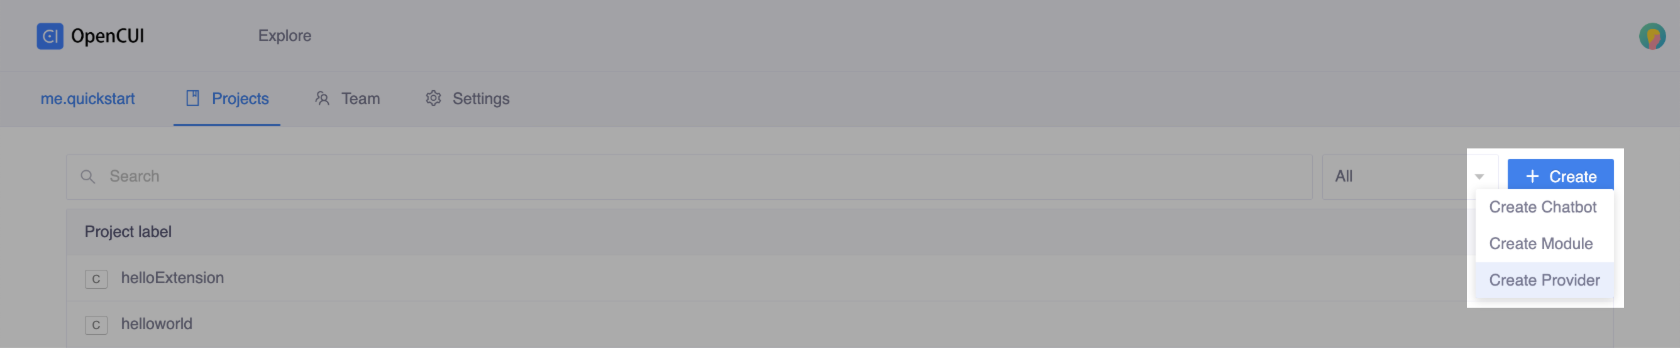
Within an org, click Create on the right side and select Create provider.
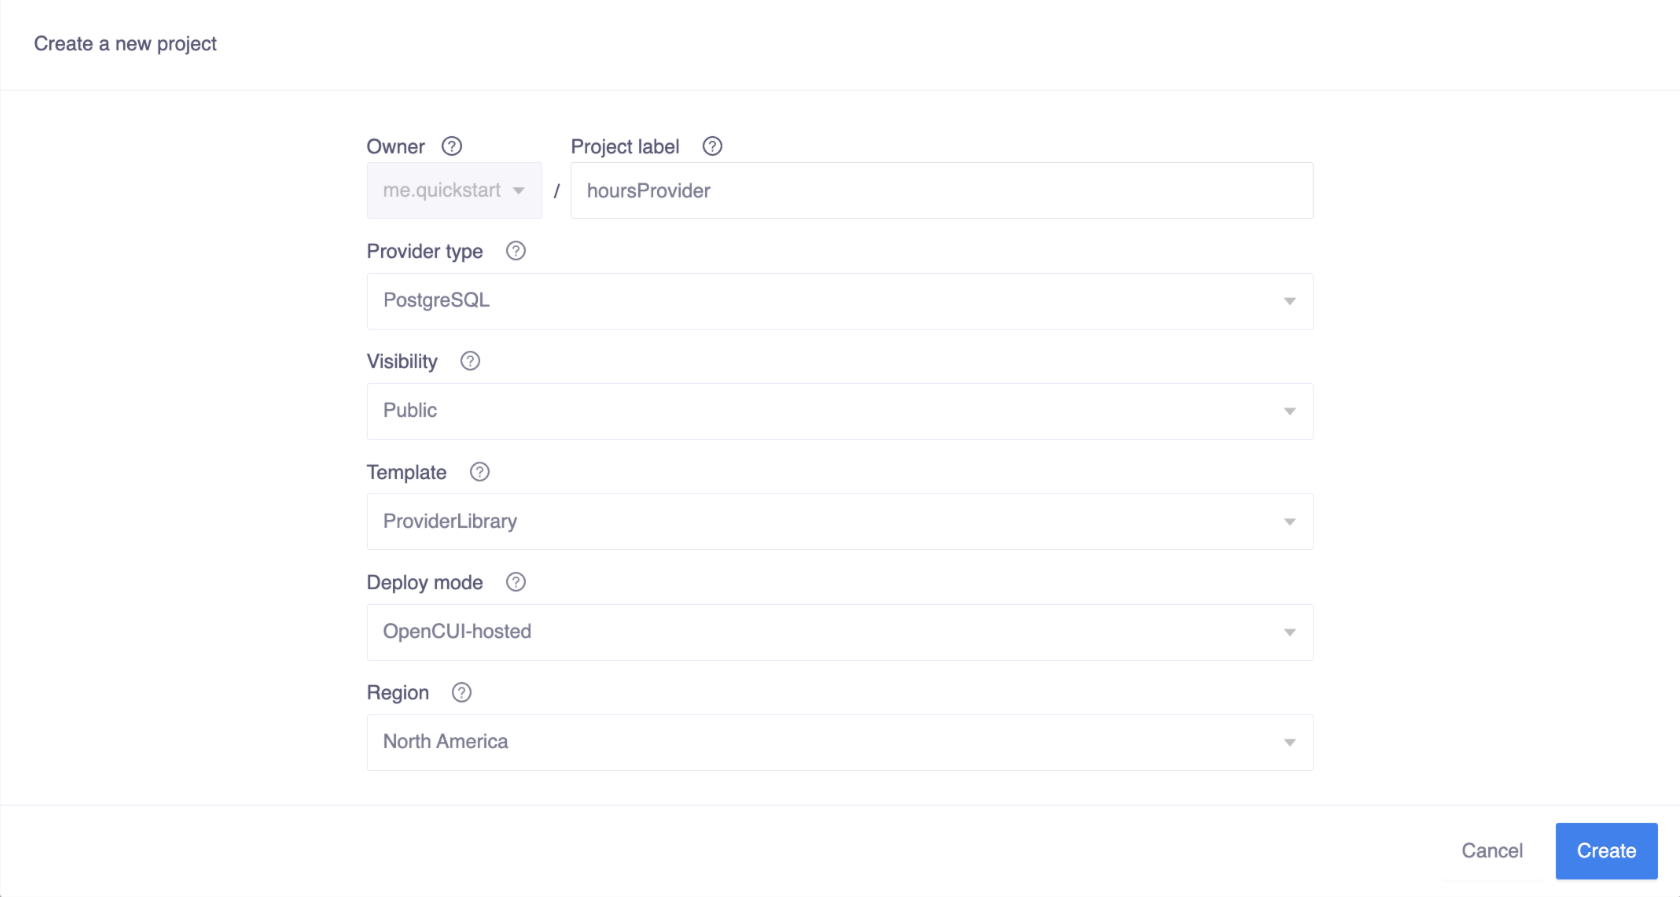
In the Create popup window, complete the form for basic settings:
- Enter a Project label for your PostgreSQL provider.
- Select PostgreSQL in Provider type field.
- Select OpenCUI-hosted in Deploy mode field as currently we only support hosted mode for PostgreSQL provider.
- Specify a Region for your PostgreSQL database.
- Click Create.
Import service interfaces
When you are done with creation, you need to import which service interface this PostgreSQL provider implements.
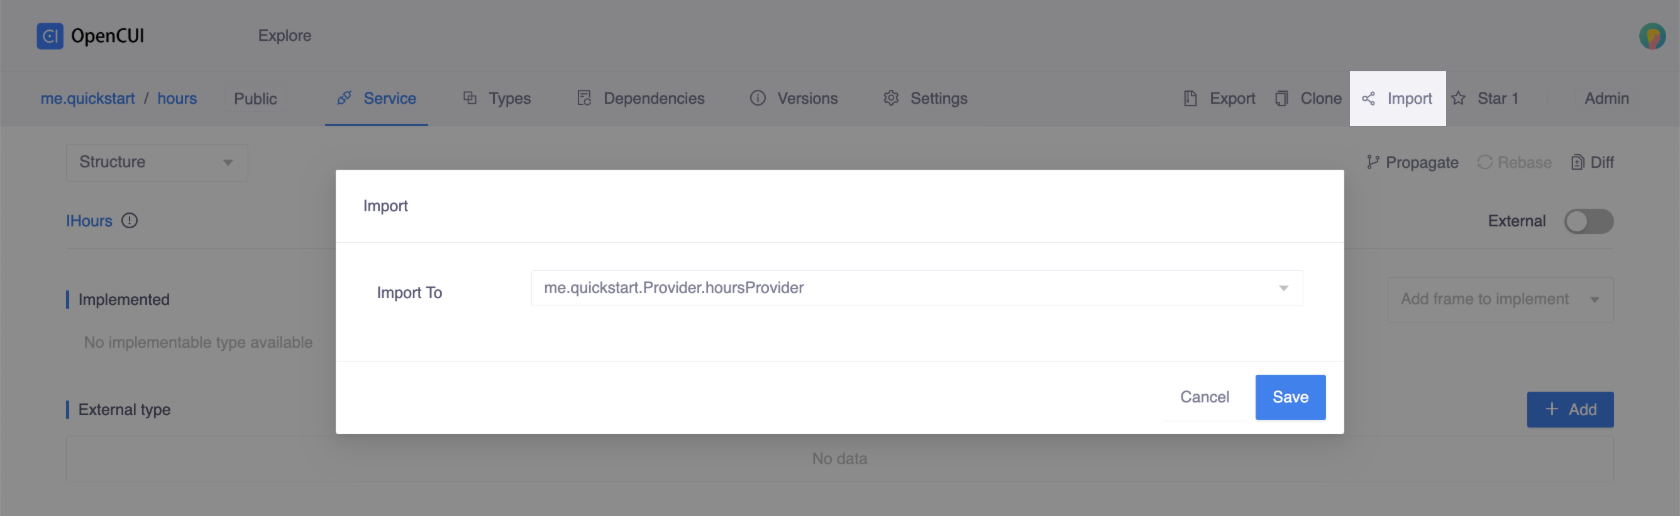
To declare the service interface:
- Enter the service component you want to implement.
- Click Import on right side of the second navigation bar.
- In the popup window, select your PostgreSQL provider and Save.
Create tables
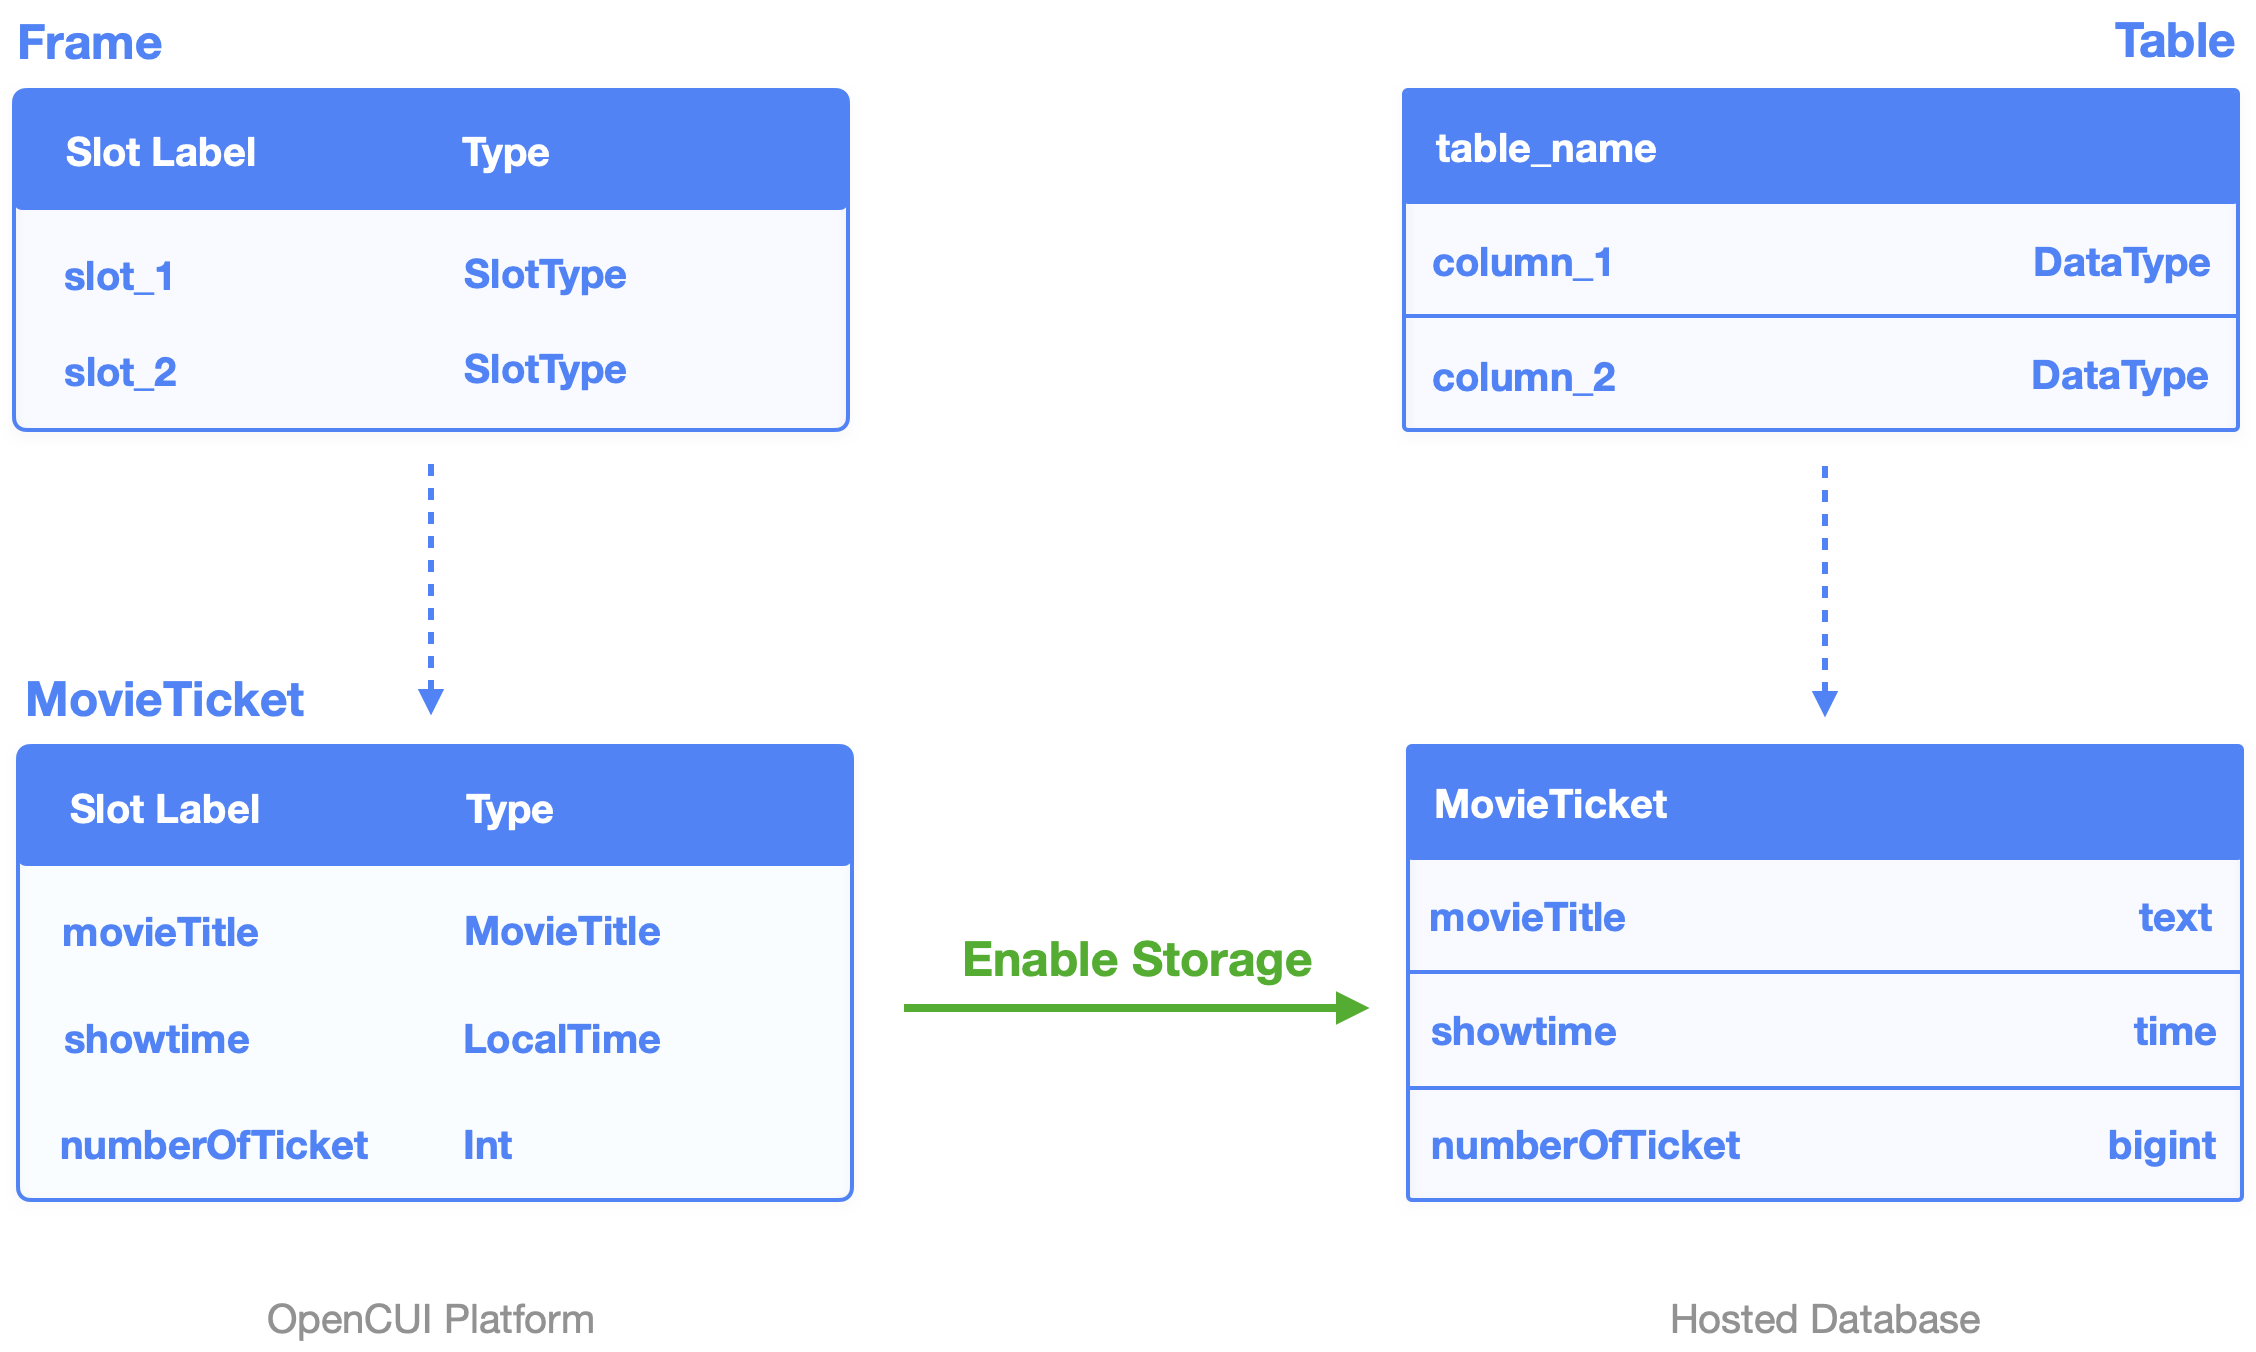
With postgres provider, it is very convenient to create a database without the SQL CREATE TABLE statement. All you need to do is create frames or select existing frames (Local or Imported) and Enable Storage.

A frame represents a table, and slots in this frame represent the table columns:
- Frame label specifies the name of the table.
- Slot label specifies the name of the column in the table.
- Slot type maps to SQL data type that specifies the type of data the column can hold.
You can use Storage Annotations to declare constraints which are used to specify rules for the data in a table. This ensures the accuracy and reliability of the data in the table. Constraints can be column level or table level, therefore, storage annotations can be slot level or type level. Slot level apply to a column, and type level apply to the whole table.
If the table needs to be accessed by the operation team on the admin interface, you can also specify it through Backoffice Annotations.
When the postgres provider Deploy button is triggered, OpenCUI platform will update the table structure in the corresponding hosted database.
Need to know
When creating a table in hosted database, OpenCUI will automatically add two columns, ID column and created_at column. So, normally, you don't need to add these two slots in a frame, but you can if you need to.
Data types
Data types are a way to limit the kind of data that can be stored in a table: integer, character, date and time, binary, and so on. For sure, there will be some type conversion between OpenCUI platform and SQL date types. For an overview of the available data types:
| OpenCUI Platform Type | SQL Data Type Examples |
|---|---|
| kotlin.Boolean | boolean |
| kotlin.Float | double precision |
| kotlin.Int | bigint |
| kotlin.String | text, char(n), varchar(n) |
| java.time.LocalDate | date |
| java.time.LocalDateTime | timestamp without time zone |
| java.time.LocalTime | time without time zone |
| java.time.DayOfWeek | text |
| java.time.Year | bigint |
| java.time.YearMonth | date |
Types that are not specified in the table above will be considered as string types, including custom entity types. String types can be one of text, char(n) and varchar(n), where n is a positive integer. For more information about such types in PostgreSQL, click Character Types.
If the type conversion is deterministic, you don't need to worry about it, the SQL data type will be displayed automatically. Otherwise, you need to specify one.
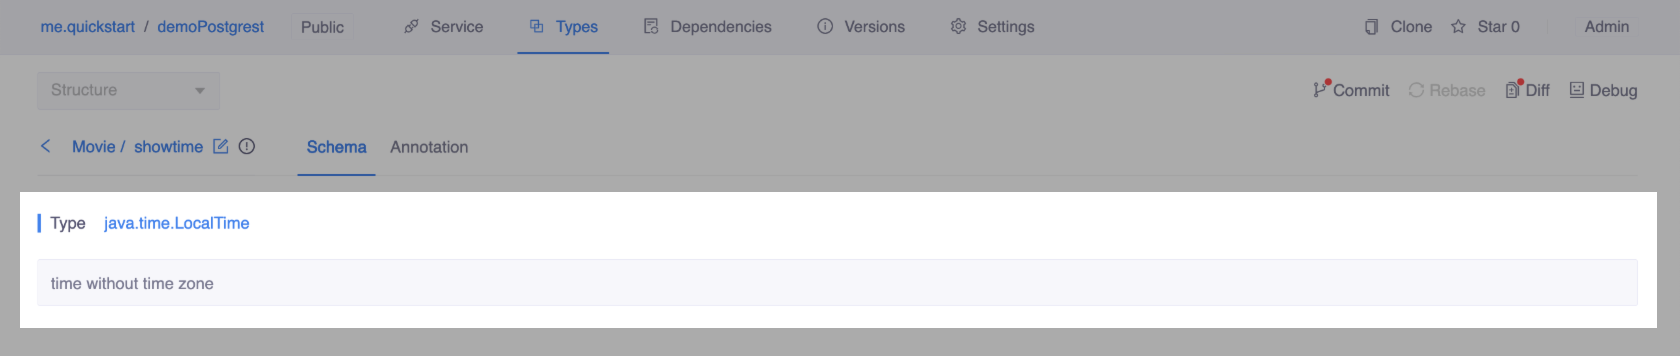 Type conversion is deterministic
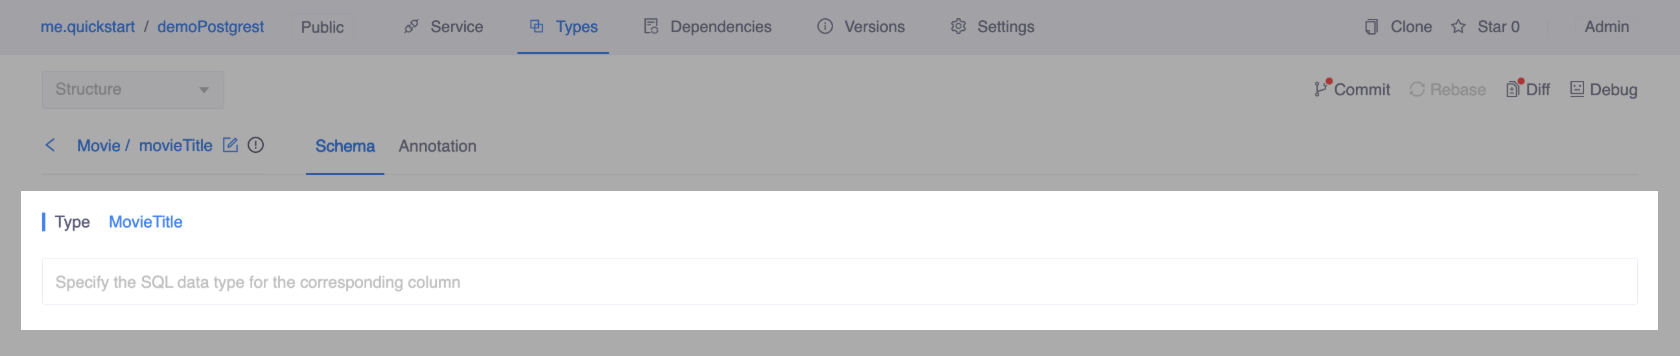 Need to specify data type
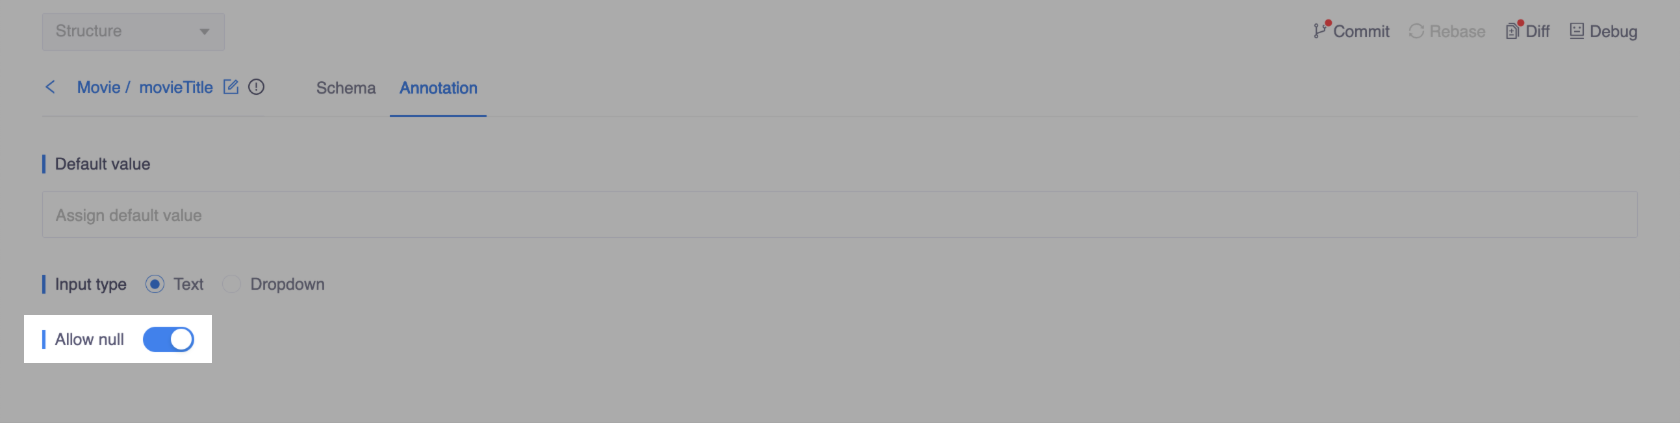
Allow null
By default, a column can hold NULL values. So the Allow Null toggle is enabled by default. To enforce a column to NOT accept NULL values, disable it. For more information about this constraint in PostgreSQL, see Not-Null Constraints.
Default value
A column can be assigned a default value. When a new row is created and no values are specified for some of the columns, those columns will be filled with their respective default values. The default value can be a constant or an expression. A common example is for a java.time.LocalTime slot, you can set default value as now(). For more information about default value in PostgreSQL, click Default Values.

Unique
Unique ensure that the data contained in a column, or a group of columns, is unique among all the rows in the table. It is a type level annotation, you can have many unique constraints per table.
You can set one slot in one unique constraint, this specifies that all values in this column are different. You can also set a group of slots in one unique, this specifies that the combination of values in the indicated columns is unique across the whole table, though any one of the columns need not be (and ordinarily isn't) unique. For more information about unique constraints in PostgreSQL, see Unique Constraints.

Input type
Input type is a backoffice annotation, indicating how the operation team input data values on the admin interface. Here are three options: text, dropdown and media.

Text: An input box for the data value, allowing to enter any content.

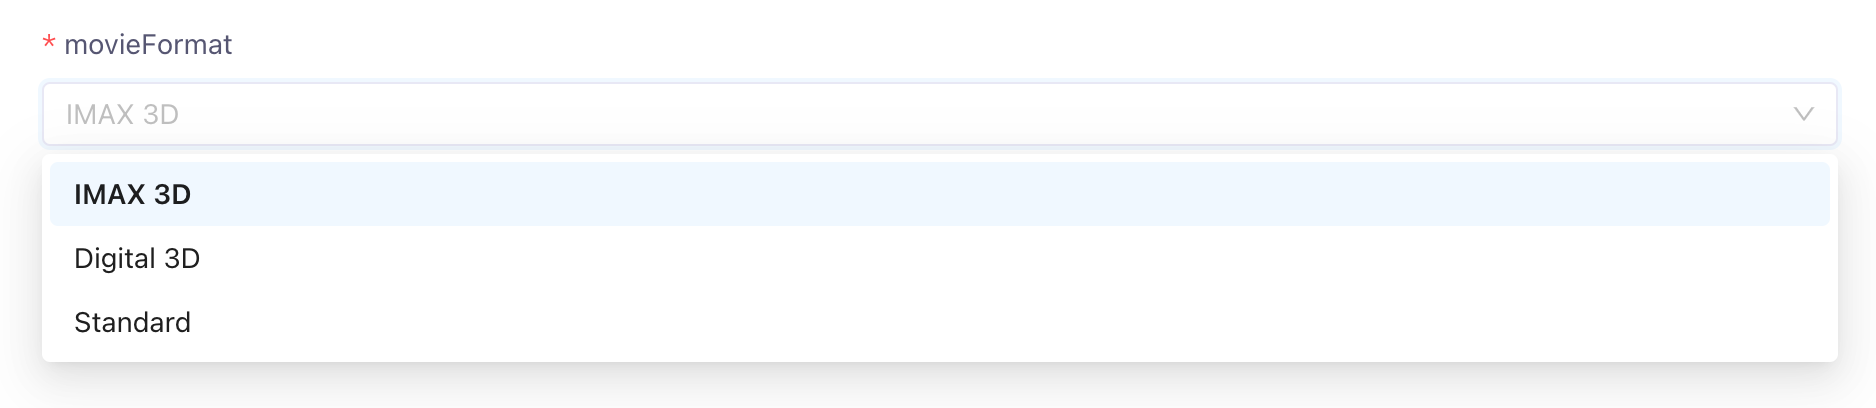
Dropdown: A dropdown menu for displaying choices. To select value from options makes it easier for operators to input legit and compatible value.
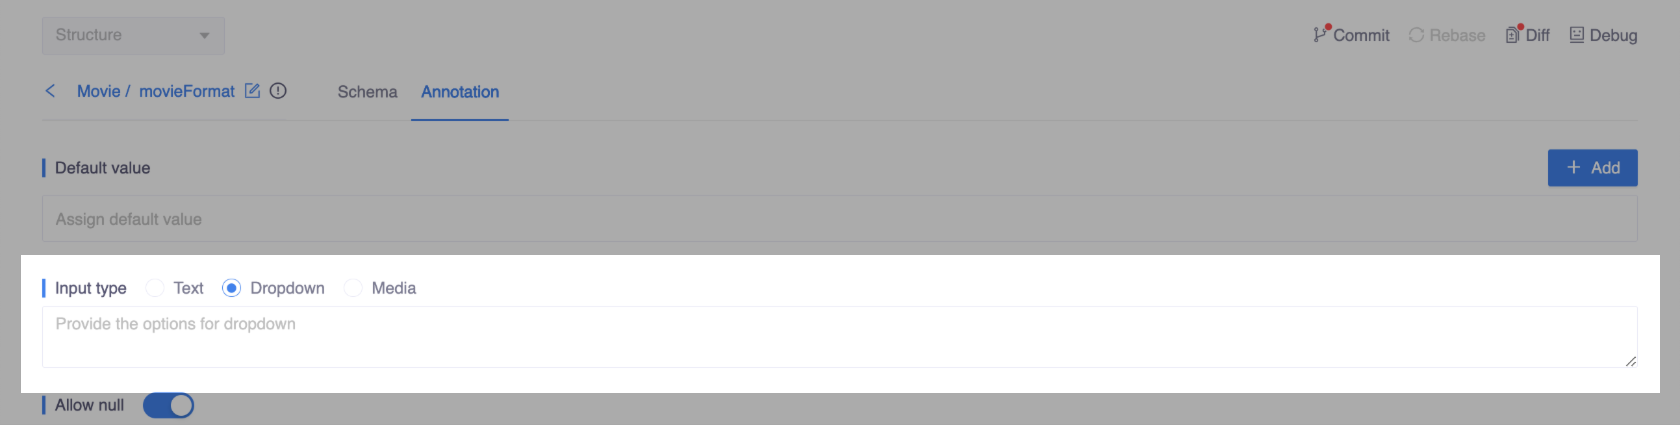
Currently dropdown only supports static options, which can be defined via JSON:
- JSON Representation
json[ { "id": "value1", "name": "display1" }, { "id": "value2", "name": "display2" } ]- Fields
Fields Type Description idstring Required. Stored as value in the database. namestring Required. Displayed in backoffice (admin interface). For example, you can provide a dropdown list statically via JSON like this:
json[ { "id": "imax3d", "name": "IMAX 3D" }, { "id": "digital3d", "name": "Digital 3D" }, { "id": "standard", "name": "Standard" } ]Then operators can select the value from the select component in backoffice like this:
Media
By setting input type to media, operators can upload pictures by selecting or dragging in the backoffice and the URLs of pictures will be stored in cells automatically. When you need to send rich messages to users, you can use these URLs for displaying.
For example, there is a slot called photo of which input type is media on OpenCUI. In its corresponding column in backoffice, you can upload a picture and view the picture in the table.
 Figure 1: upload pictures
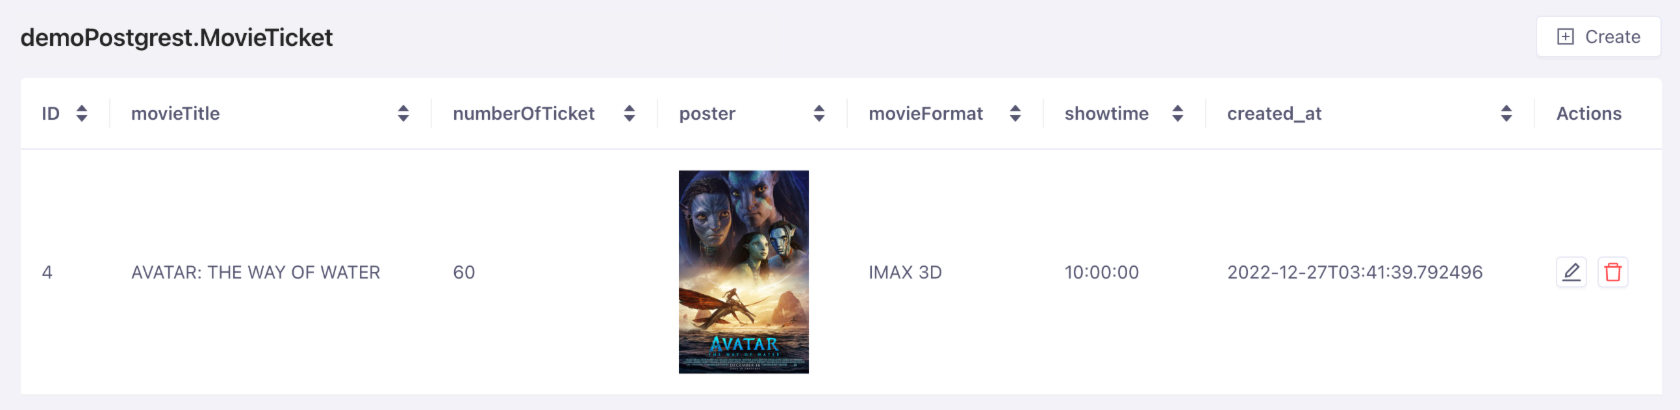 Figure 2: view pitures in the table
Need to know
When the SQL data type is one of text, varchar and varchar(n), you can choose Media.
Provide function implementation
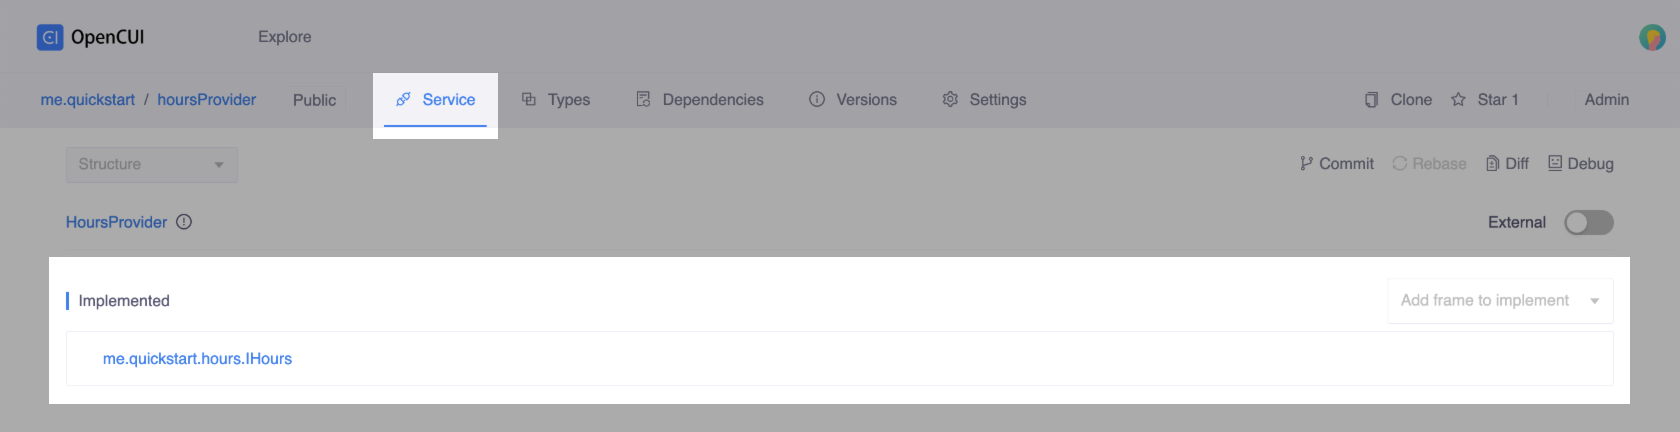
To provide function implementation, you need to add service interface to implement first.
Back to your PostgreSQL provider, and head to Service page from the navigation bar. In the Implemented section, select the service interface you want to implement.
Then all the functions on the service interface will be shown. To implement a fucntion, click one of the functions in Functions section. In the function popup window, you can provide the implementation in Provider Dependent script language or just in Kotlin. No matter which language you will be using, OpenCUI provides a built-in Auto Completion feature to help you with your implementation.
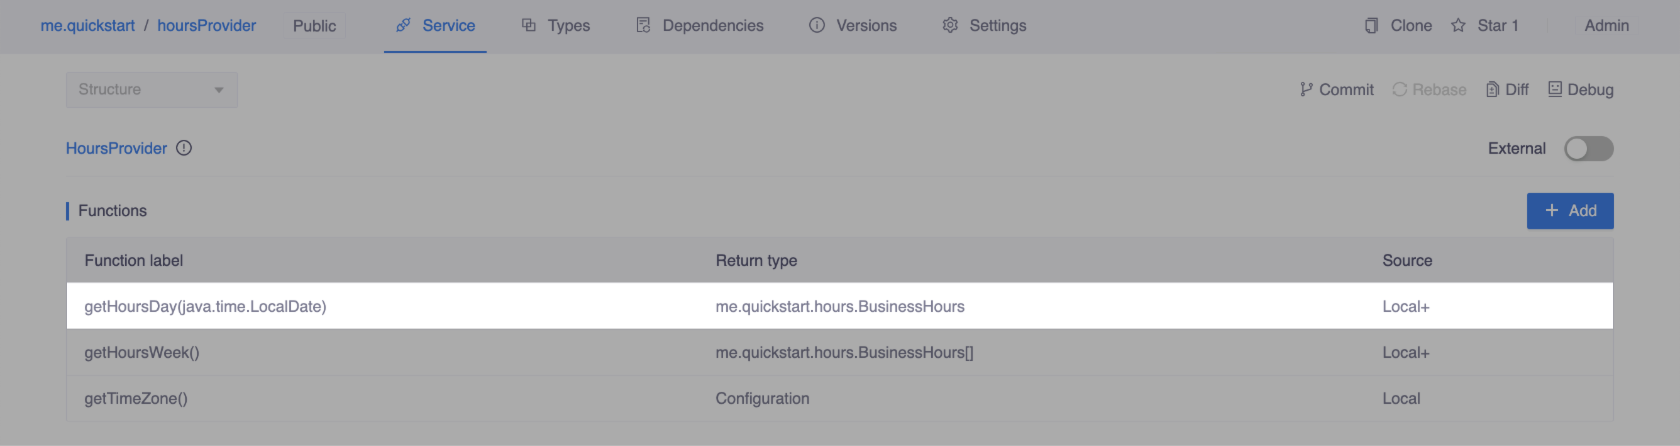 Click a function
 Provide implementation
PL/pgSQL
For PostgreSQL providers, the provider dependent language is PL/pgSQL. If you are familiar with SQL, writing SQL commands within a PL/pgSQL function will be easy.
For example, if you've stored your customers' information in your database and you want to get a customer's name by their user ID, which is an input parameter named userId_input, the code will be like this:
DECLARE
    result text;
BEGIN
    SELECT name FROM "Info" WHERE "userId" = "userId_input" INTO result;
    RETURN result;
END
Besides, PL/pgSQL language also supports simple loops and conditionals.
Need to know
If the return value is not a storage-enabled frame and the type of slot in the frame is builder-define entity or kotlin.String, check whether the type of its corresponding column is text in PostgreSQL. If not, use ::text to convert the type of column into text.
For example, when calling a function, it returns sets of dishId and dishName values. The type of dishName is customized entity and its corresponding column is varchar(50) in PostgreSQL. Add ::text behind dishName to convert varchar(50) to text, so that the conversion between OpenCUI and PostgreSQL can work smoothly.
BEGIN
    RETURN QUERY
    SELECT "dishId", "dishName"::text FROM "dishItem";
END
When the function returns a set of values of composite type, we convert the composite type back to a frame, so you can display or use these values in the OpenCUI environment. When returning values, be sure to follow these rules.
- The types of slots in the the frame should be compatible with the types of return columns in the same index. For example, if the types of slots in the frame are [kotlin.Int, kotlin.String], the SQL data types of return columns should be [bigint, text] instead of [text, bigint].
- The labels of slots in the the frame and the names of columns in the same index can be different. For example, if the labels of slots in a frame are [id, name], the names of return columns can be [userId, userName].
Kotlin
In OpenCUI, function can always be implemented in Kotlin, known as native functions. For more information about Kotlin, see Kotlin.
Function Console
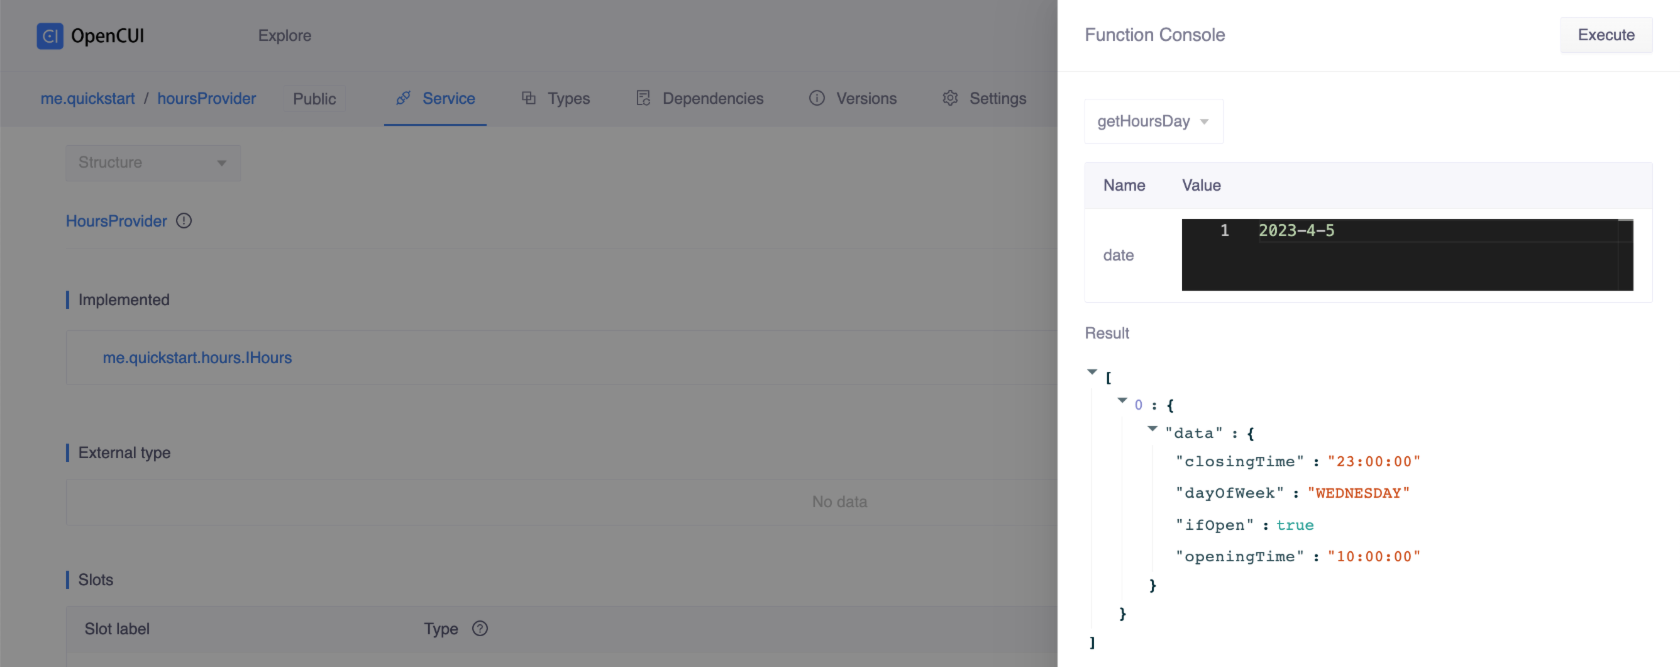
When you finish implementing the function, before you wire it to the chatbot, you can verify whether your implementation is as expected through Function Console. Currently, function console can only test Provider dependent implementations. To use function console, following these steps:
Deploy your postgres provider. In the navigation bar, select Versions tab, click Deploy backend in the upper-right corner of the Versions area. Make sure that all changes including function implementations are merged into master and deployed successfully.

After deploying, switch to Service tab. In the upper-right corner of the Service area, click Debug.

In Function Console, select a function and pass values to parameters.
- If you want to pass null to a parameter, just leave it empty.
- If the type of a parameter is entity, you can type its value directly.
- If the type of a parameter is frame, please use JSON format.
Click Execute, then you can see the returns in Result section. As shown below, this function will return the business hours on a day.
Access Backoffice
Once the table structure has been declared in OpenCUI platform, the hosted database can be accessed through Backoffice (the admin interface). To access the actual data source, you need to deploy the postgres provider first.
- In the navigation bar, select the Versions tab.
- Click Deploy in the upper-right corner of the Versions area.

When the Deploy backend button is triggered, OpenCUI platform will update the table structure in the corresponding hosted database. Then, you can log in to the backoffice to access the actual data source through Postgres provider configuration information.
- Switch to Settings tab, then in the Backoffice section, you can get the configuration information.
- Copy and paste the URL to your browser, use Admin Email and Admin Password to log in to backoffice.
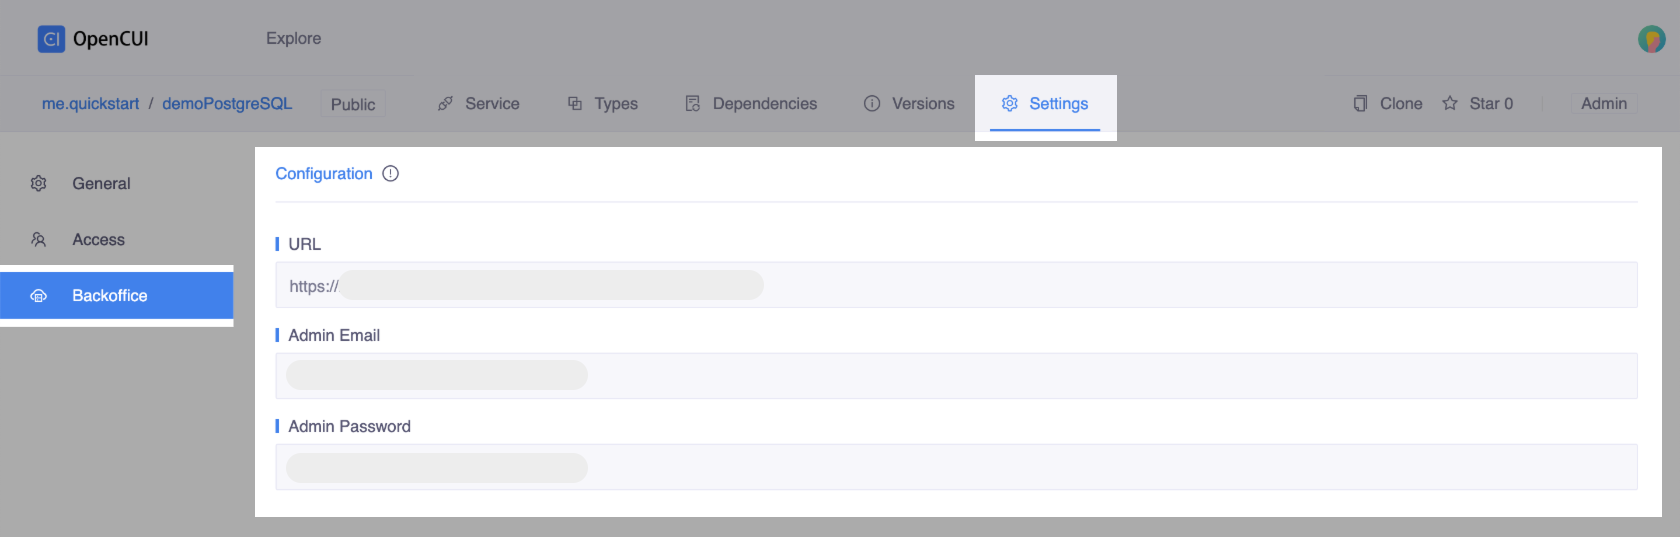 Configuration information
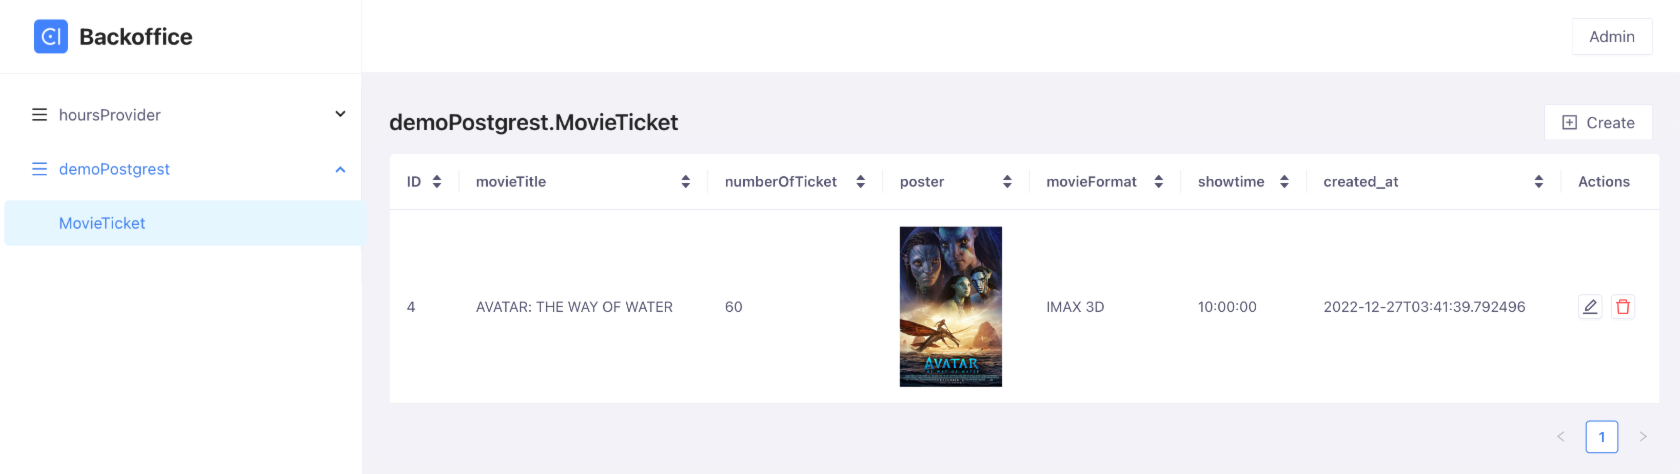 Backoffice, the admin interface
Caution
Be very careful with table schema changes, remember to manually modify data in backoffice that is no longer compatible.
Wire to Chatbot
Once you have a PostgreSQL provider running, you need to wire this implementation to its service interface in your chatbot that allows chatbots to communicate with data source. To wire PostgreSQL provider to chatbot, you can follow these steps below:
Declare service interface implemented by this PostgreSQL provider in chatbot. It means you need to import service component into your chatbot. Click into the service component, and import it into your chatbot.

Switch to your chatbot, wire PostgreSQL provider to its service interface.
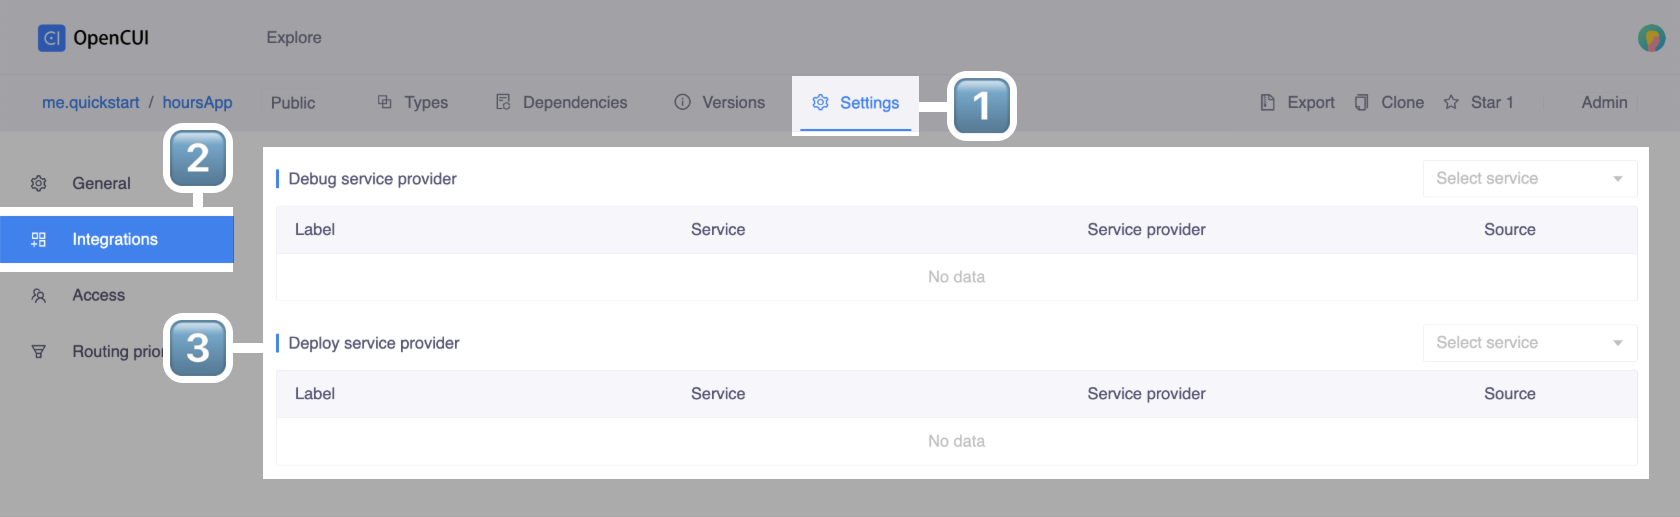
- Head to Settings page from the navigation bar.
- Switch to Integrations tab, in the Debug service provider section or Deploy service provider section, select the service interface you just imported and the PostgreSQL provider that implements it. At the same time, a label needs to be added to show different integration.
After wiring the PostgreSQL provider, you can edit it at any time. However, it's important to remember to merge your latest changes to the master branch and redeploy the provider in order to ensure that your chatbot is using the most up-to-date version.