Version control
Motivation
Work collaboratively with multiple team members, you probably work together with your teammates in a shared folder on the same set of files, which always keep in sync automatically and instantly display the changes across all users' instances. It easy to work with but operates only on single files. Meanwhile, only one user can work on a file at a time, because when editing the same file at the same time, there will be conflicts. It is very easy to accidentally overwrite an important file you never mean to.
So OpenCUI provides a Version control system, which do not rely on a shared central project and allow users to maintain independent project and communicate revisions via changesets. Everybody on the team is able to work absolutely freely on any project at any time. You know what exactly is different in these versions, your teams work faster and smarter.
For more information about providing team members with access, see Access control.
Working with branch
OpenCUI platform is a version control system. You can collaborate with multiple members independently without affecting others. When you start building, such as adding or modifying some instances, a Branch is automatically created for you based on the current master(we call it Base). Then you can work on this branch in isolation from changes that other people are making to the project.
Branch changes
While you are working, you can compare the changes you made with Base through Diffs. During a comparison, if you are not satisfied with these changes or have some new ideas, you can restore your changes by Revert operation. If you are satisfied with these changes, you can save these small groups of meaningful changes via Commit and prepare for Testing.
Keep branch in sync
Typically, when you are working, your teammates may push some changes and merge them into master. The version of master will be updated, which will cause your branch out of date. Keeping your branch up to date with the current master can help you catch problems prior. You can synchronize at any time you need via Rebase, but it's best to do this before committing and testing.
Resolve merge conflict
There are conflicting changes, when people make different changes to the same field of the same component, or when one edits an instance and another deletes it. Sometimes, when you merge branch that have competing changes, you need to decide which changes to incorporate in the final merge. You need to resolve all conflicts before you can move to the next step via Resolve Conflict by selecting the changes that you want to keep.
Open pull request
Once you're satisfied with your work, you can open a pull request to tell others about changes you've pushed in a project. Pull requests display diffs to compare the changes you made in your branch against the base master, which indicates you are willing to merge them into master. Others can review your proposed changes and submit reviews by marking Approve or Close.
Pull requests can only be opened when there are differences between branch and master, and you have already committed these differences. Only approved change can be merged into master.
Terms
- Branch: Where you work in isolation from changes that other people are making to the project. One always works with a branch and can keep one active branch for each project.
- Base: The latest merged master when the branch was created. Each branch has a base.
- Rebase: When the master version is upgraded, synchronizing the latest master to your branch.
- Diffs: Shows you exactly how it differed from the base master.
- Commit: Confirm your branch chagens and ready to start testing.
- Pull request: Pull requests display diffs to compare the changes you made in your branch against the base master, which indicates you are willing to merge them into master.
How to use
This guide walks you through version control workflow:
Create branch
To create branch, you can just modify your project, for example you can create a skill. And then all your work will be done in your branch.
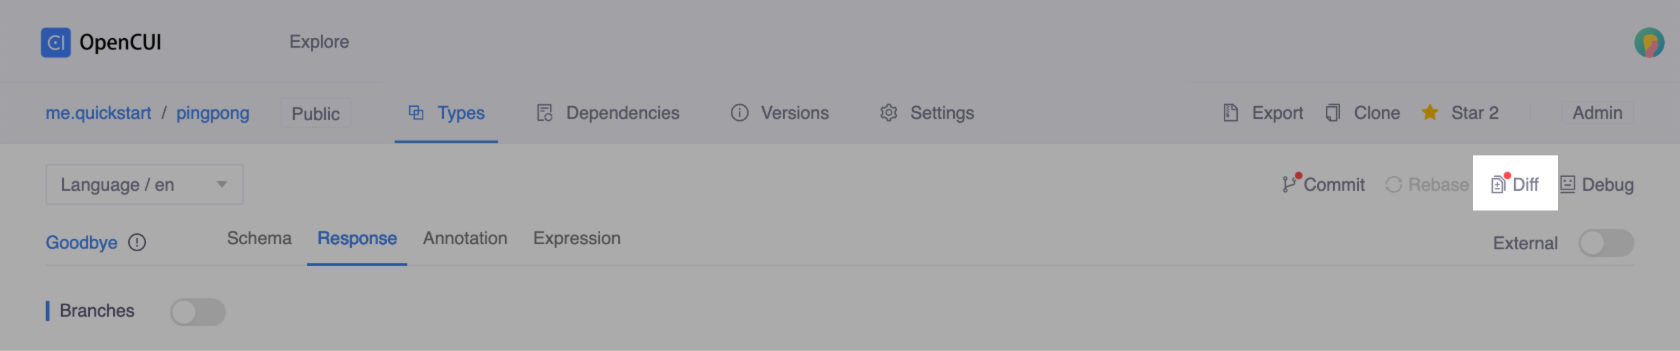
View your changes
To view your changes, click Diff in the upper-right corner of the Types area.
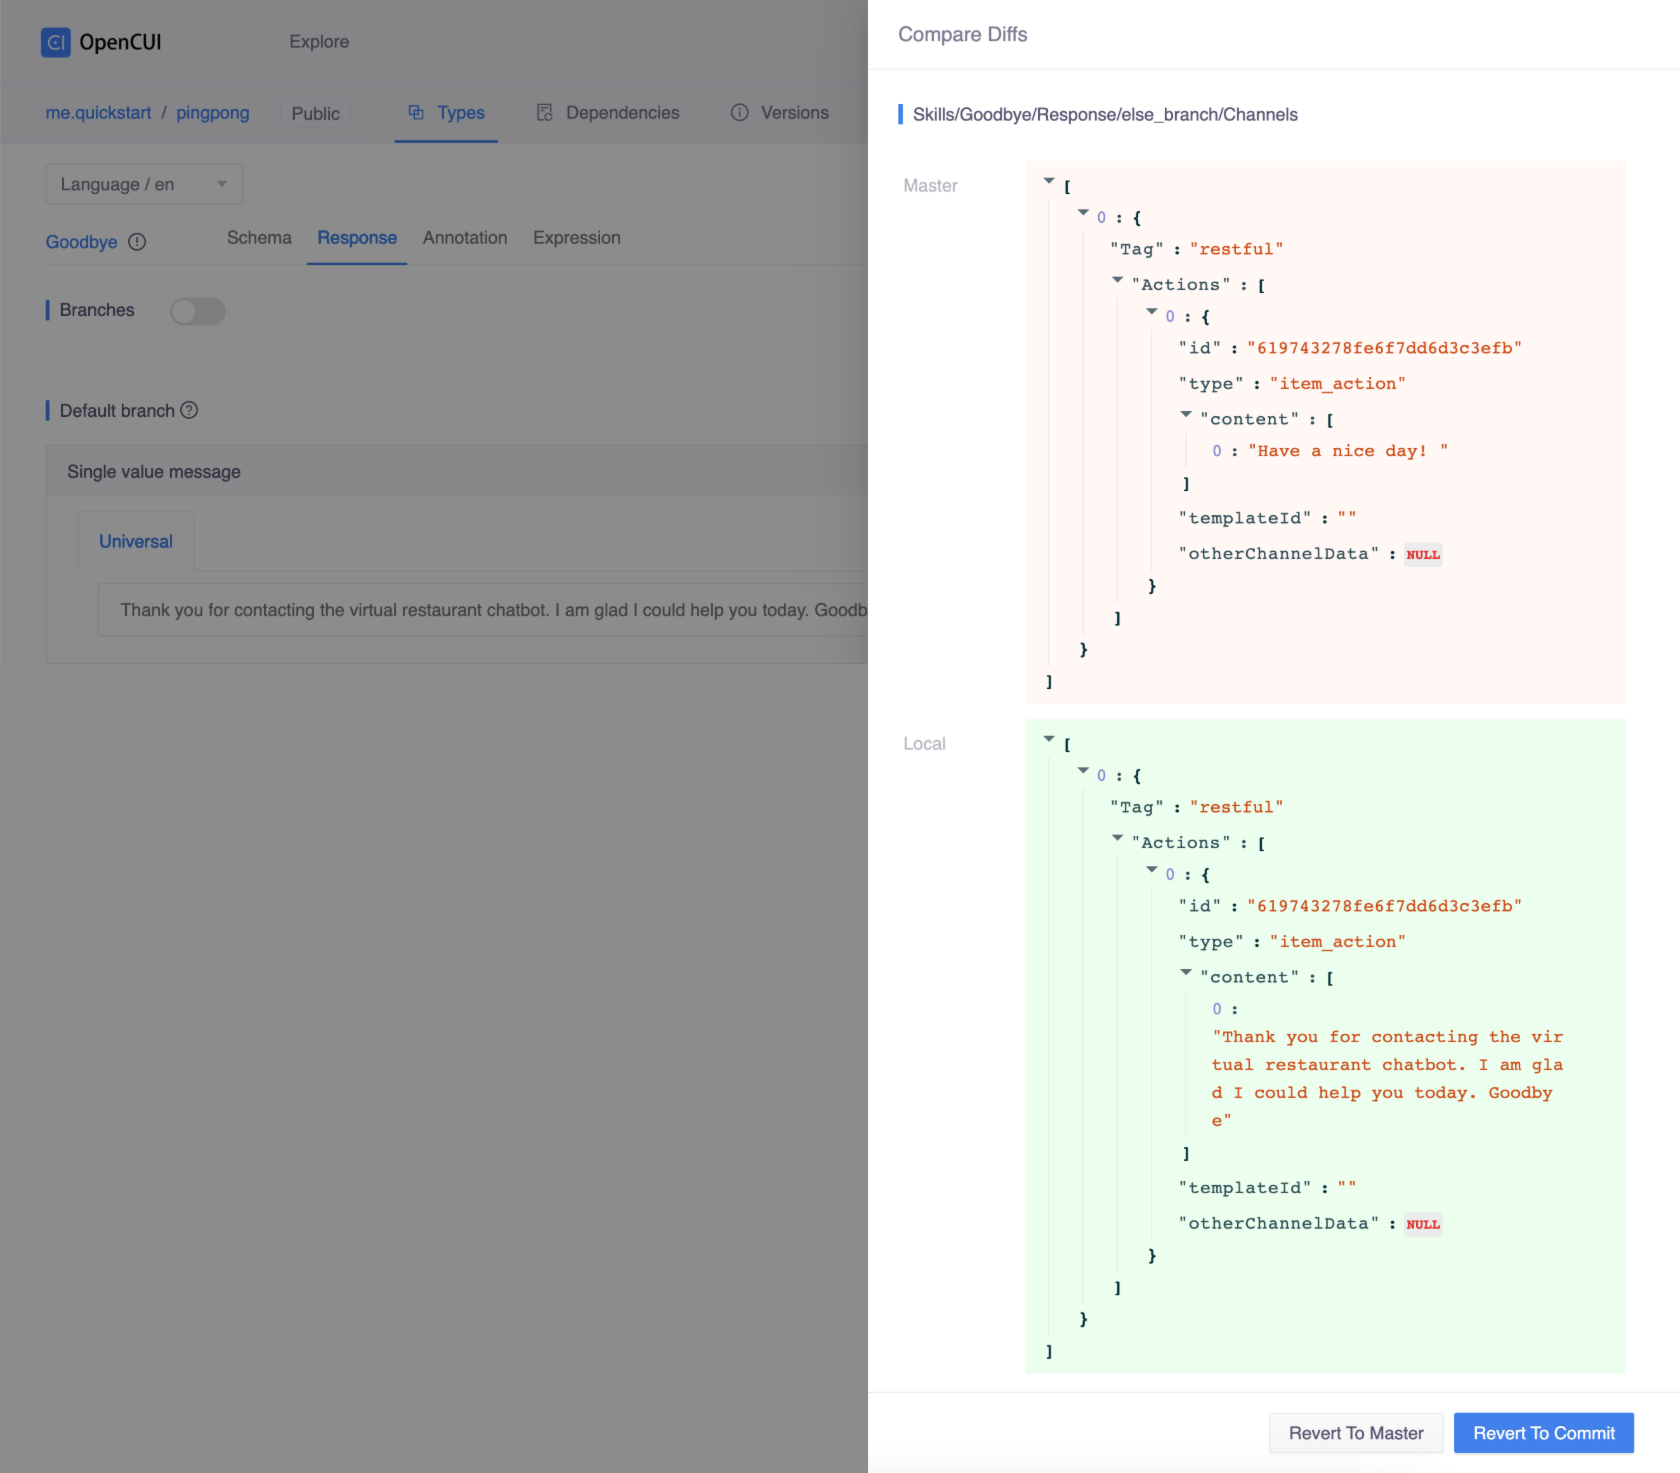
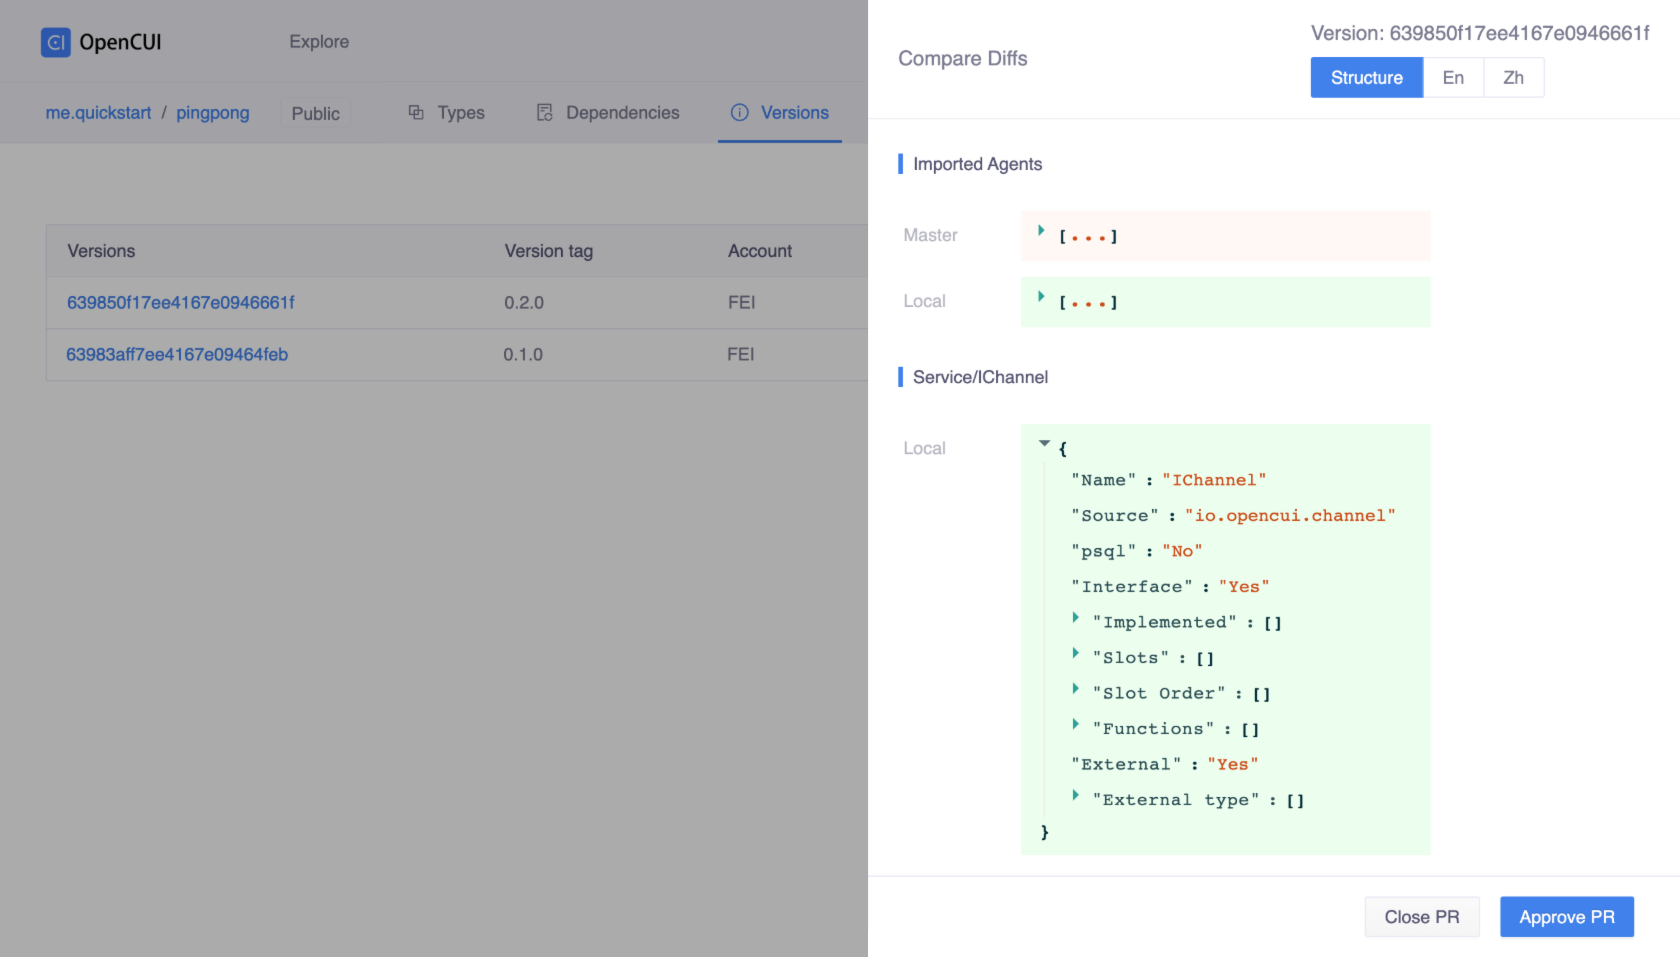
Here will show all the changes you made, adding, deleting, modifying, which allows you to visually compare the difference between your branch and the base master. Local represents your changes on the branch, while Master shows what the original is in base master.
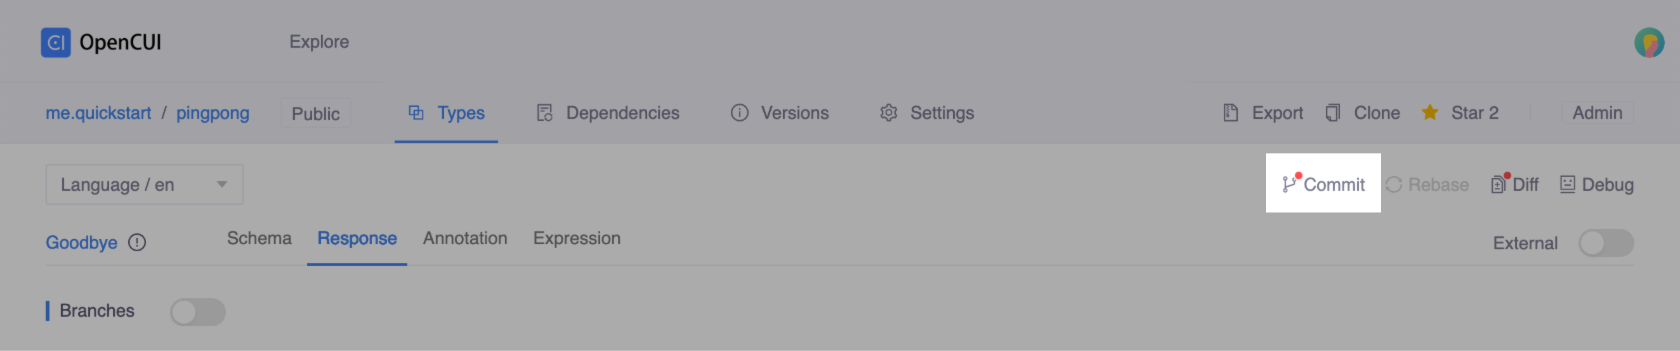
If you are done with your work, don't forget to Commit your changes on both structure level and language level. This will prepare for the testing and pull request.
Sync up with master
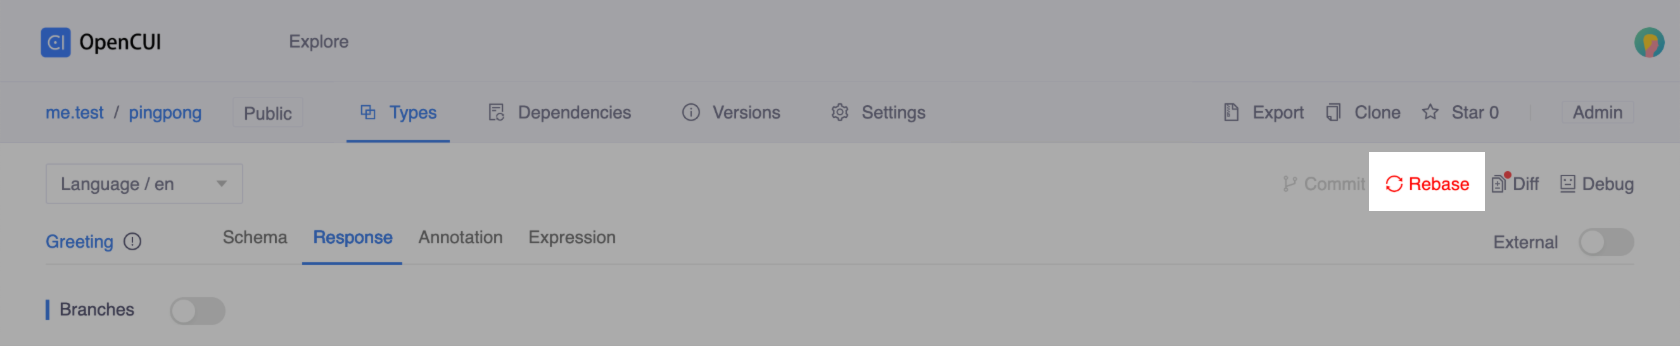
During your working, if the version of master has changed, Rebase with its icon in the upper-right corner of the Build area will light up and turn red.
Click Rebase to merge the latest changes from the master into your branch.
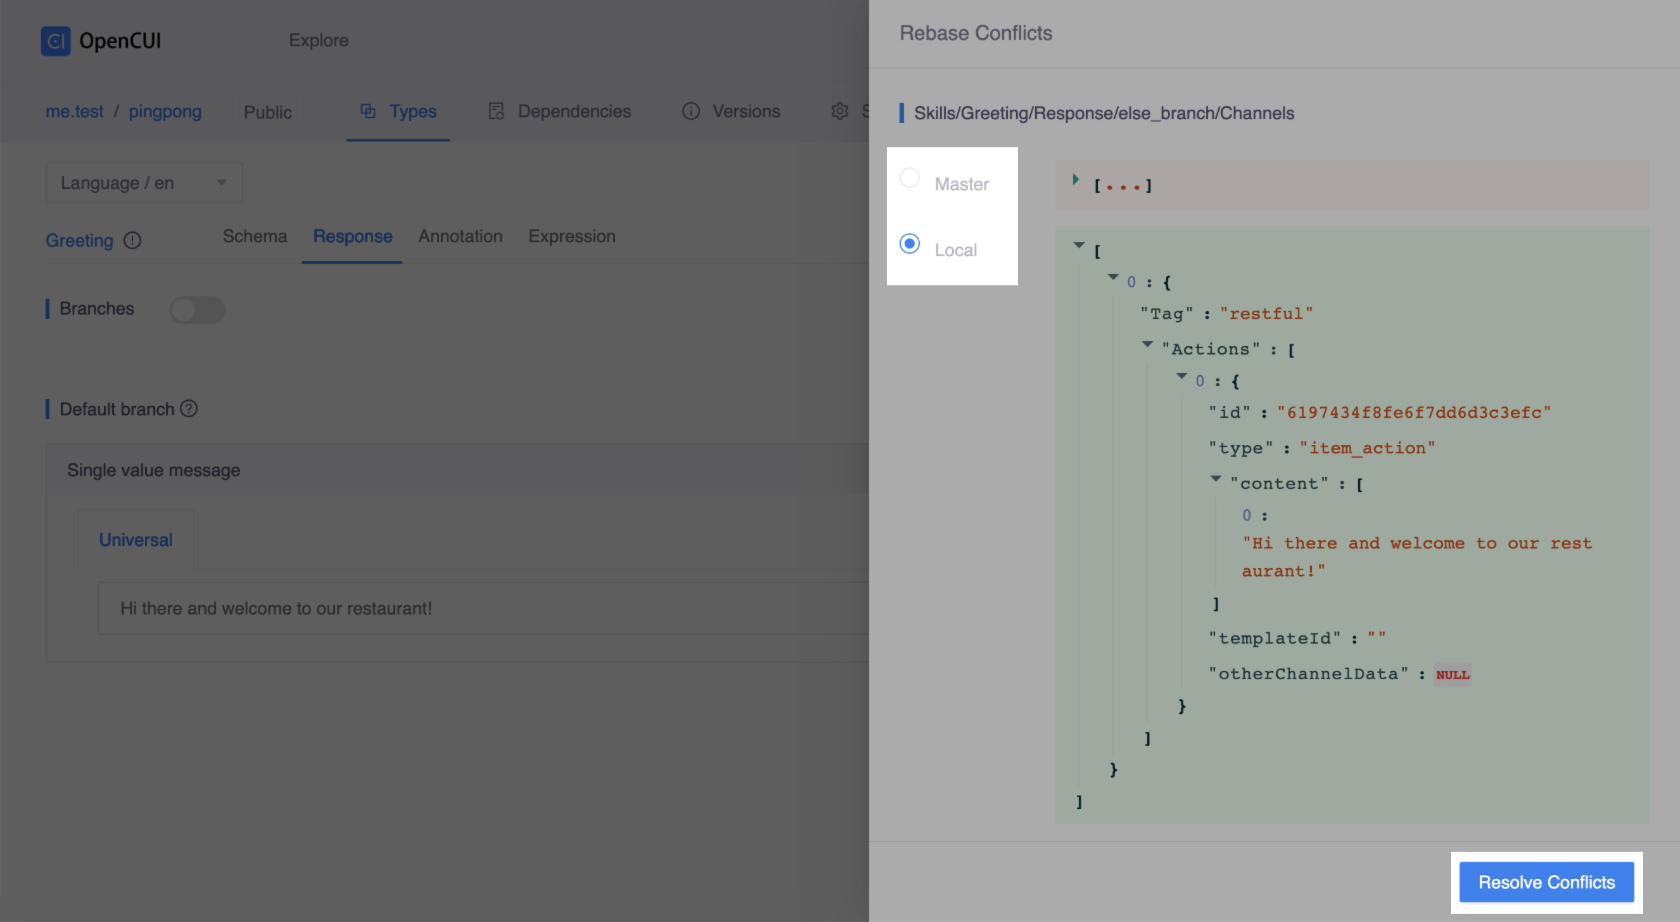
If the Rebase Conflicts field slide out, it means there is a merge conflict.
You have to make a choice, choose one of the two options you want to keep in the final merge. Once you've resolved all the conflicts, click Resolve Conflicts as resolved, then you can continue your branch work.
Review changes
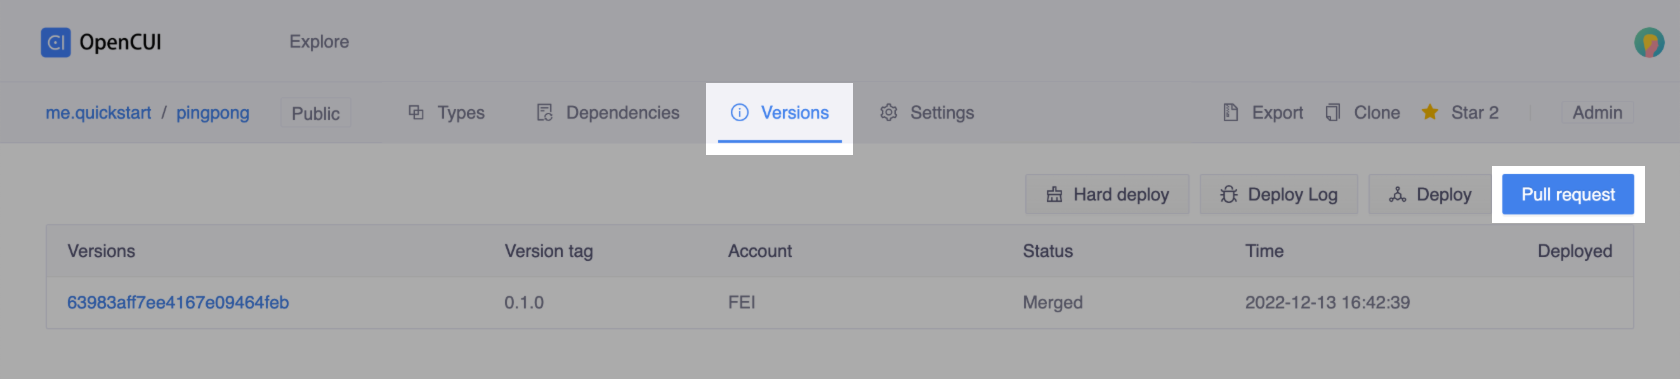
To review changes, you should switch to Versions page.
If you are ready to be reviewed, you can create a pull request with your changes.
Click Pull request in the upper-right corner of the Versions area.
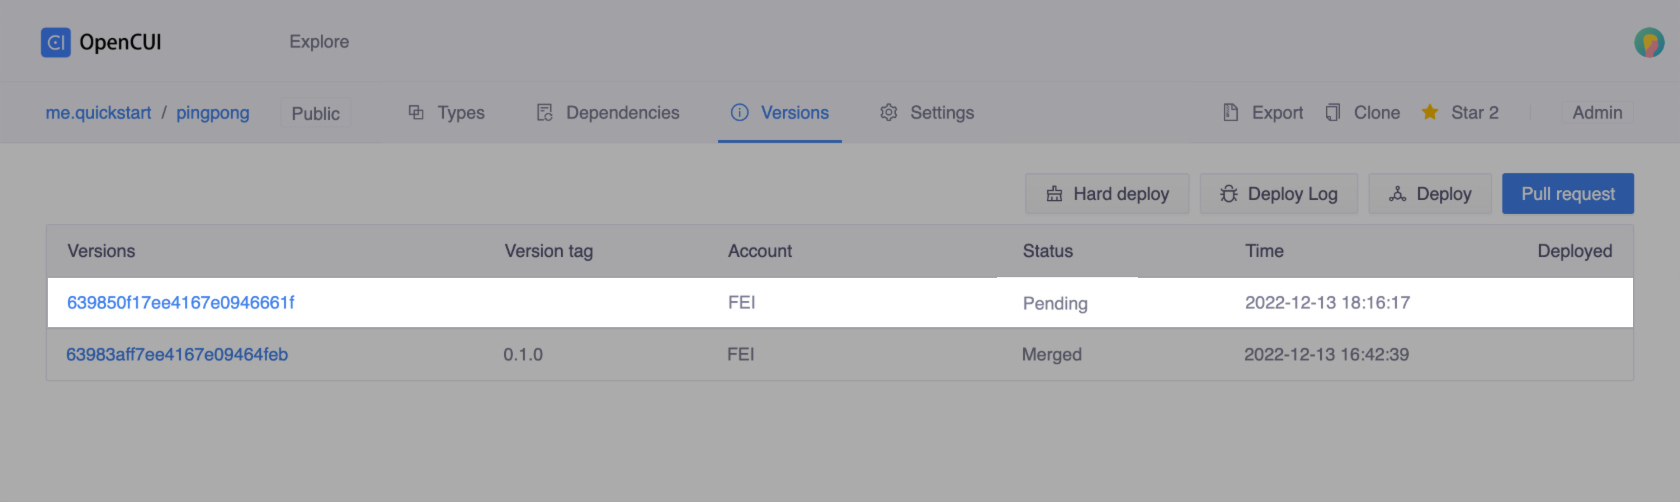
When the creation is successful, you can see the pull request item in the version list. You can review by yourself or request a review from other person.
If the pull request item already exists, click on the item to review. After you've finished reviewing all the diffs in the pull request, click Approve PR or Close PR to submit your review.
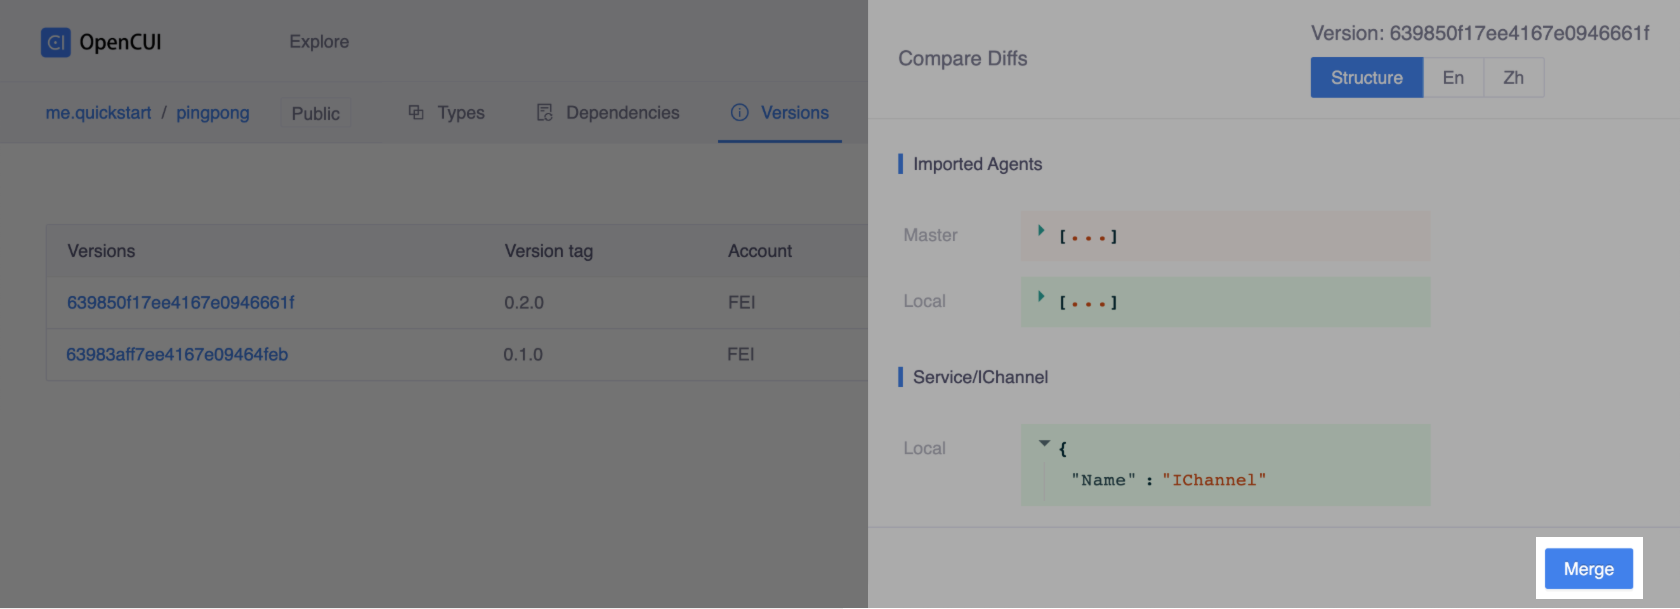
When the pull request is approved, you can merge it. Select the approved pull request you'd like to merge, click Merge.
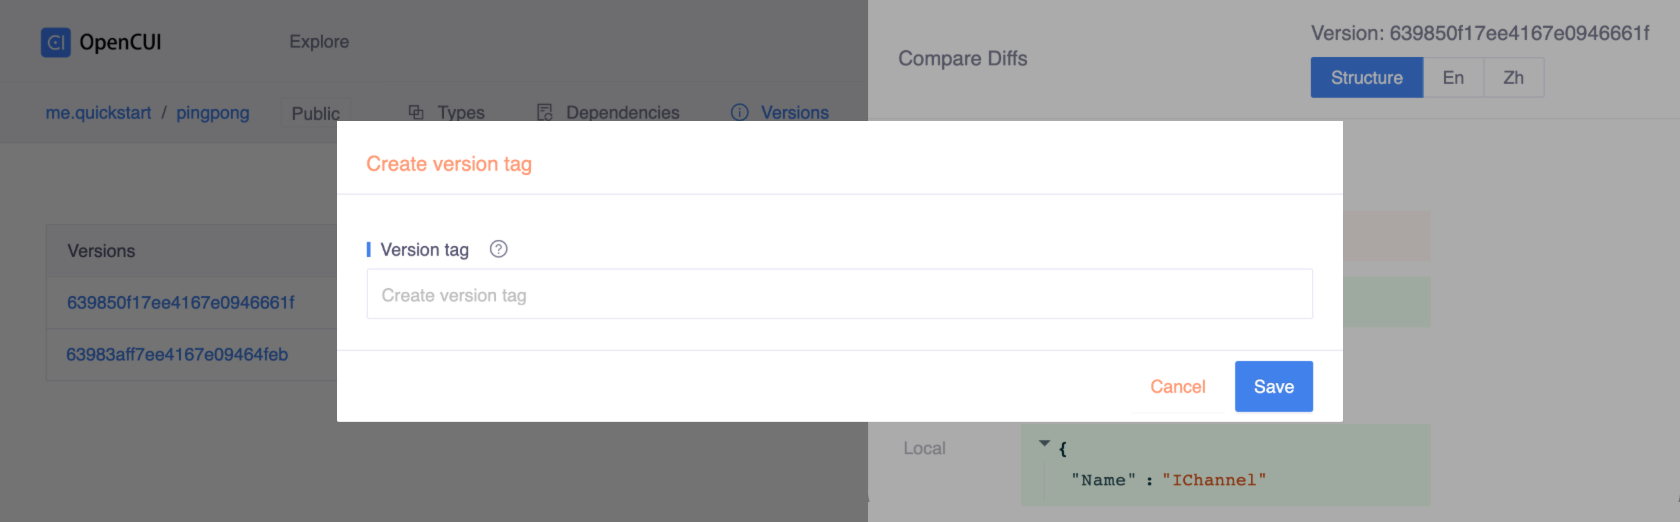
Enter your version tag, click Save, the Merge process will start. At the same time, a Rebase operation will be done automatically to avoid changes being out of date.
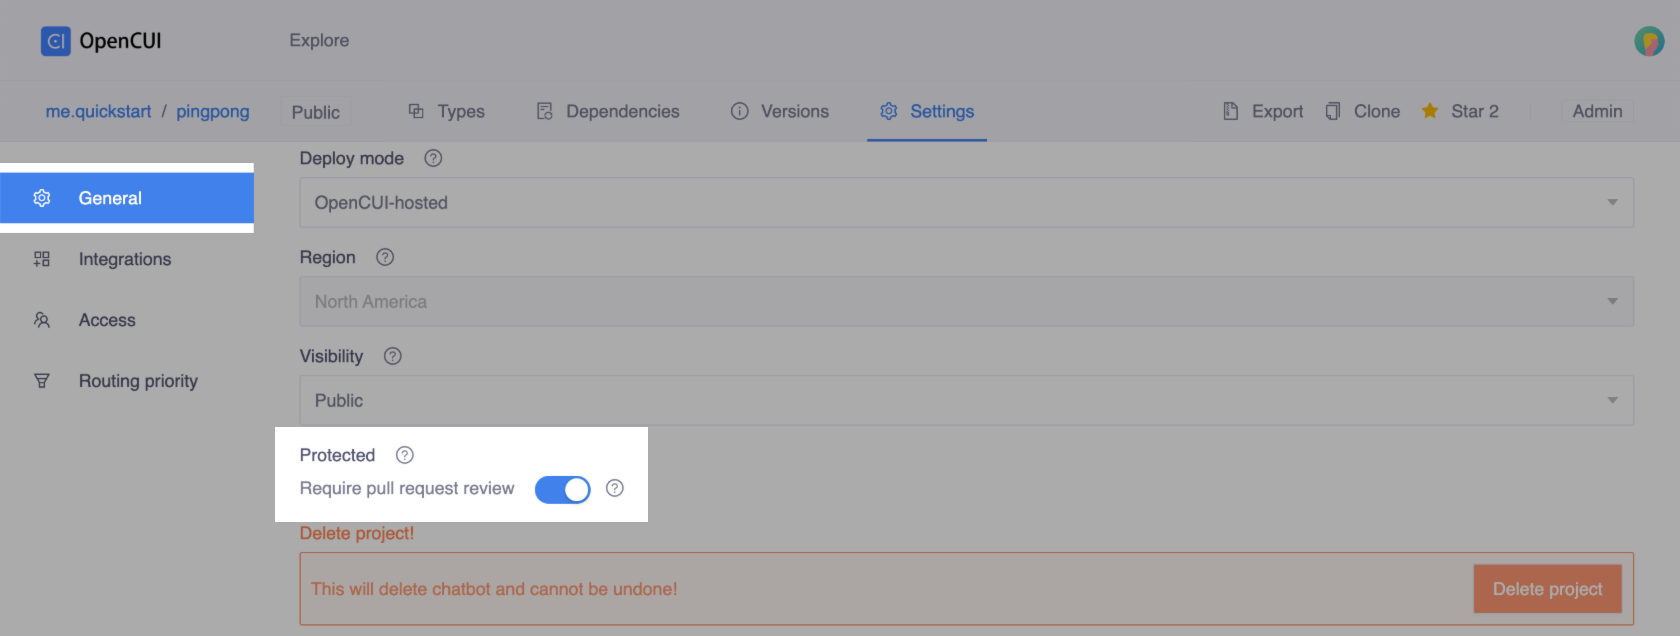
If you are an owner or have admin permissions, you can set the project as protected project. It means pull request authors cannot approve their own pull requests. To set this feature, head to the Settings page, enable the Protected by turning on the toggle.